FRCBA BLOG

Vaganova Fourth Port de Bras
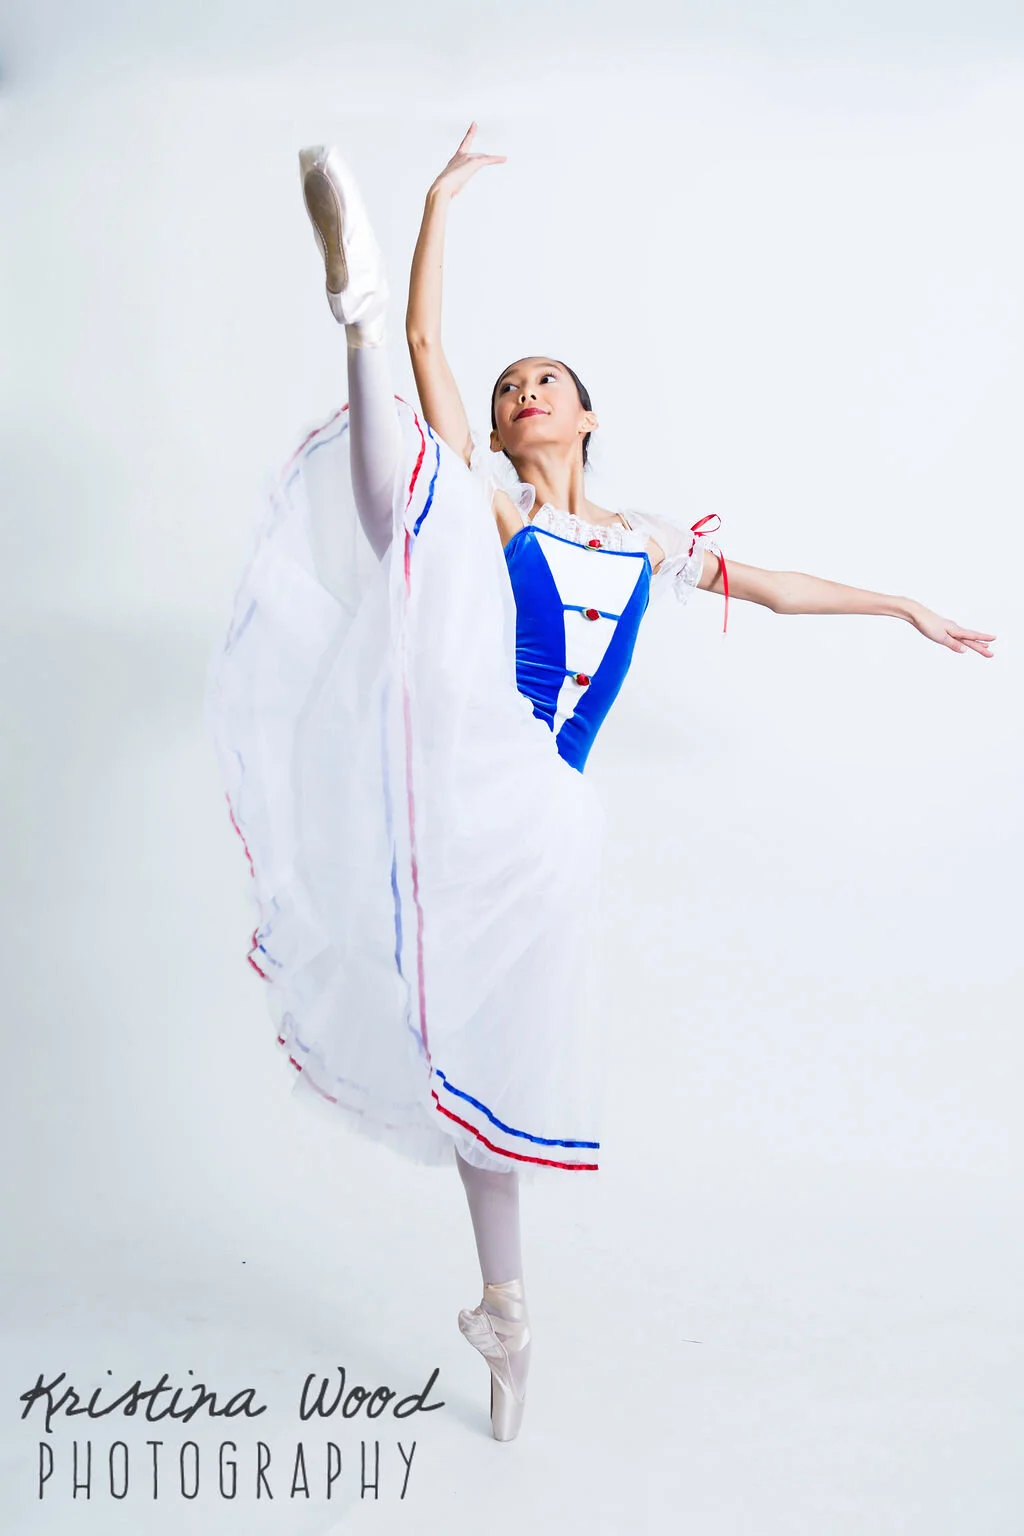
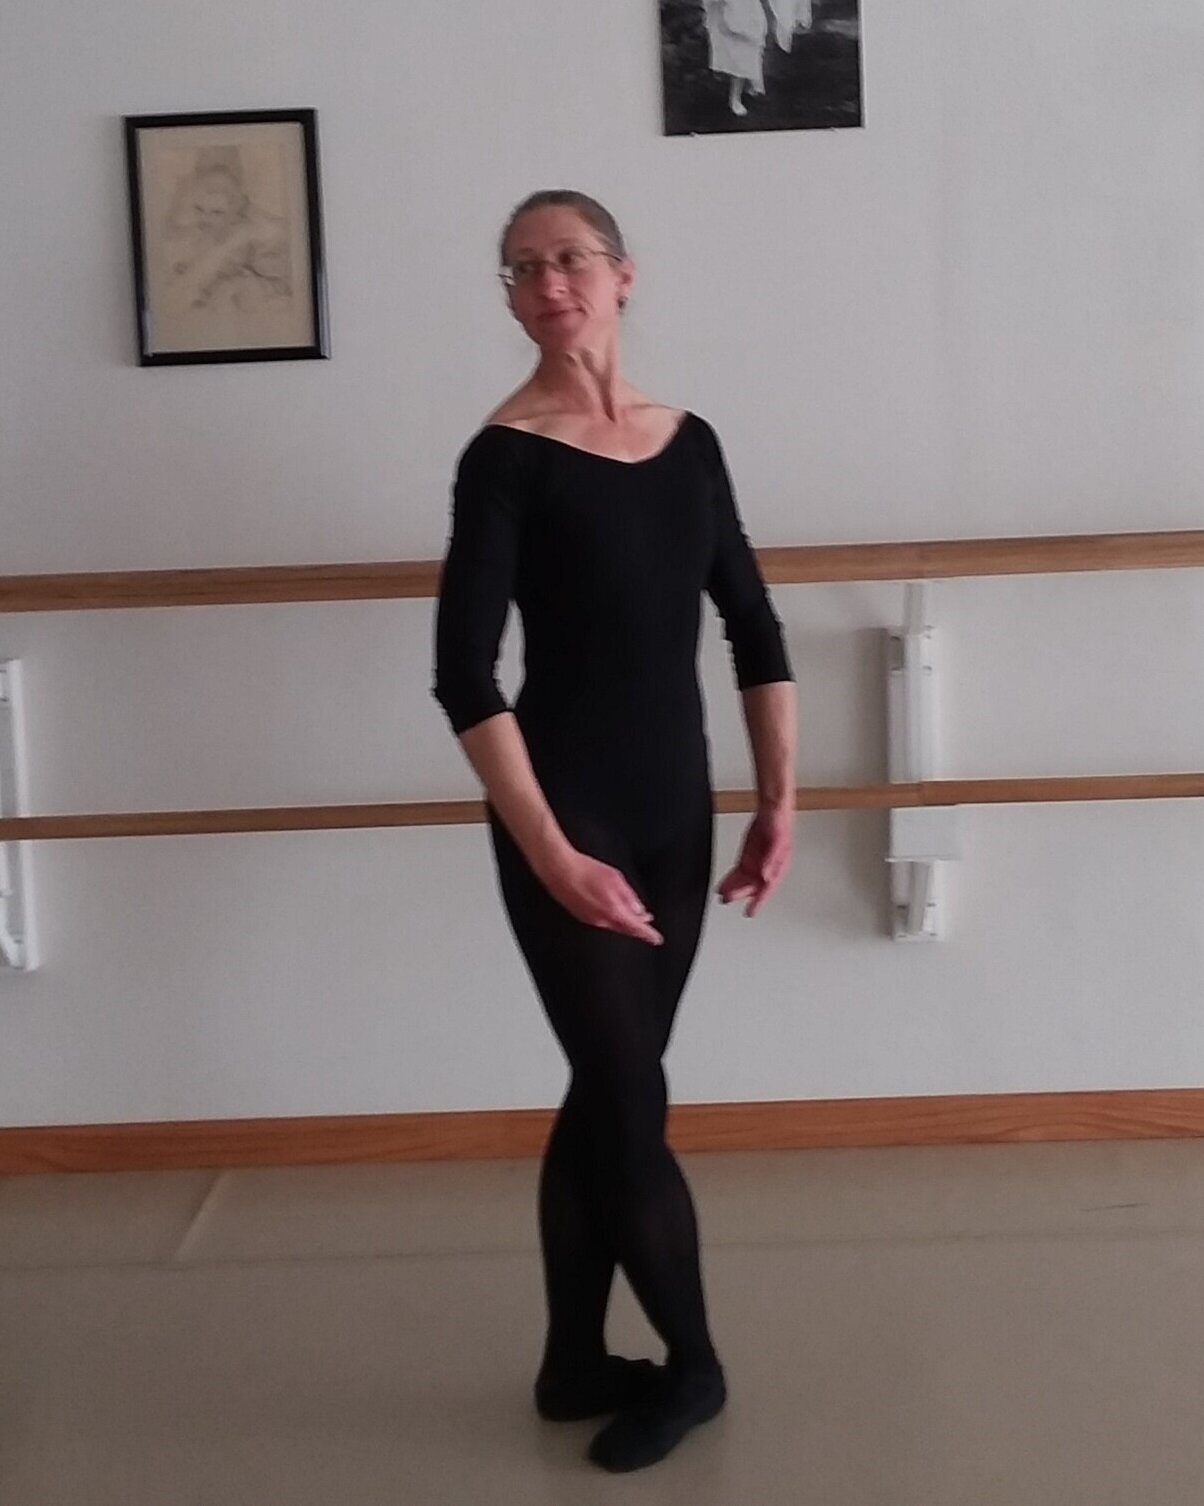
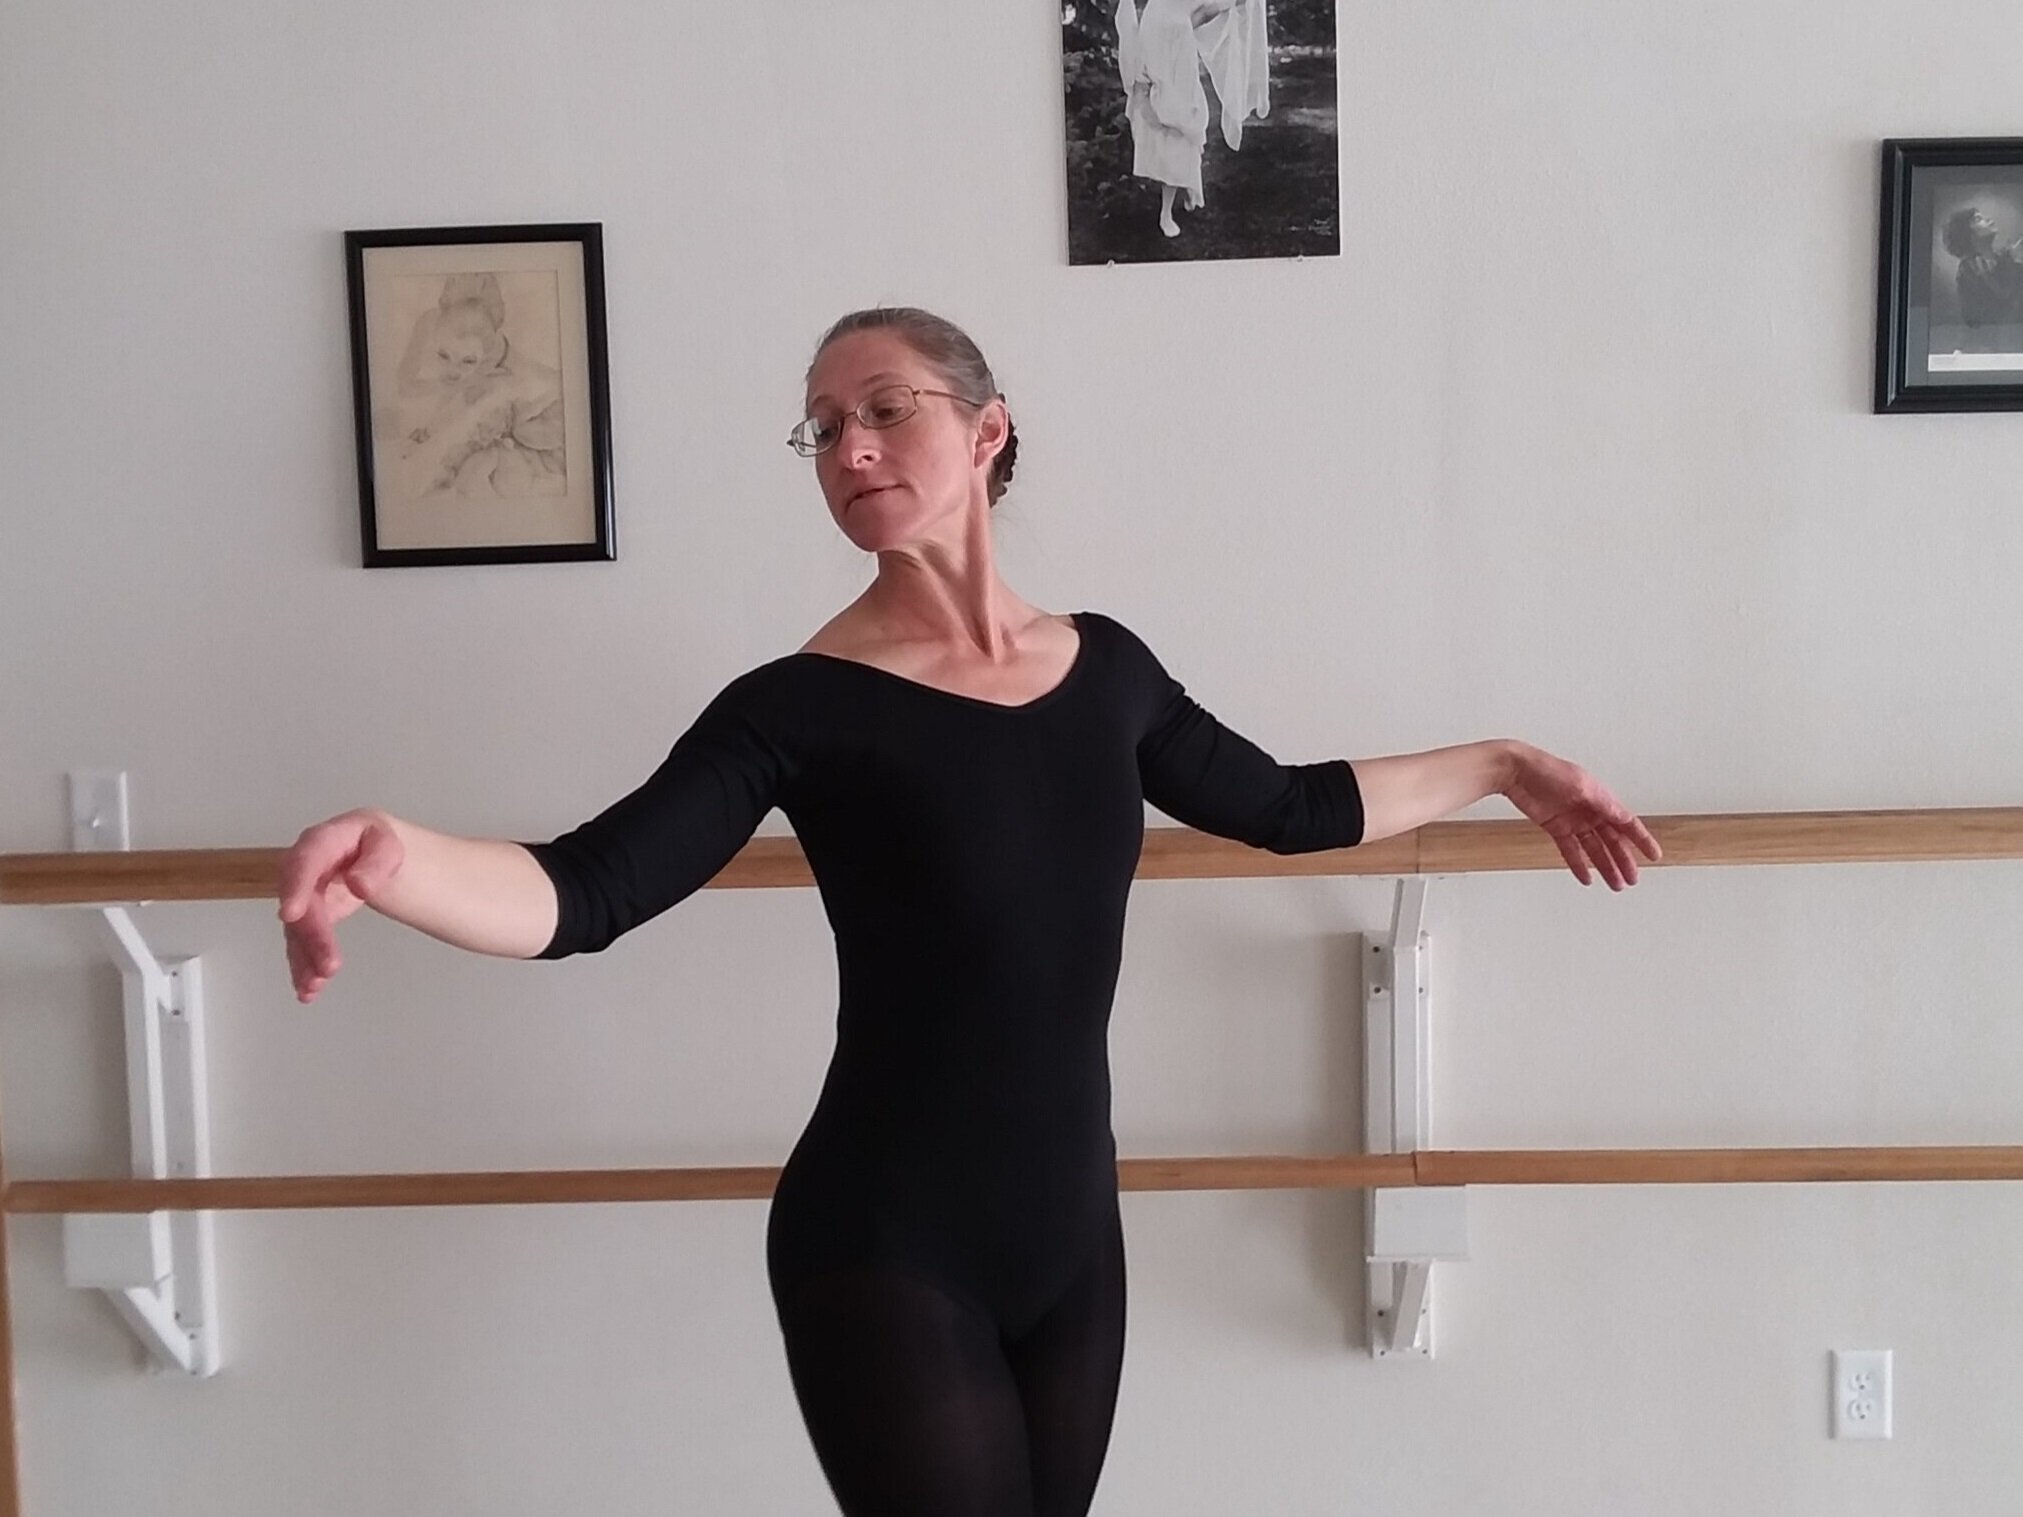
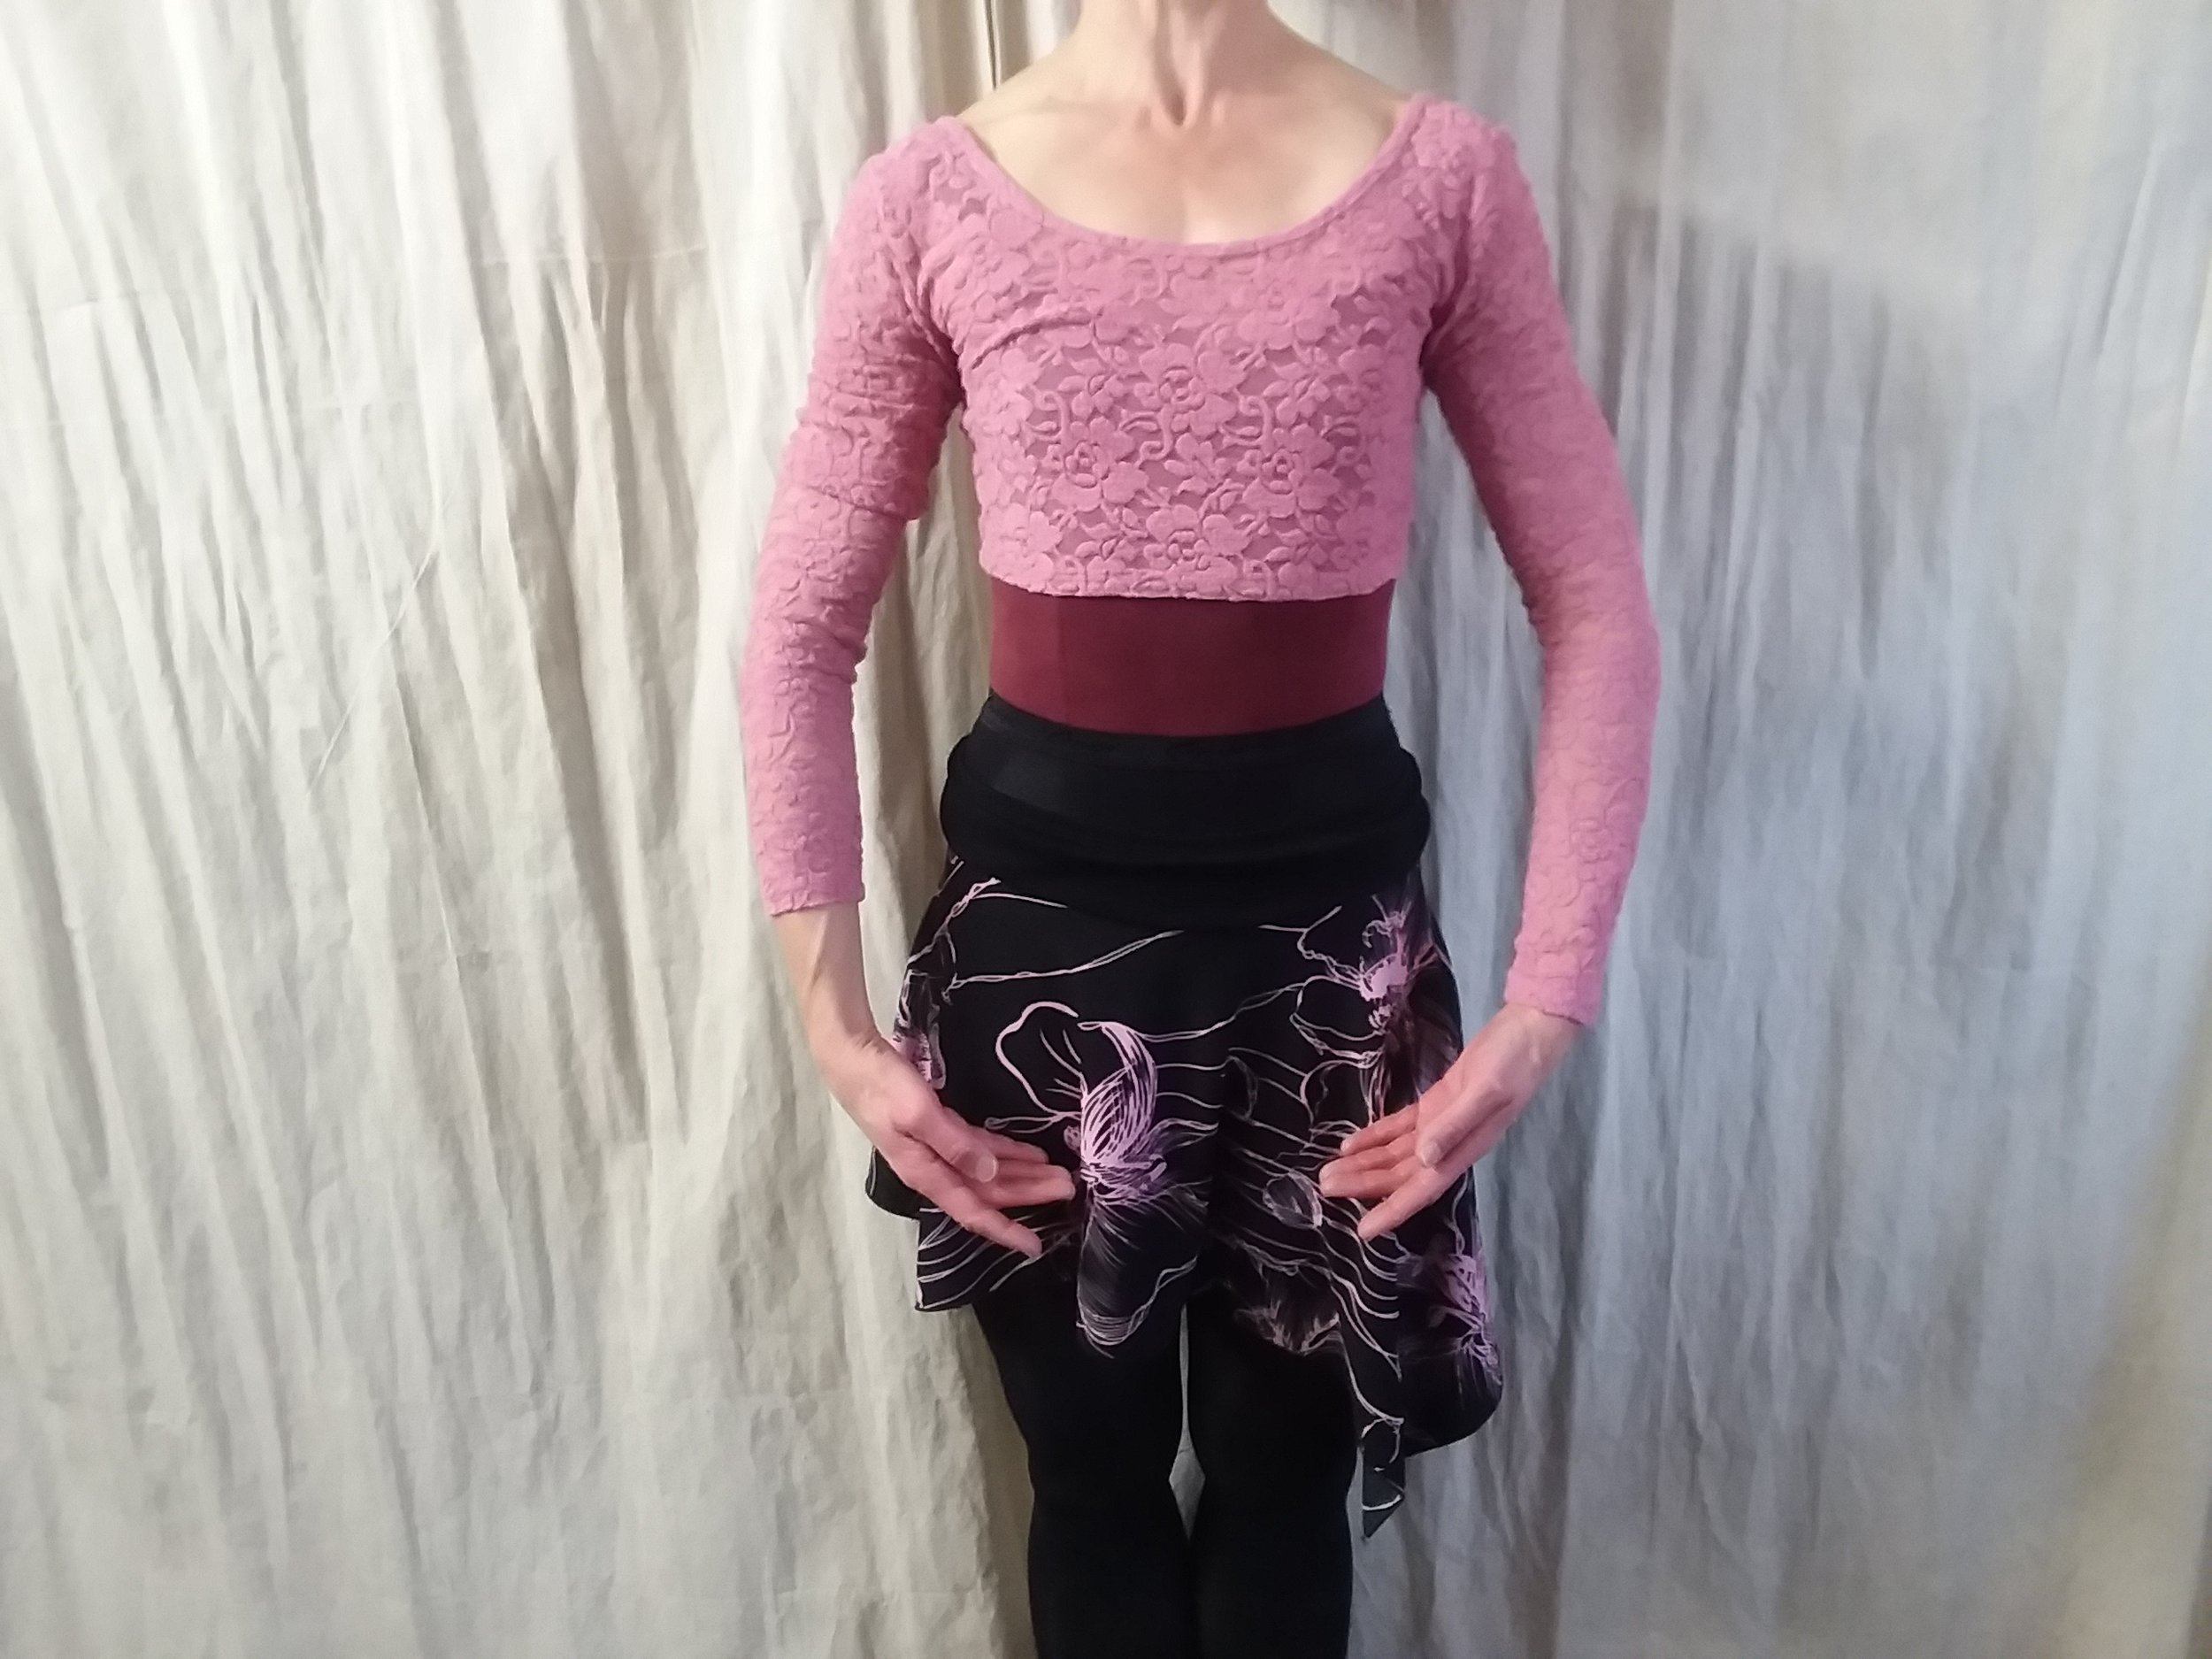
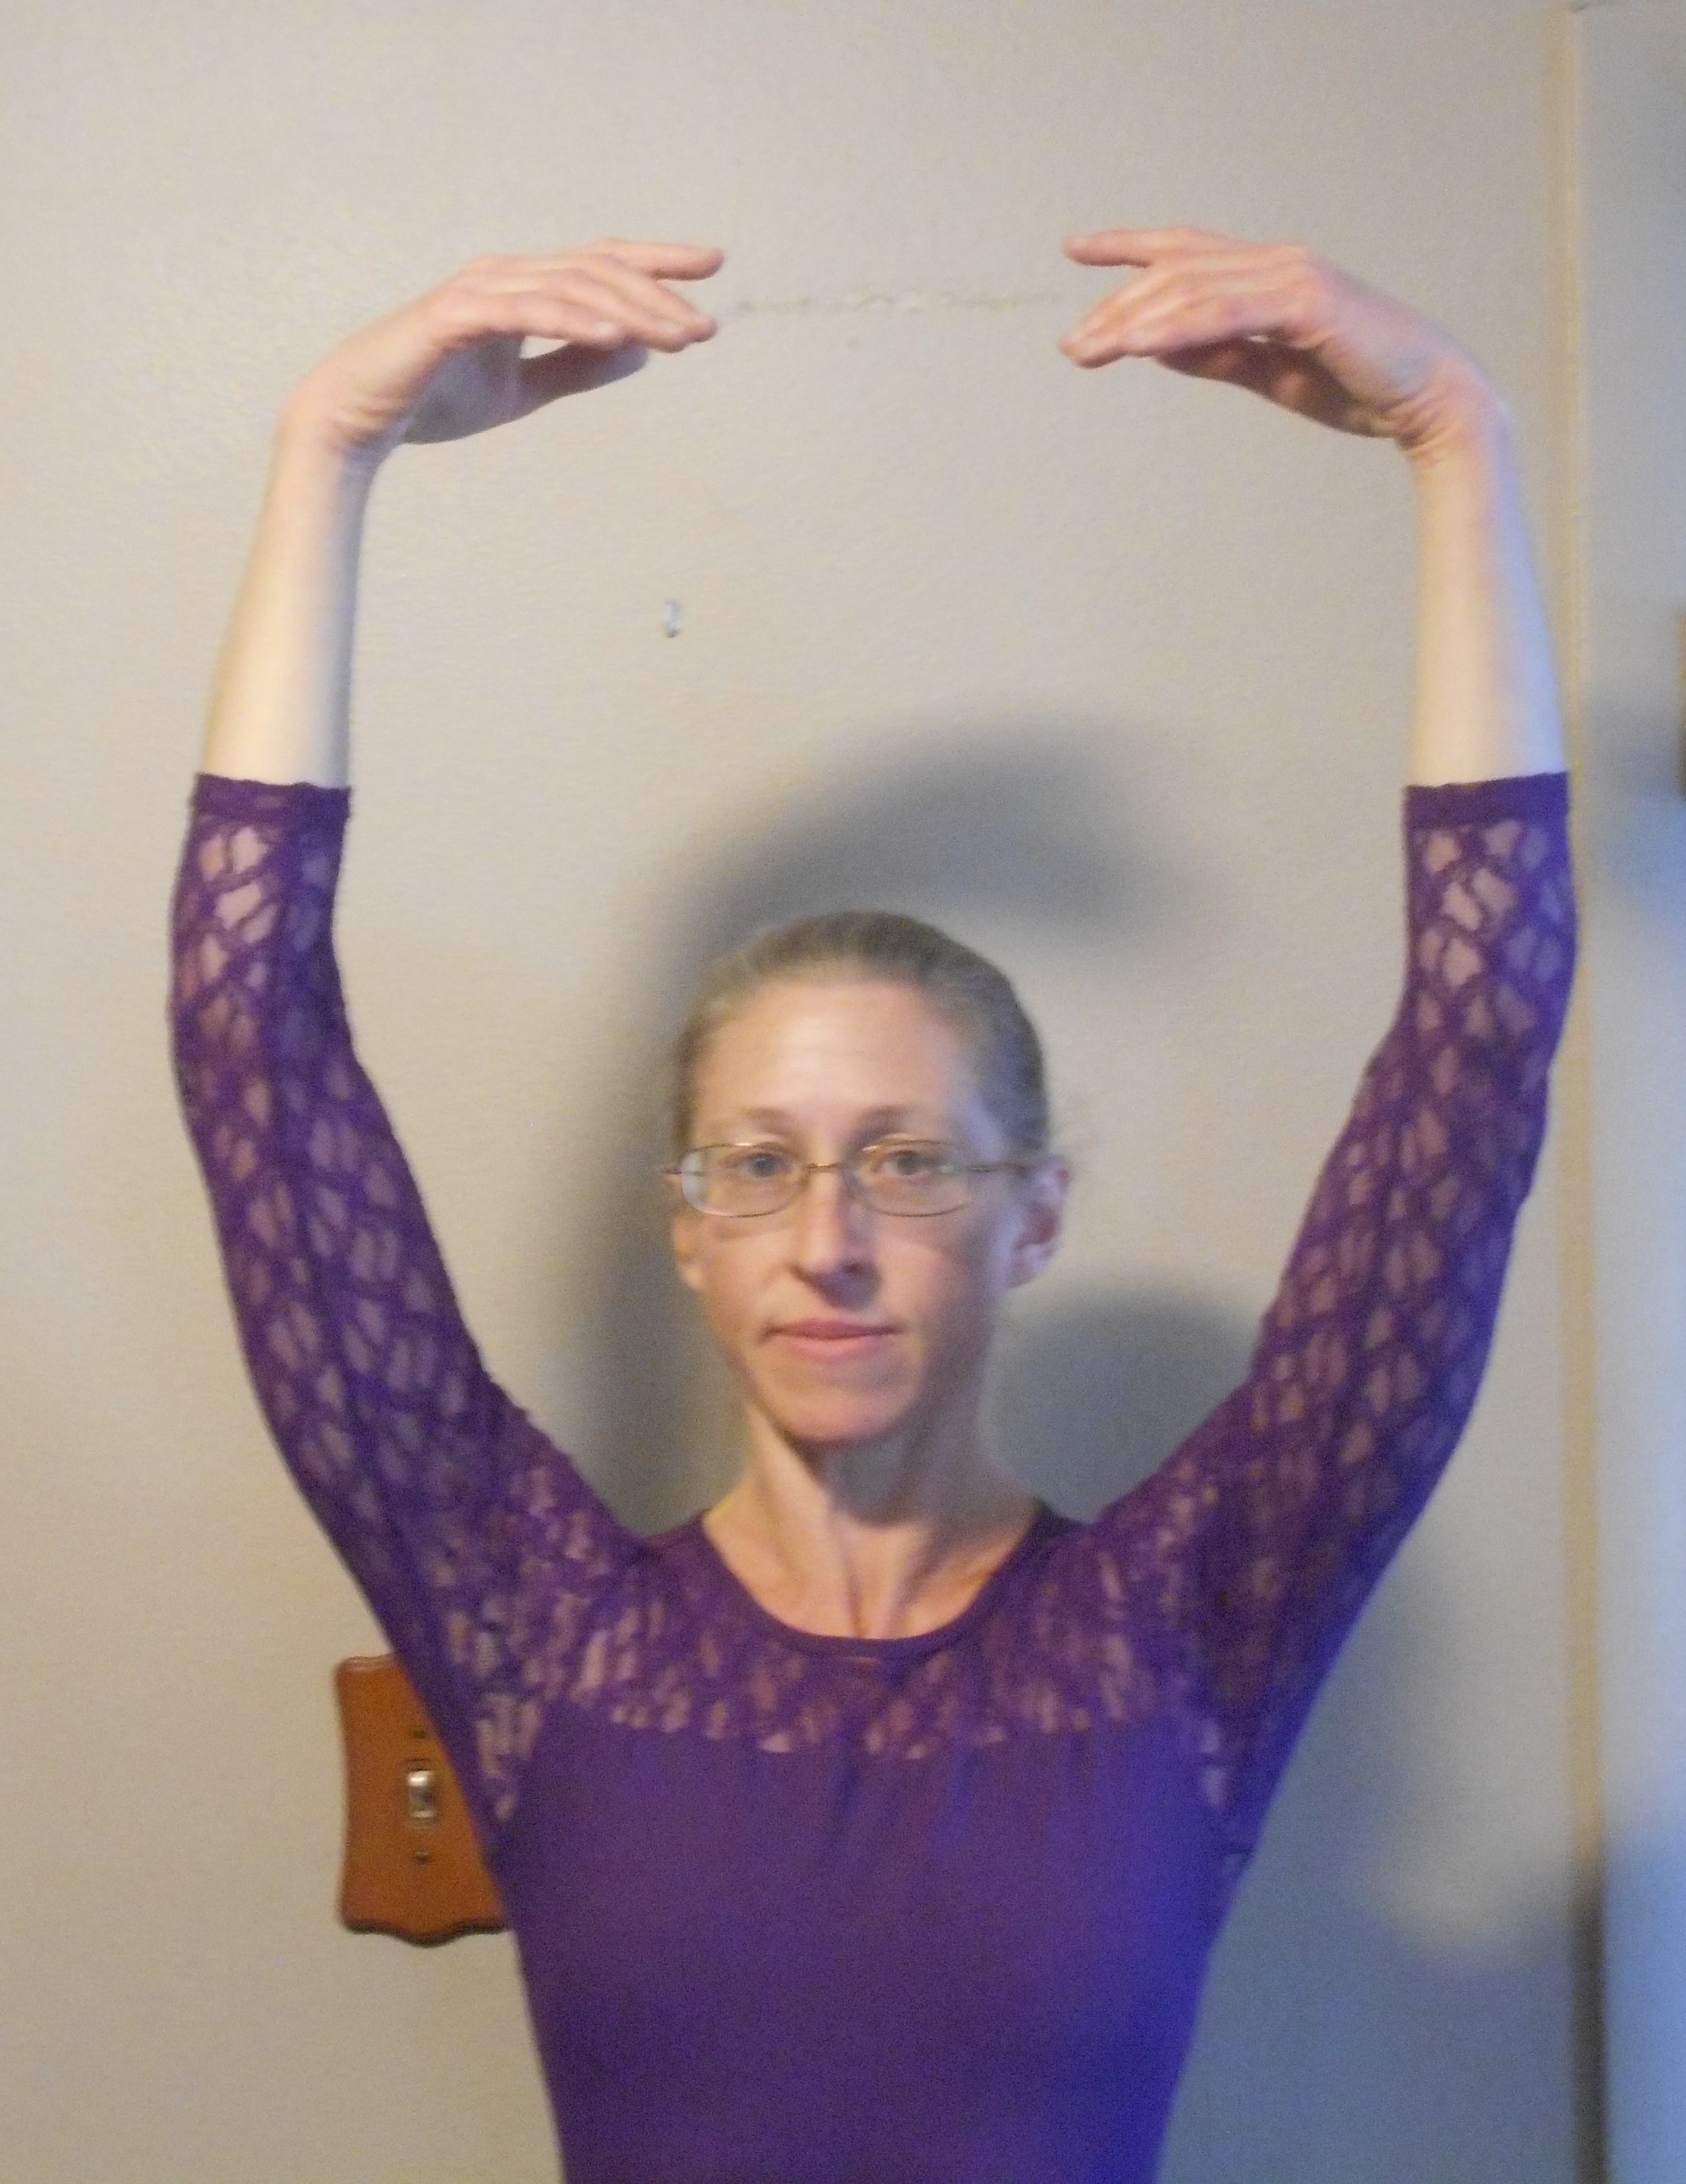
The Vaganova 4th Port de Bras involves a challenging twist of the upper body, achieving its characteristic line in the 4th arabesque arm position. It requires a great deal of energy and strength in the back muscles, all the while creating a soft expressive look.
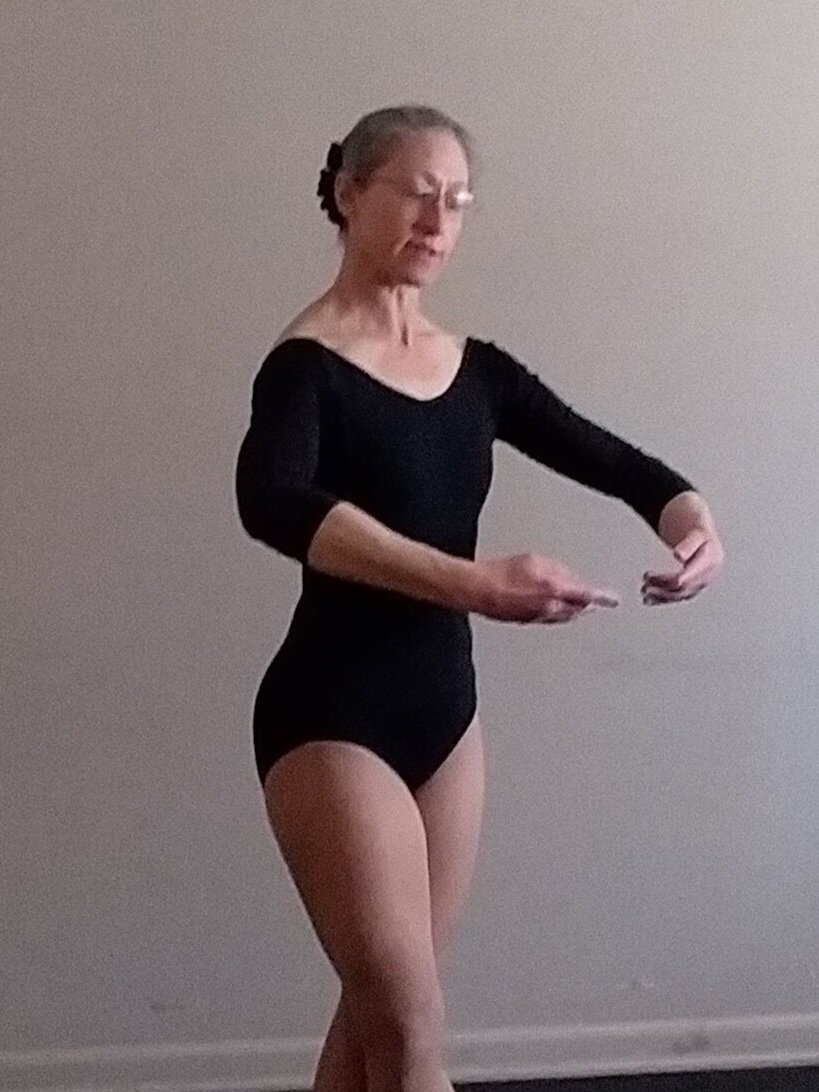
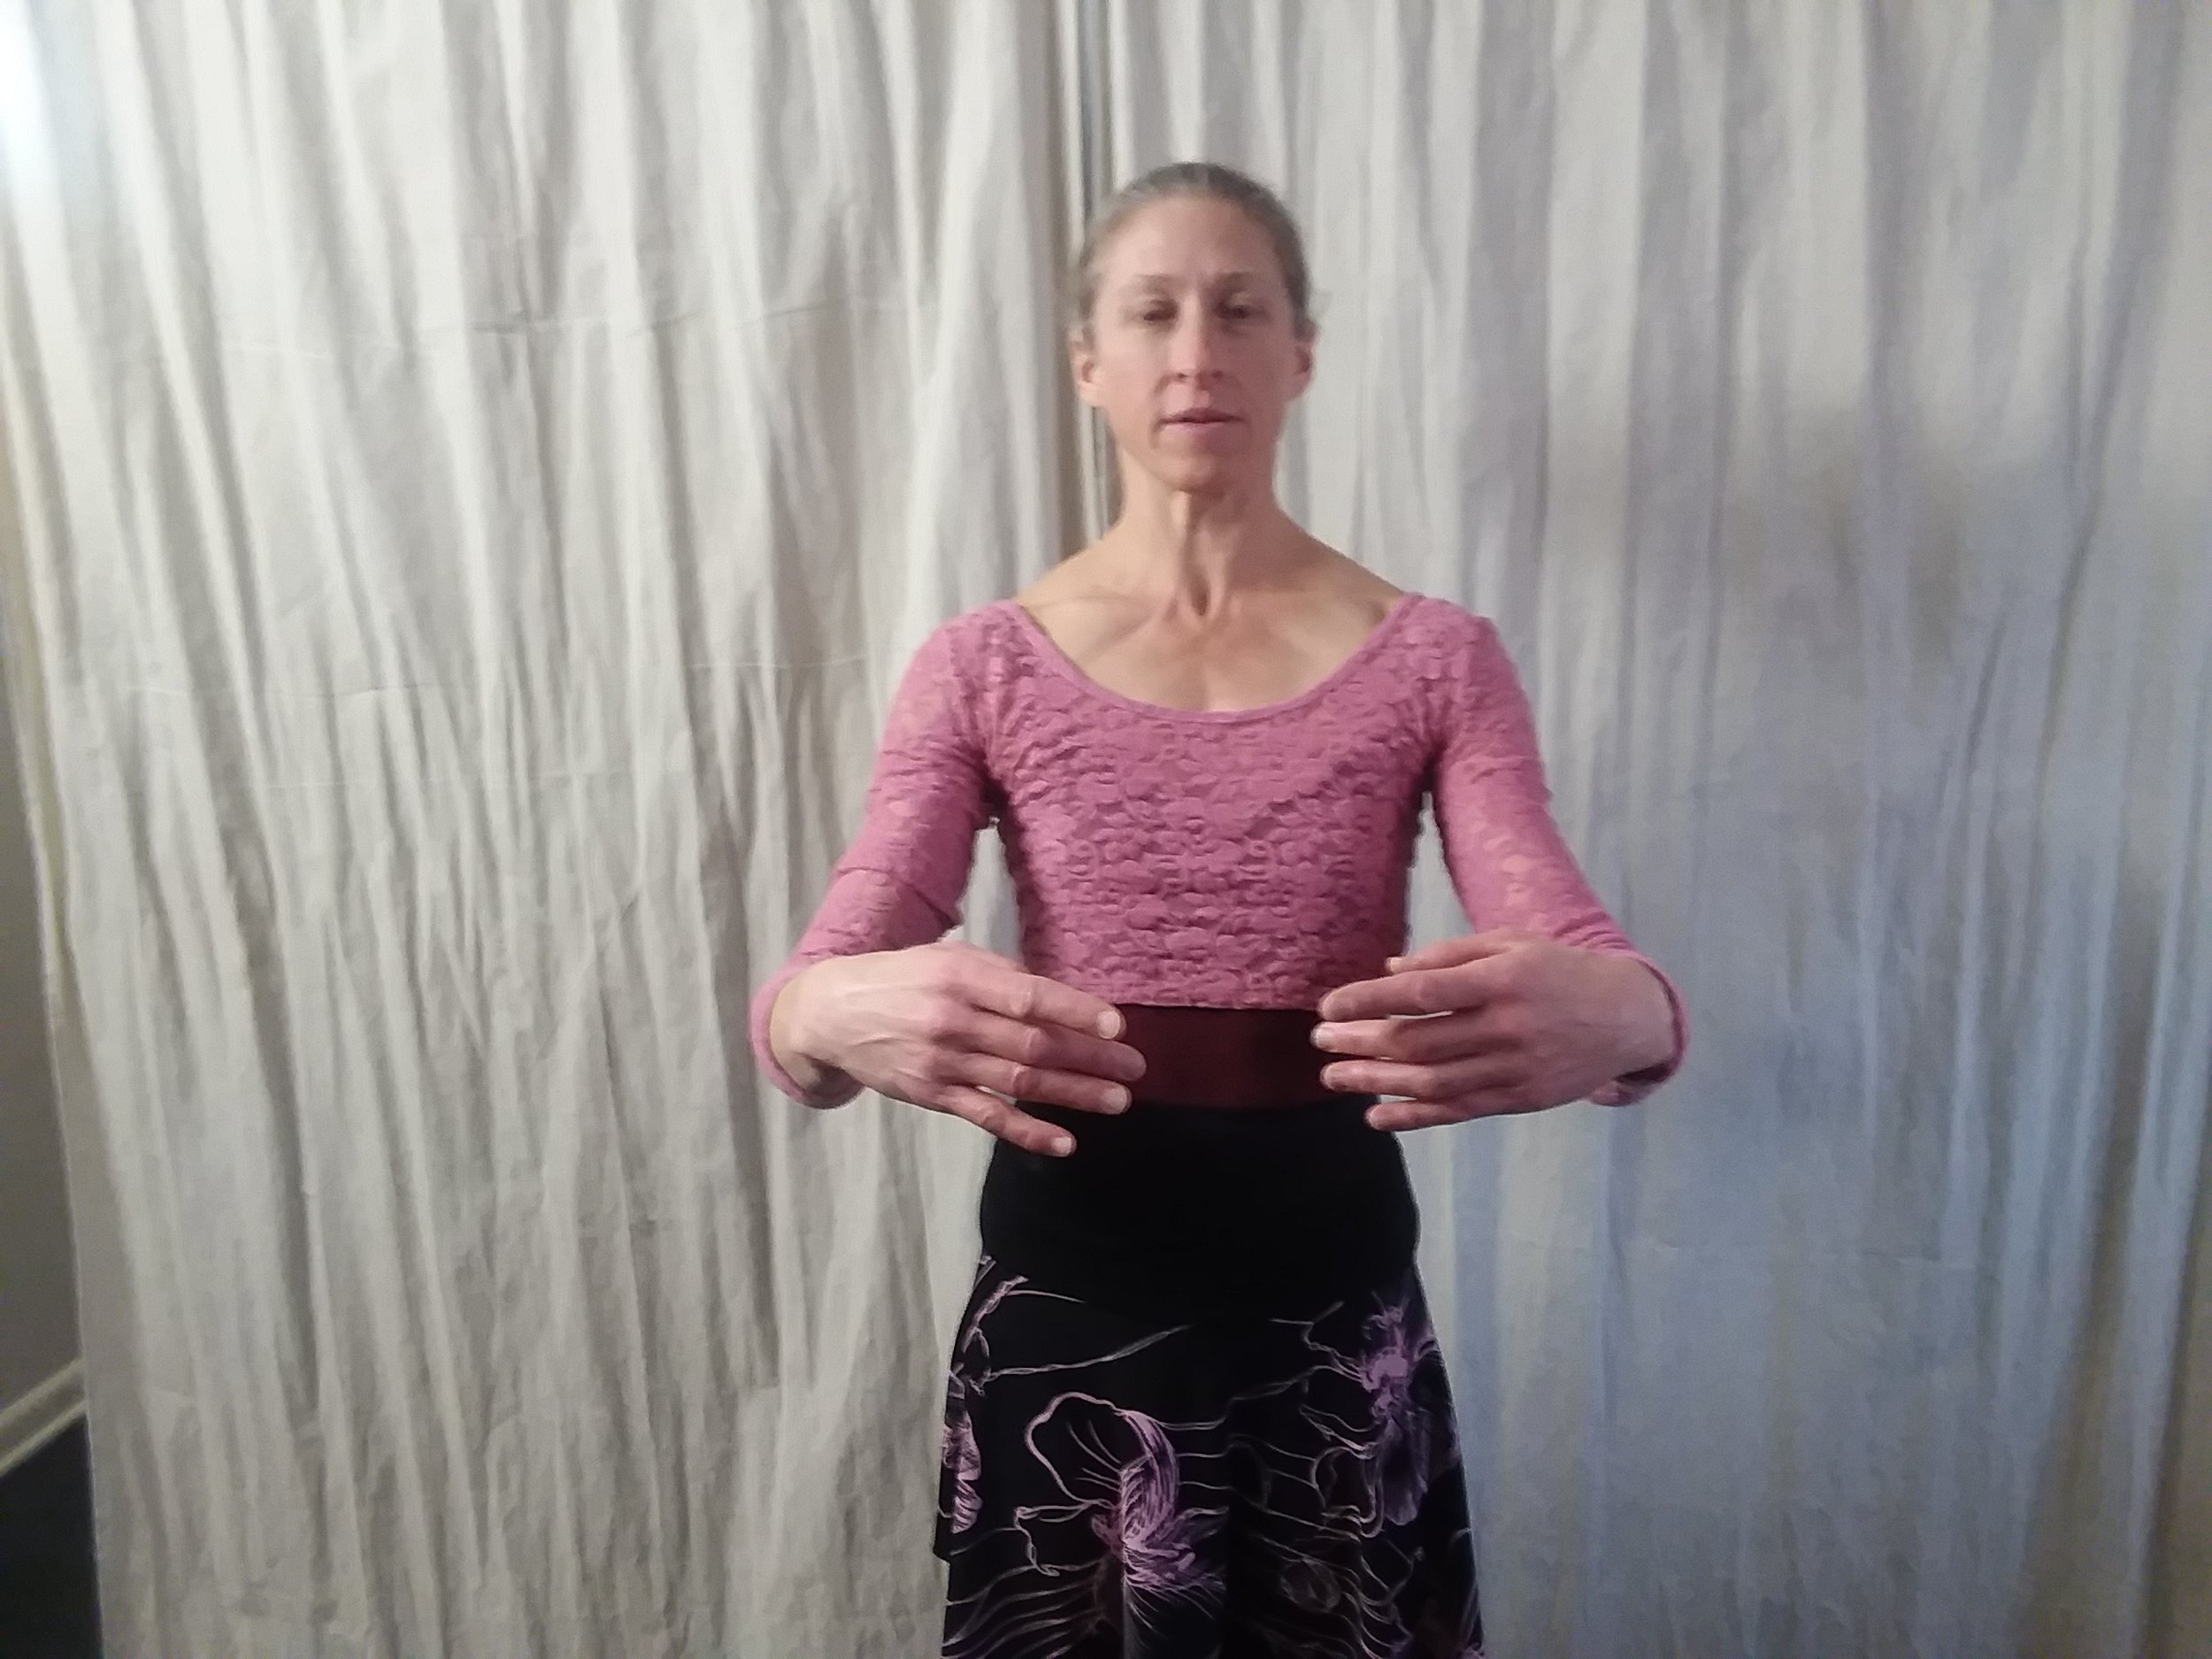
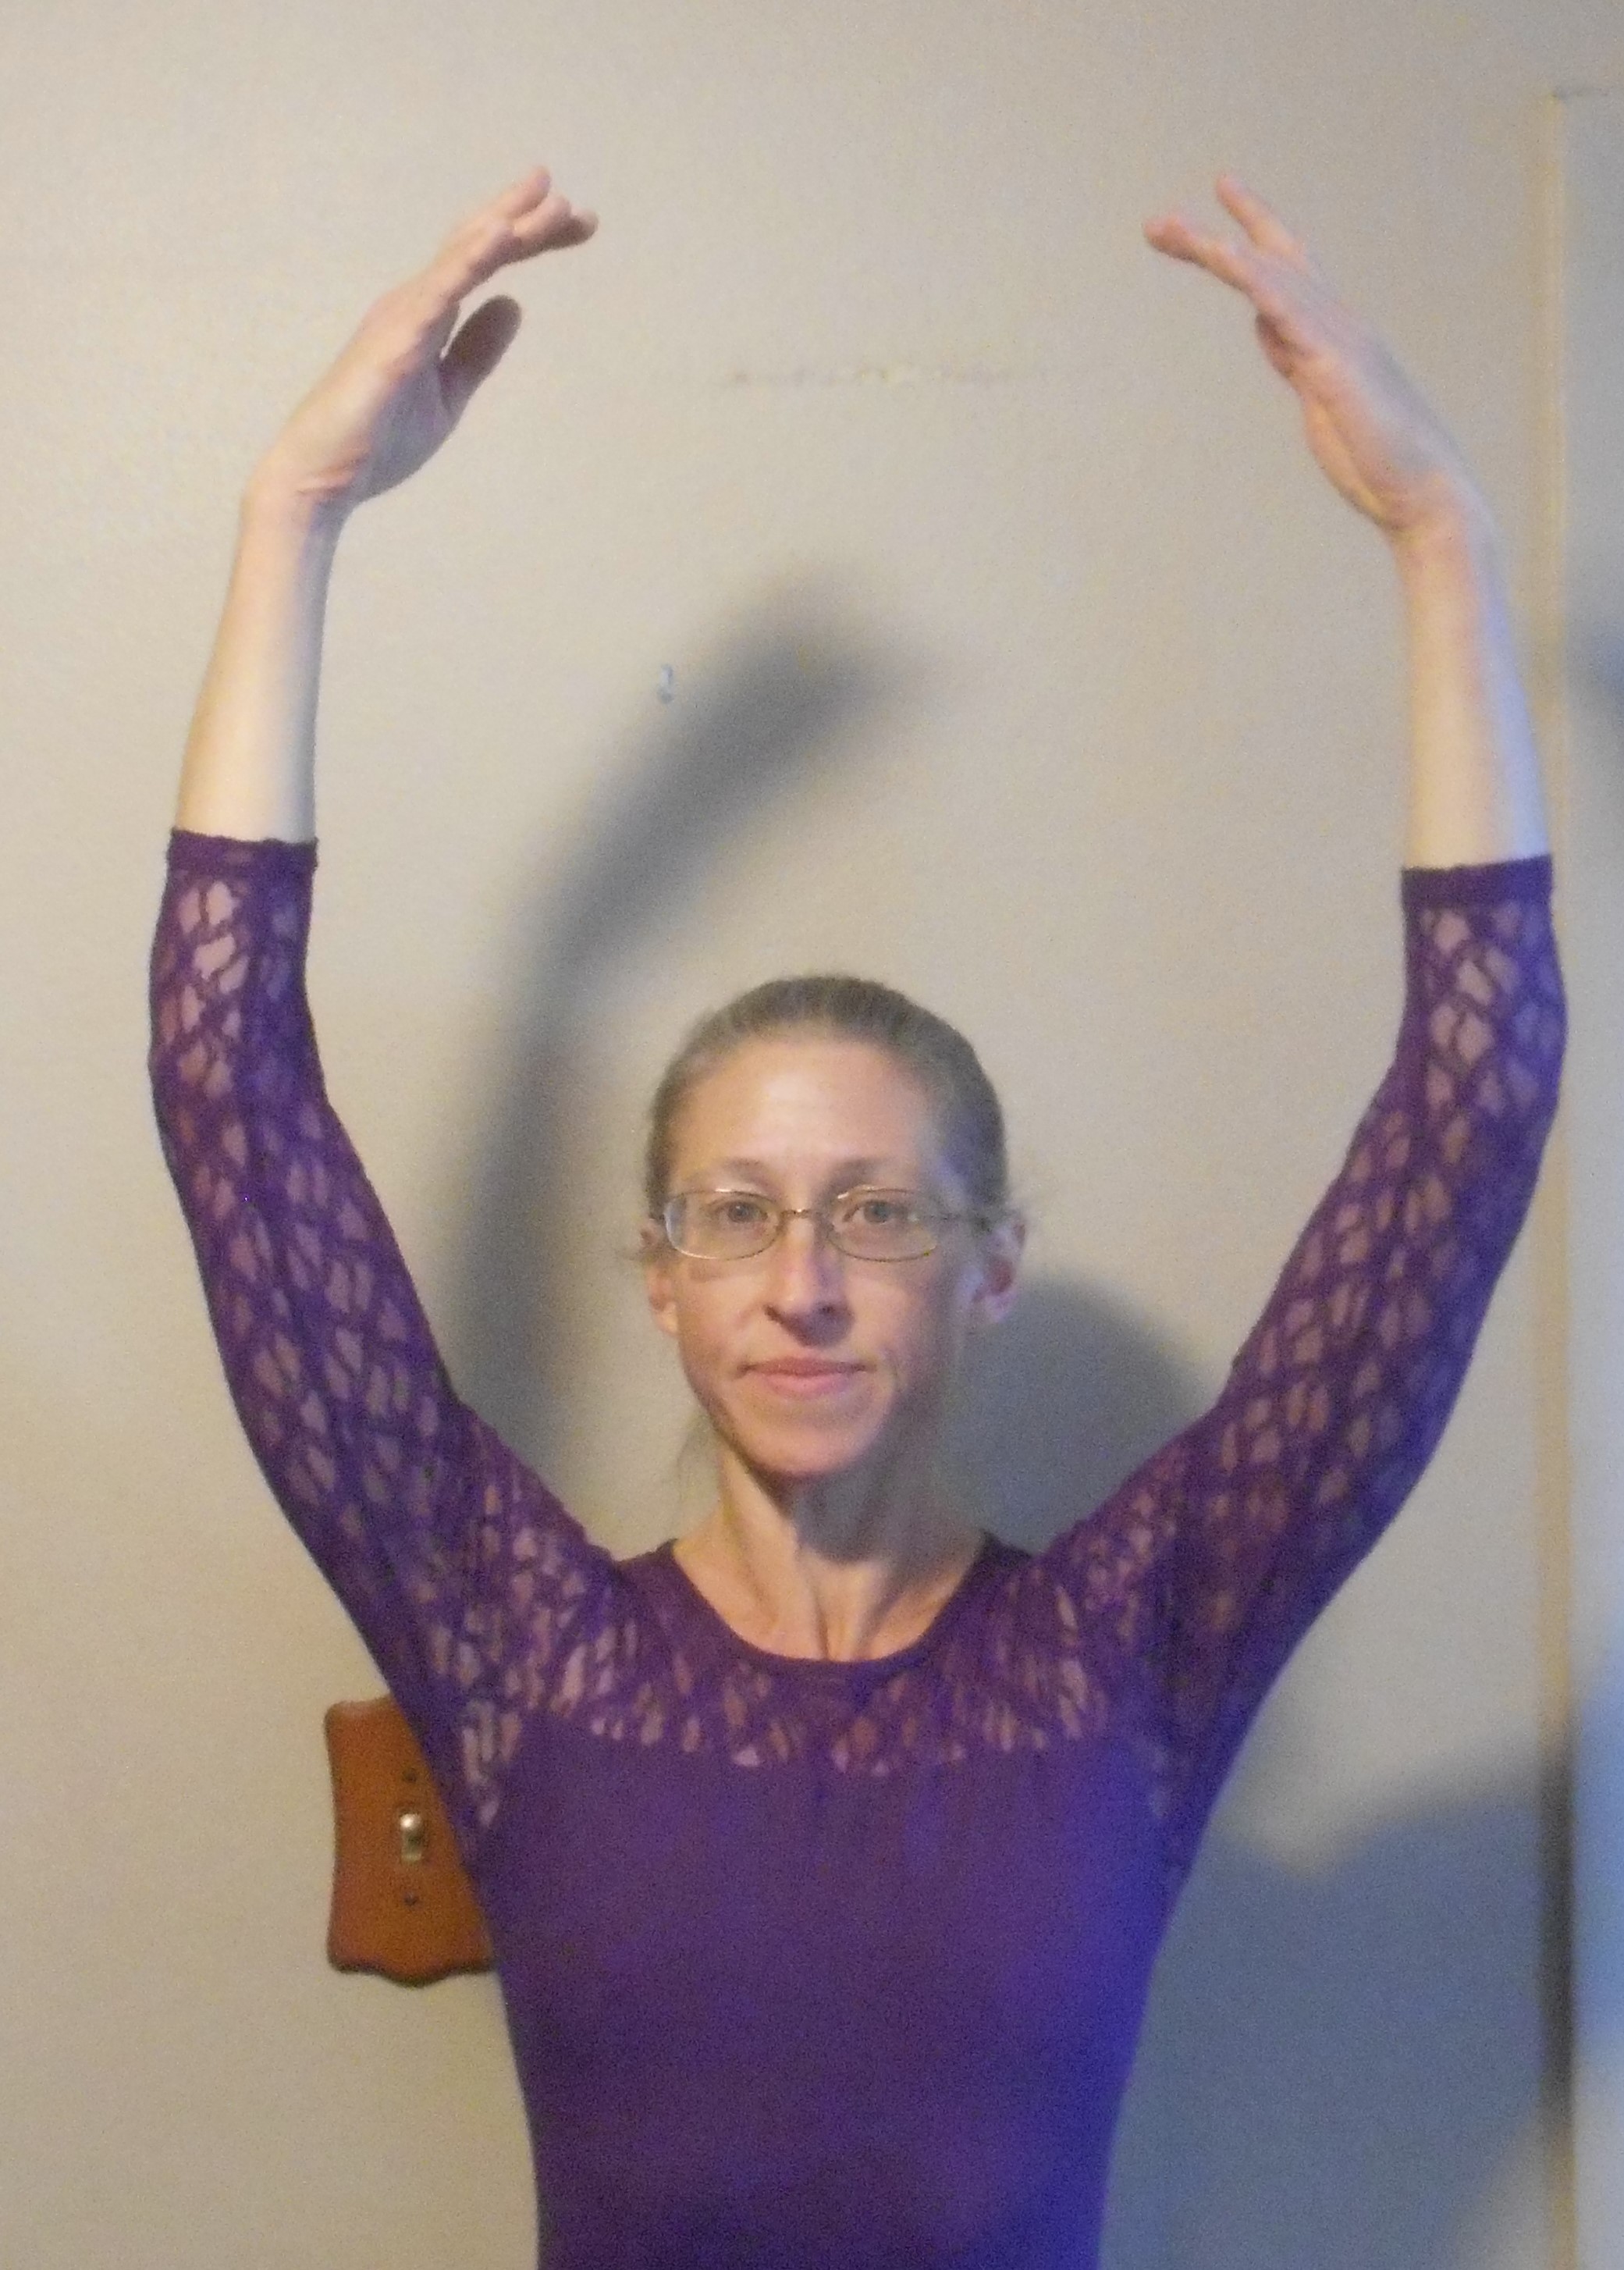
The dancer begins with feet in 3rd or 5th position croisé and arms in preparatory. After a small breath, the arms rise together to 1st position, then split as they do for 2nd Port de Bras, with the upstage arm arriving in 3rd position while the downstage arm arrives in 2nd position. During this phase, the eyes focus on the downstage hand, following its movements up to 1st position with a slight inclination over the upstage shoulder, and out to 2nd position with an inclination slightly backward over the downstage shoulder.
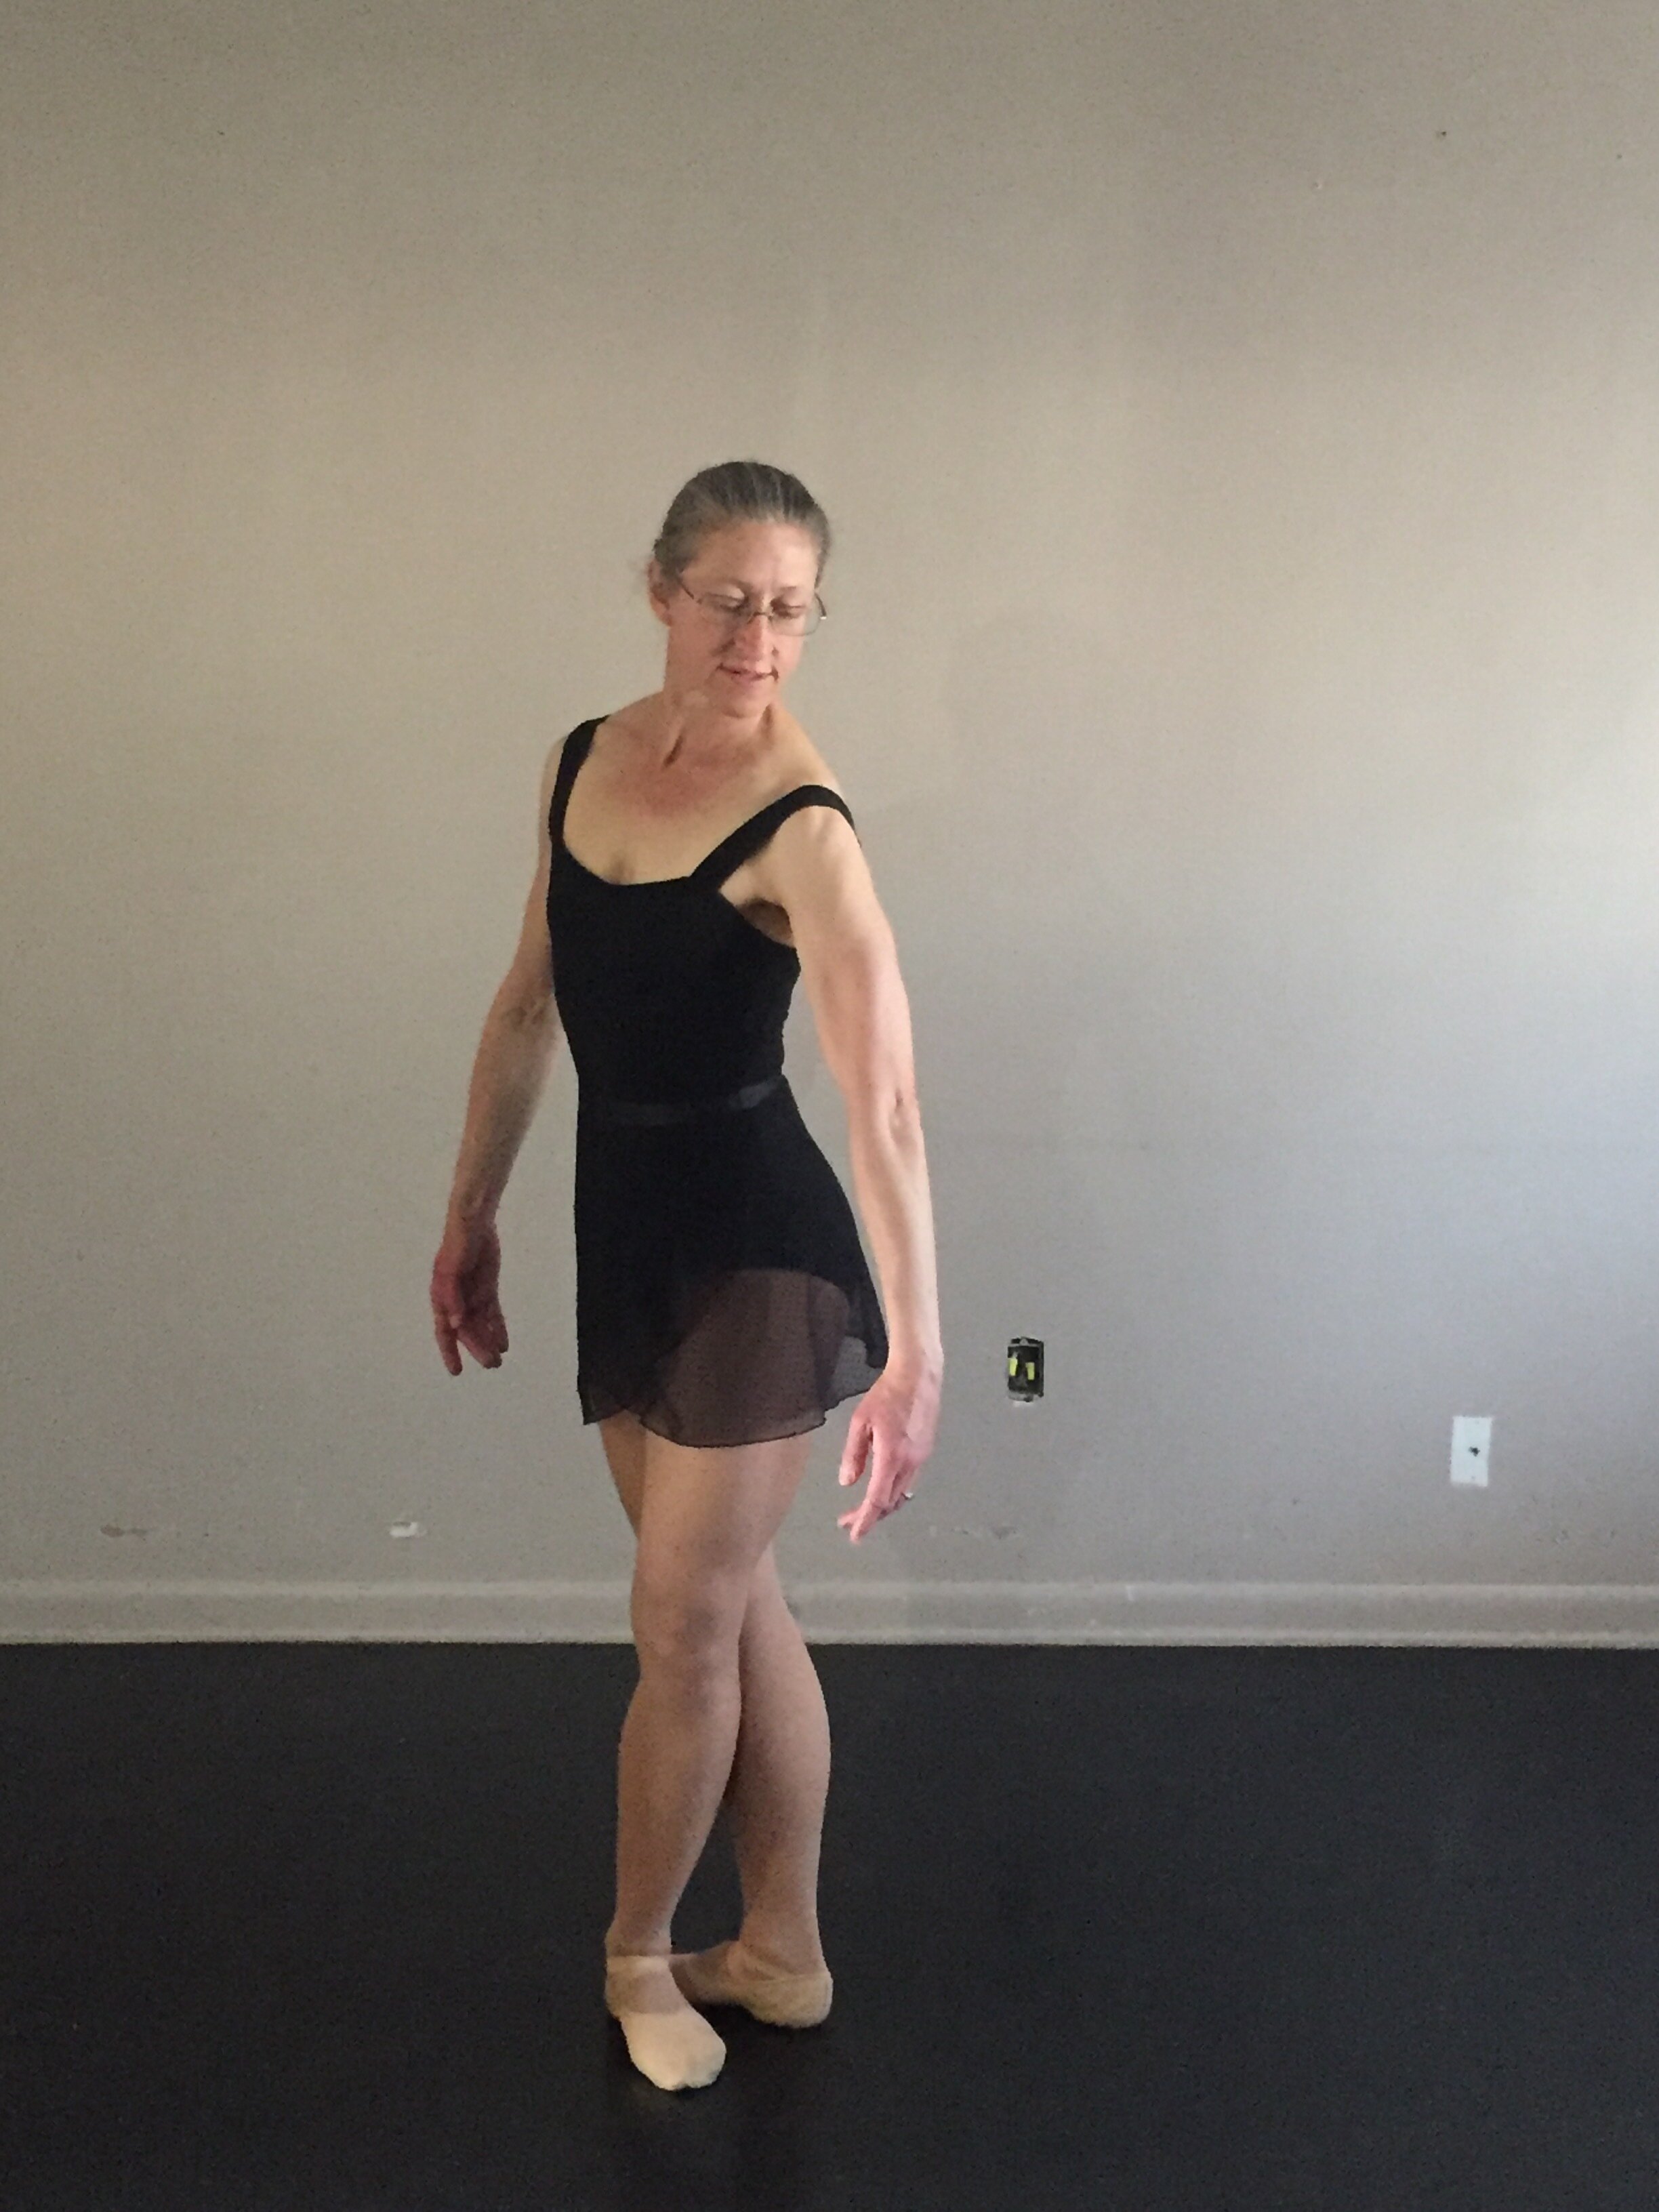
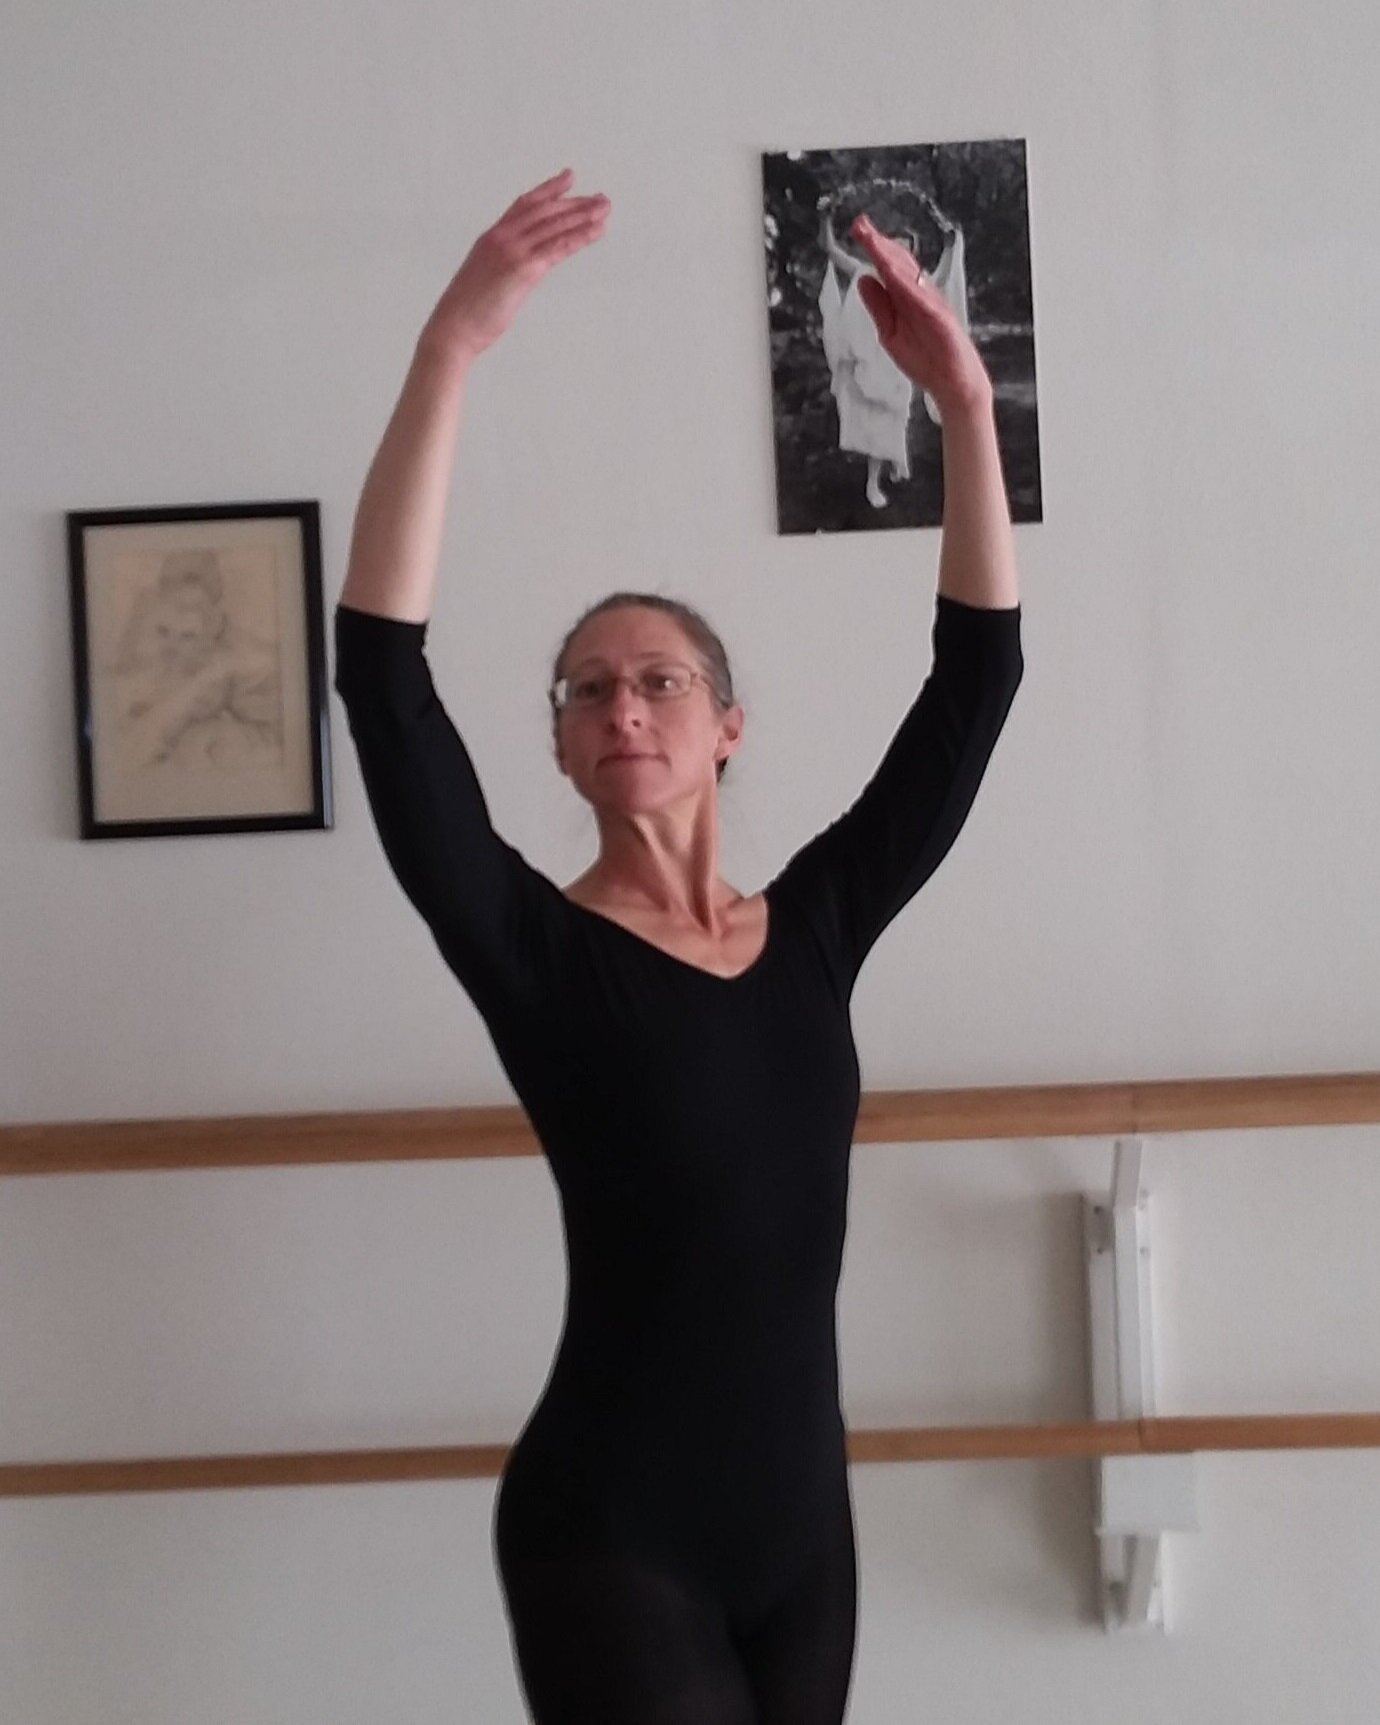
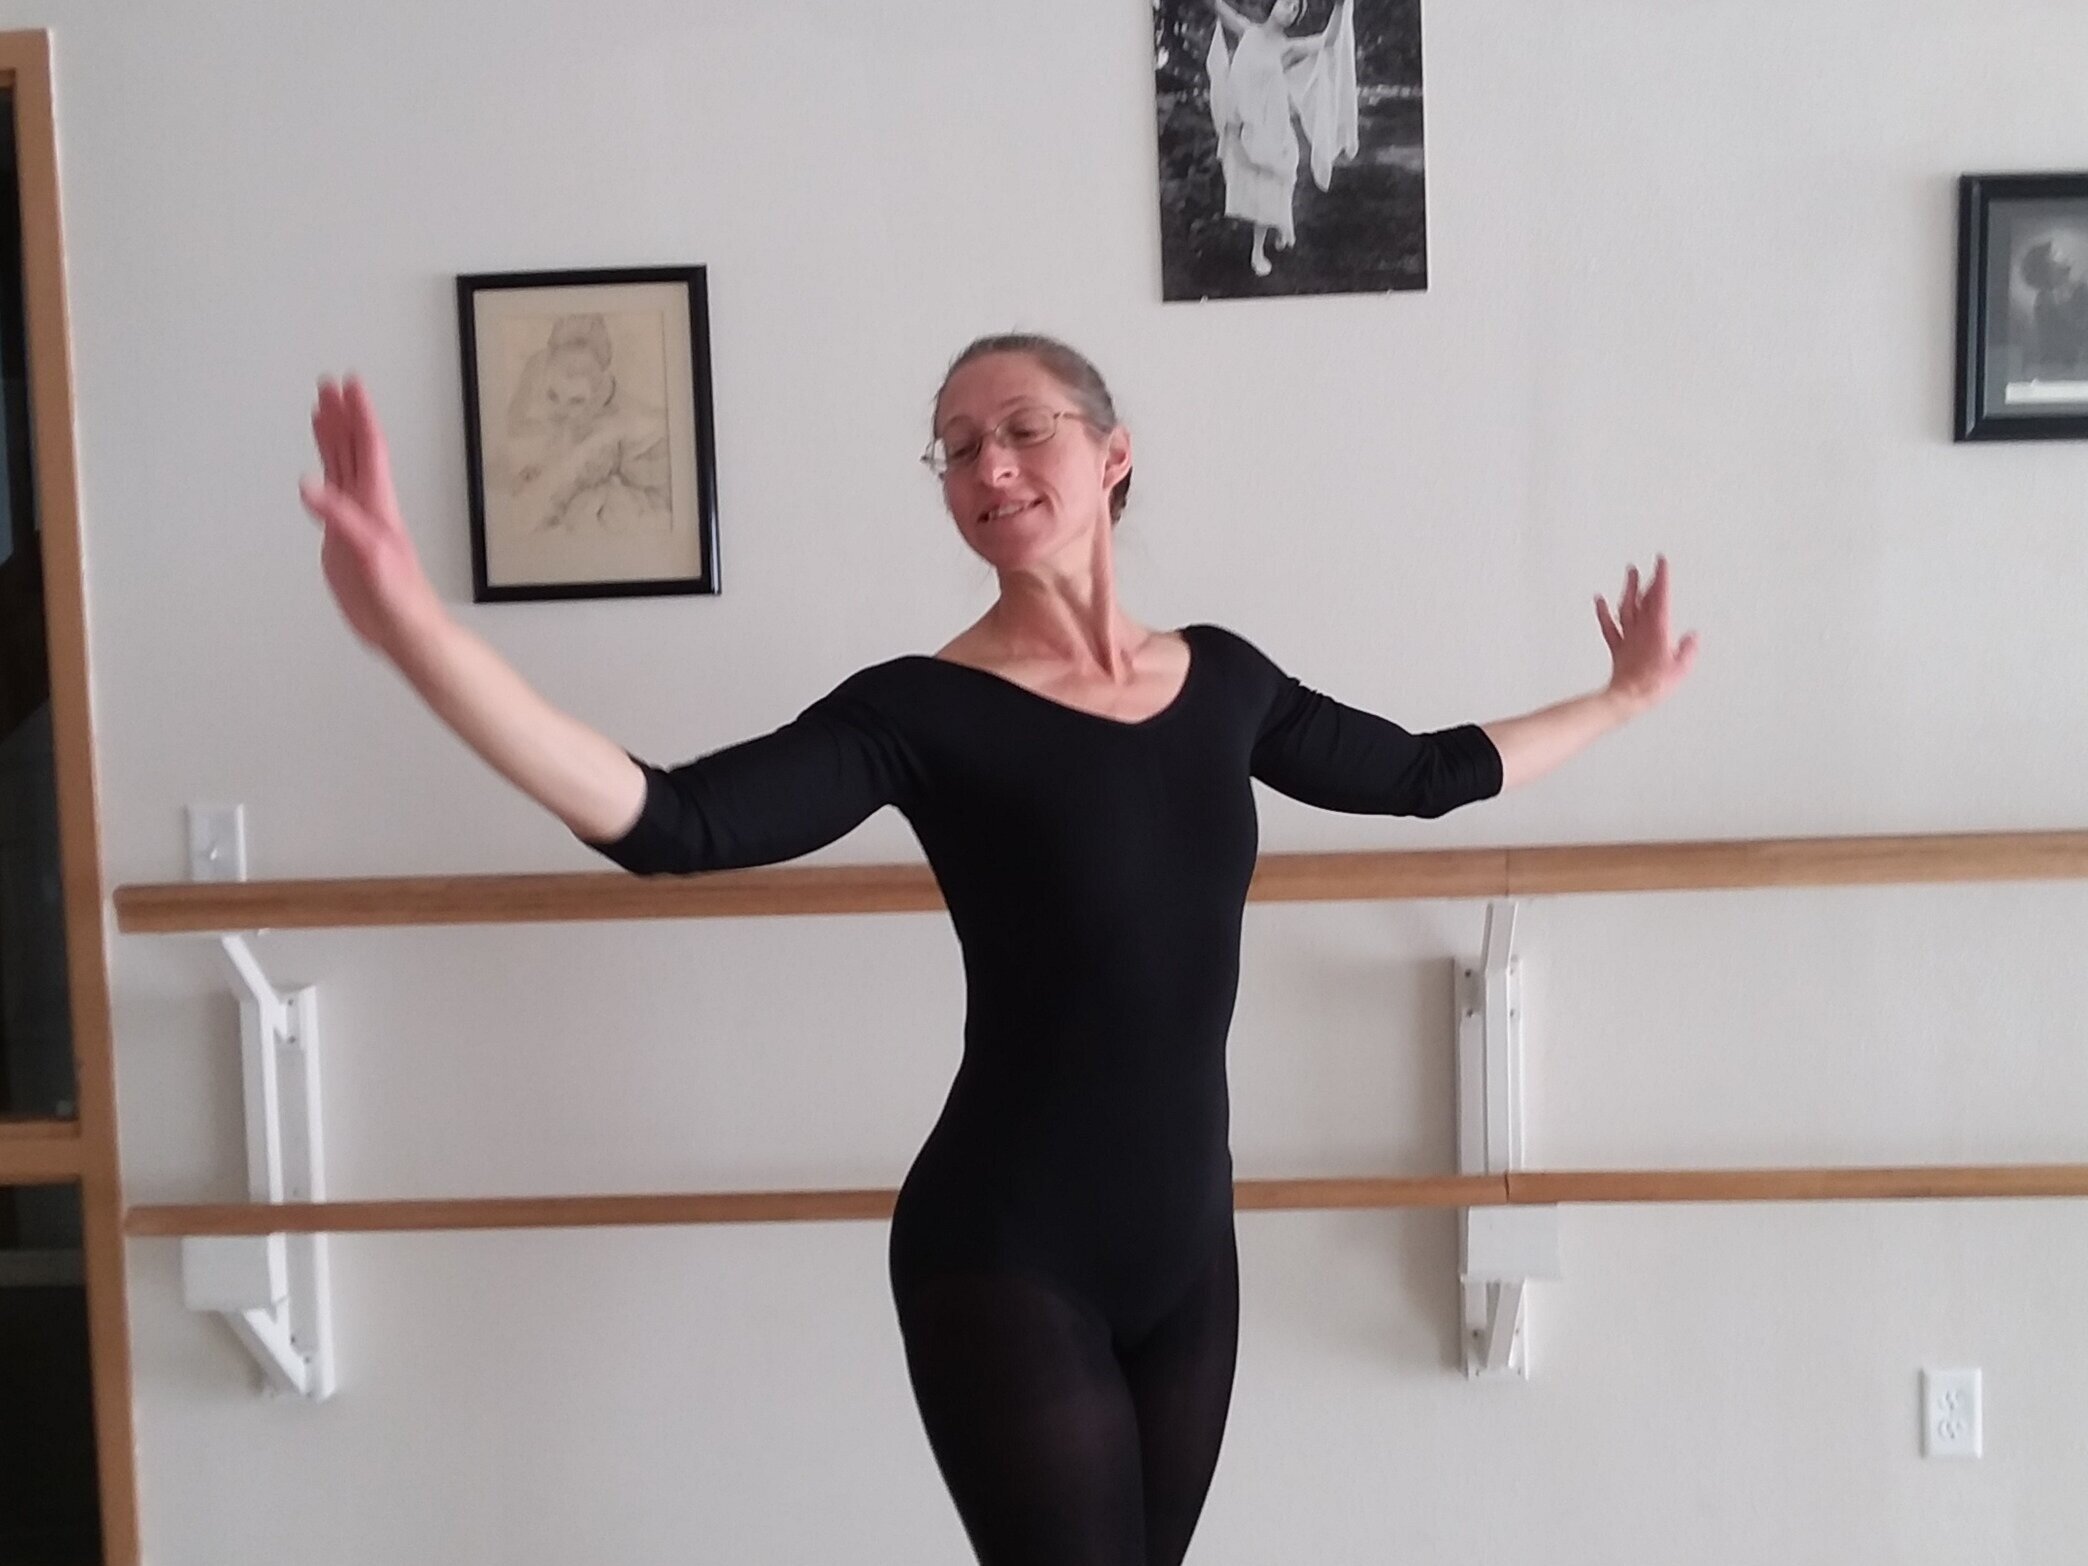
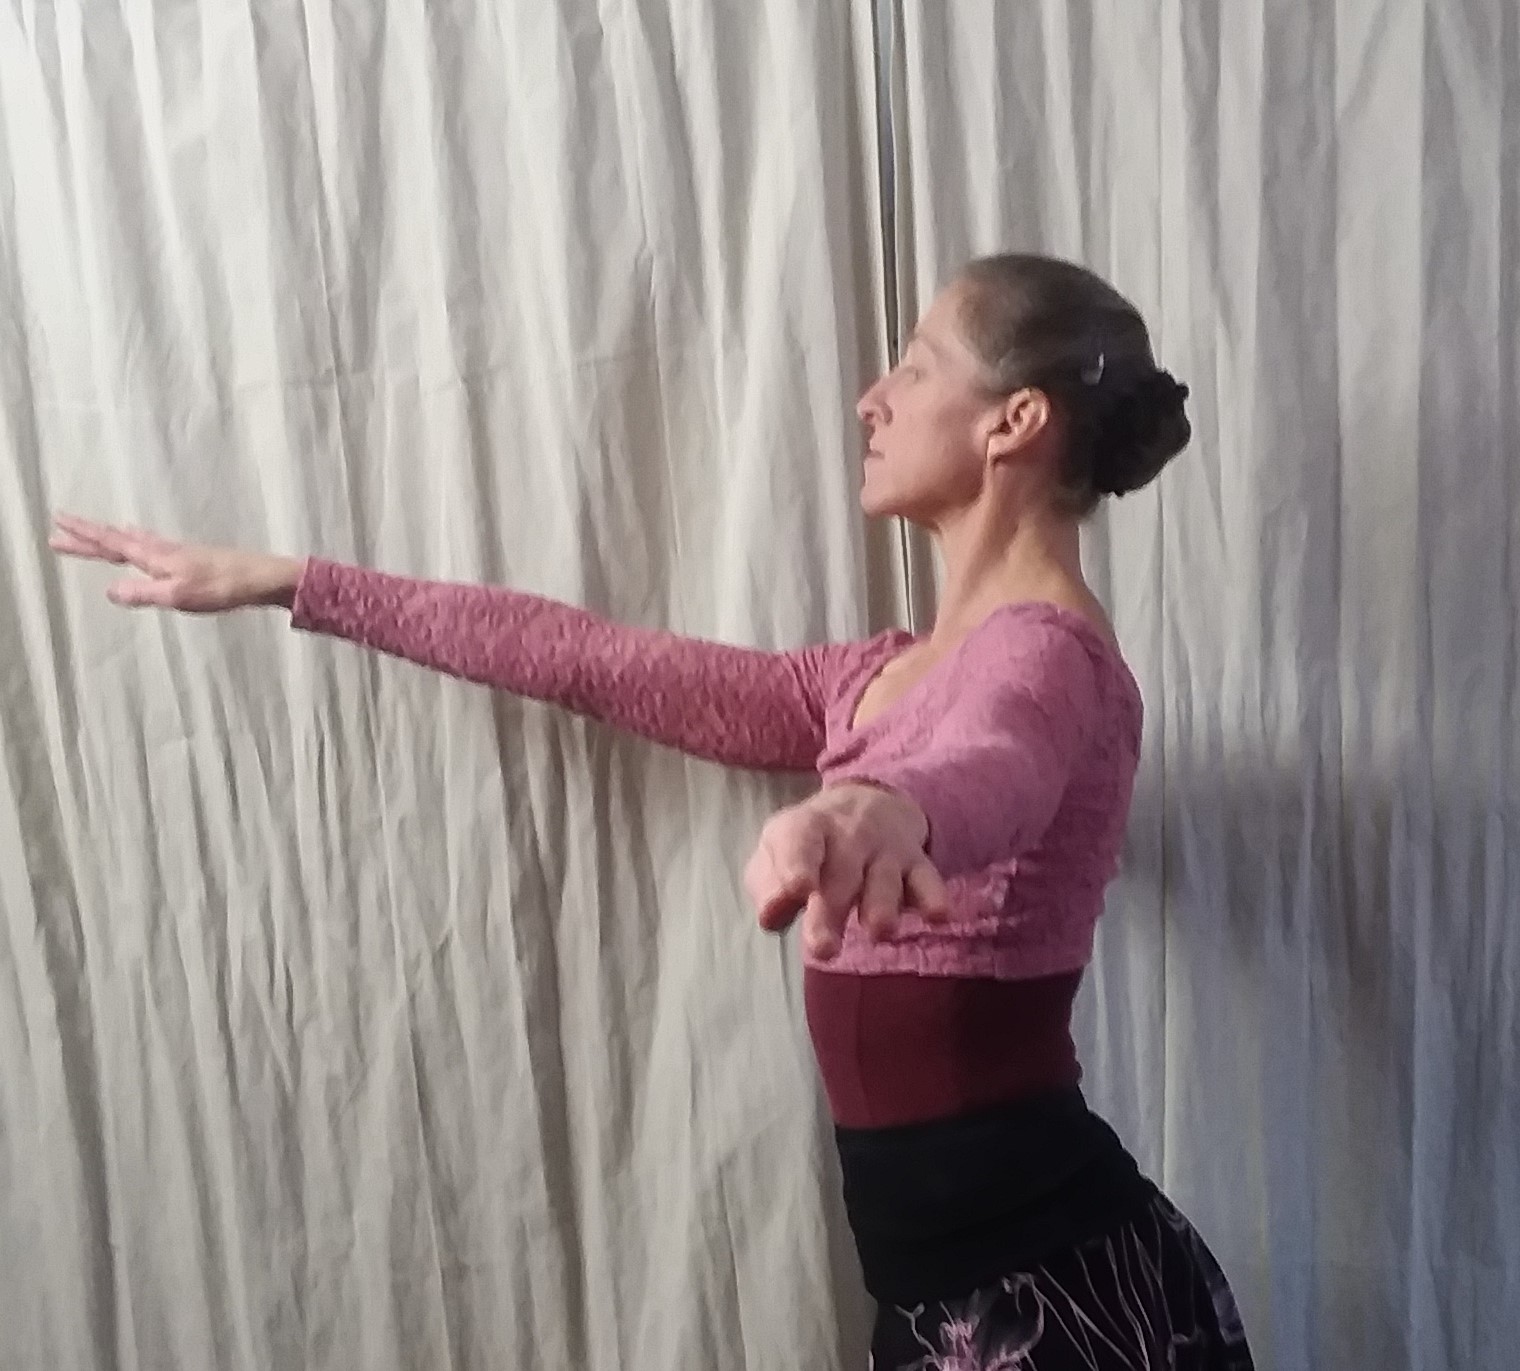
Now the dancer turns the focus to the upstage hand, watching it as it begins its reach towards the back corner of the room, opposite to the corner the dancer’s hips are facing. As this upstage arm is reaching to the back corner, the dancer is twisting at the waist towards the back of the room and the downstage arm is beginning movement down to preparatory.


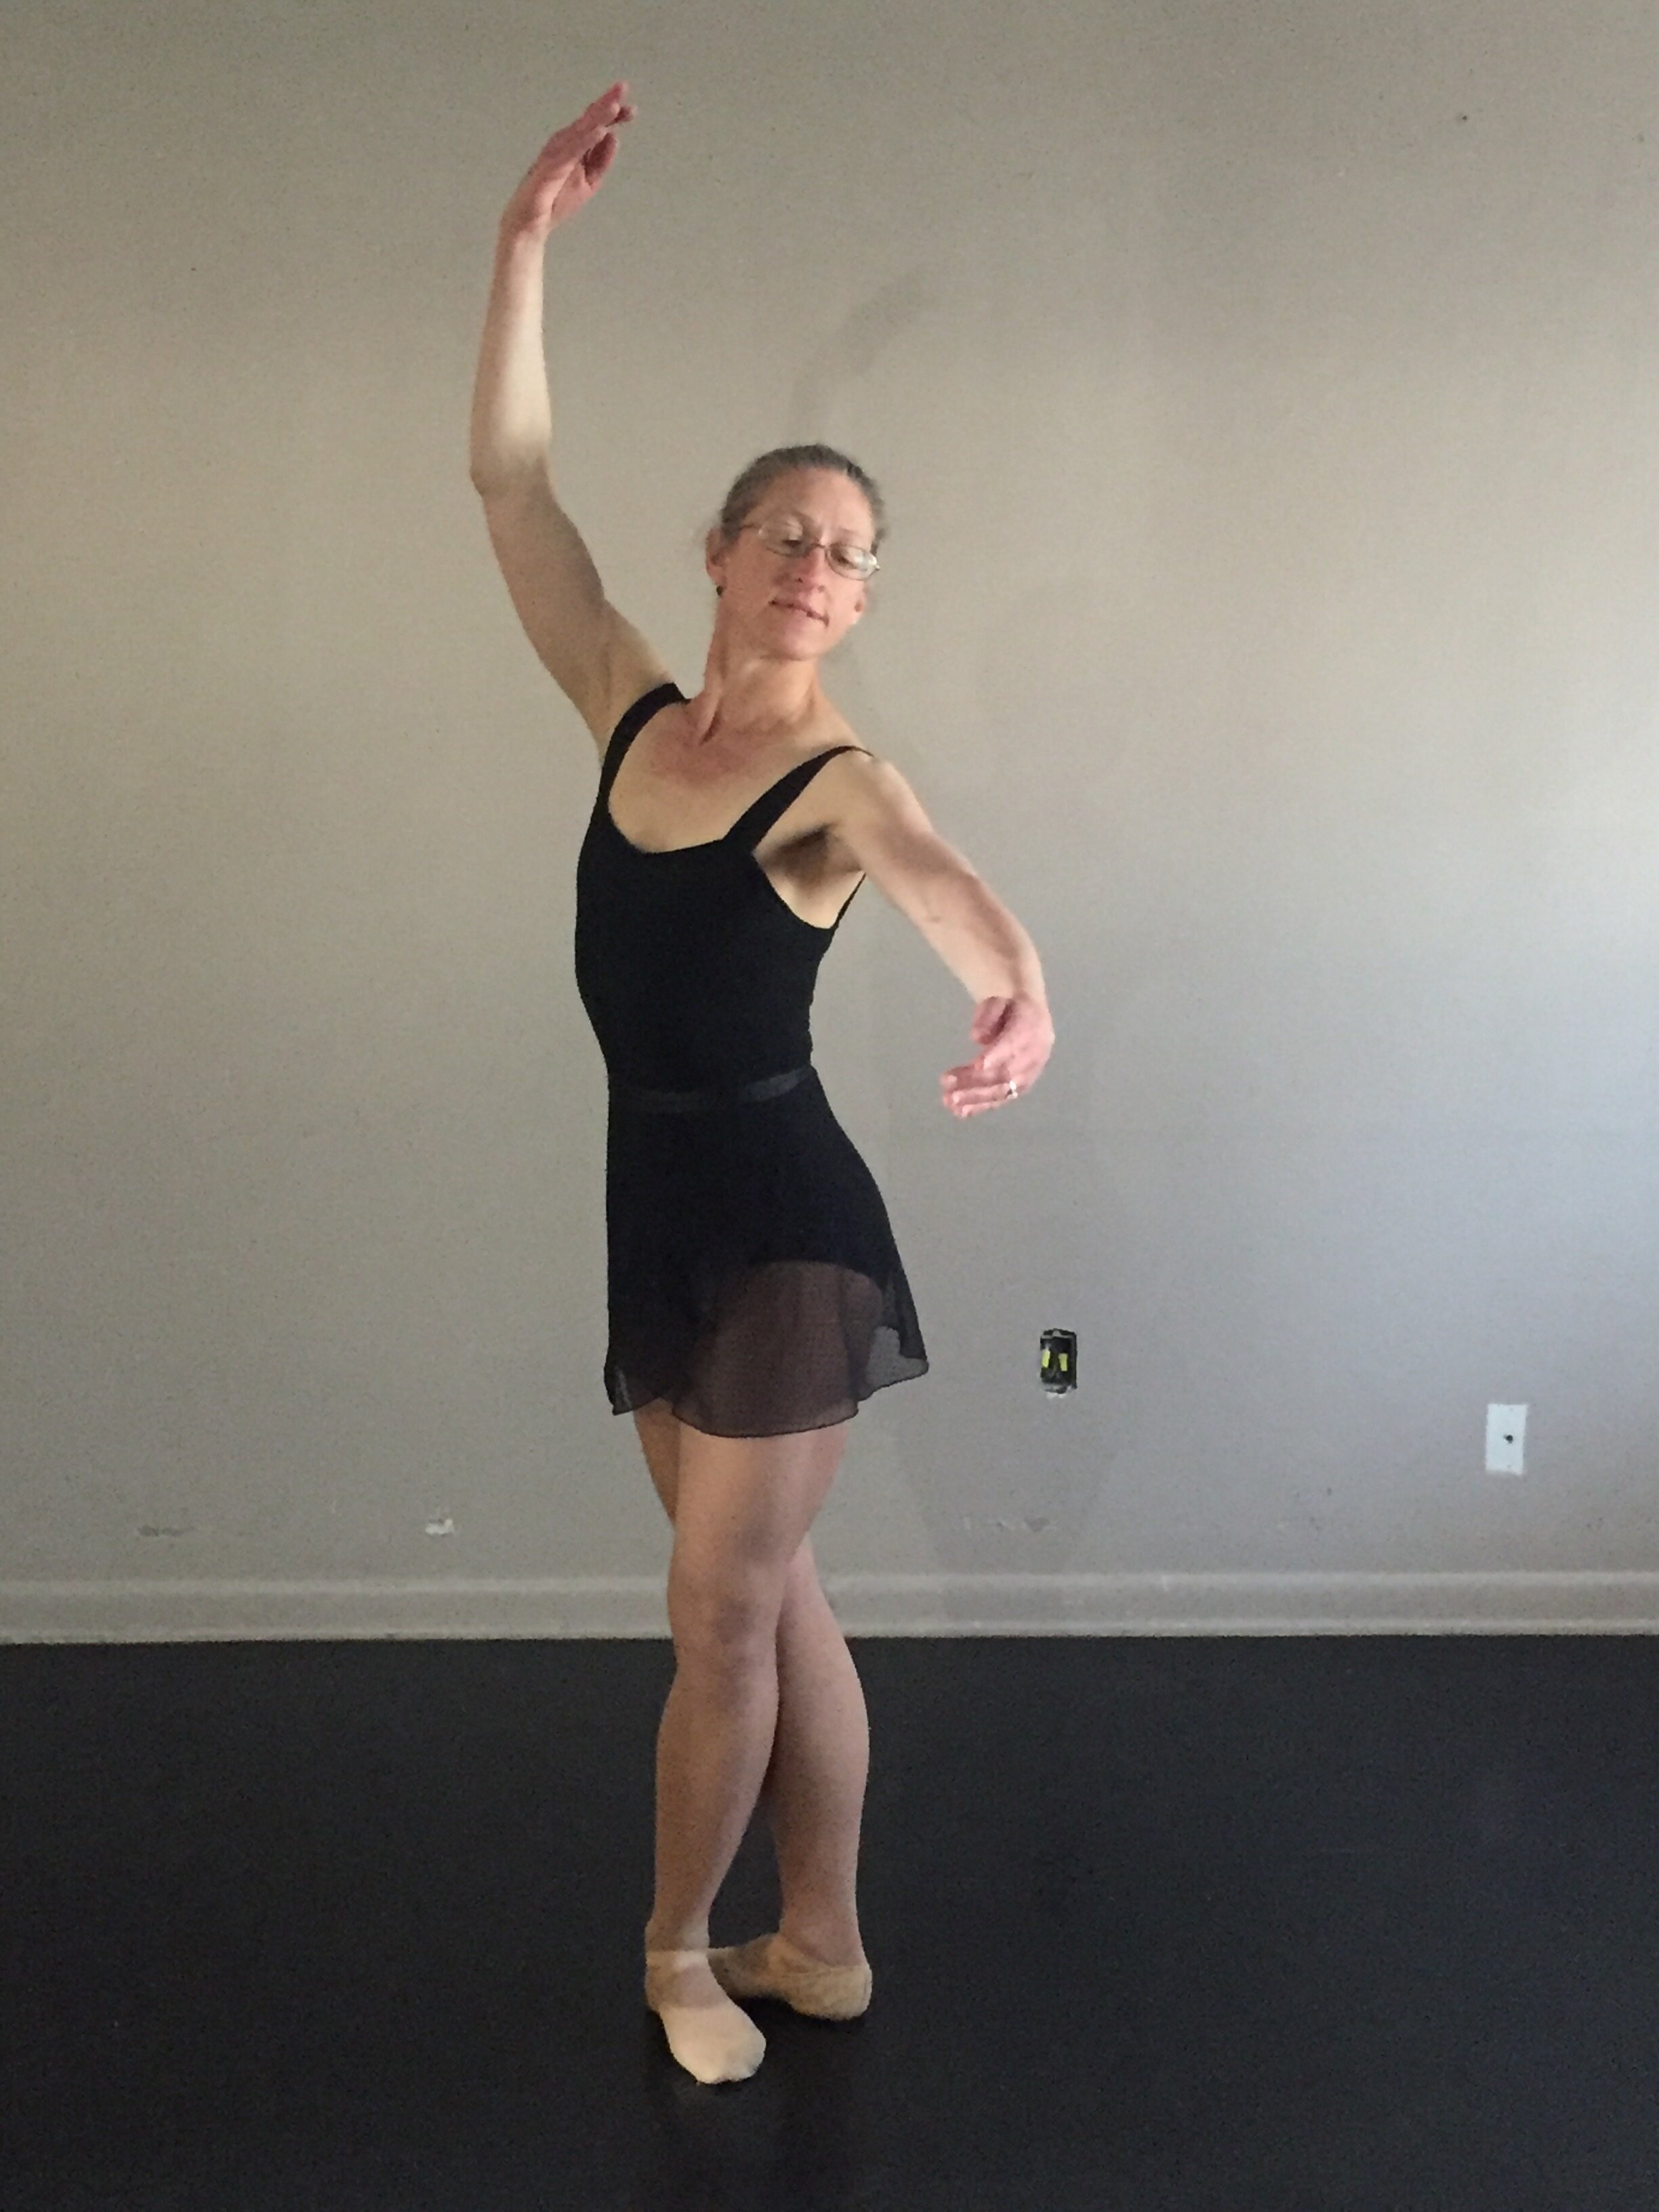
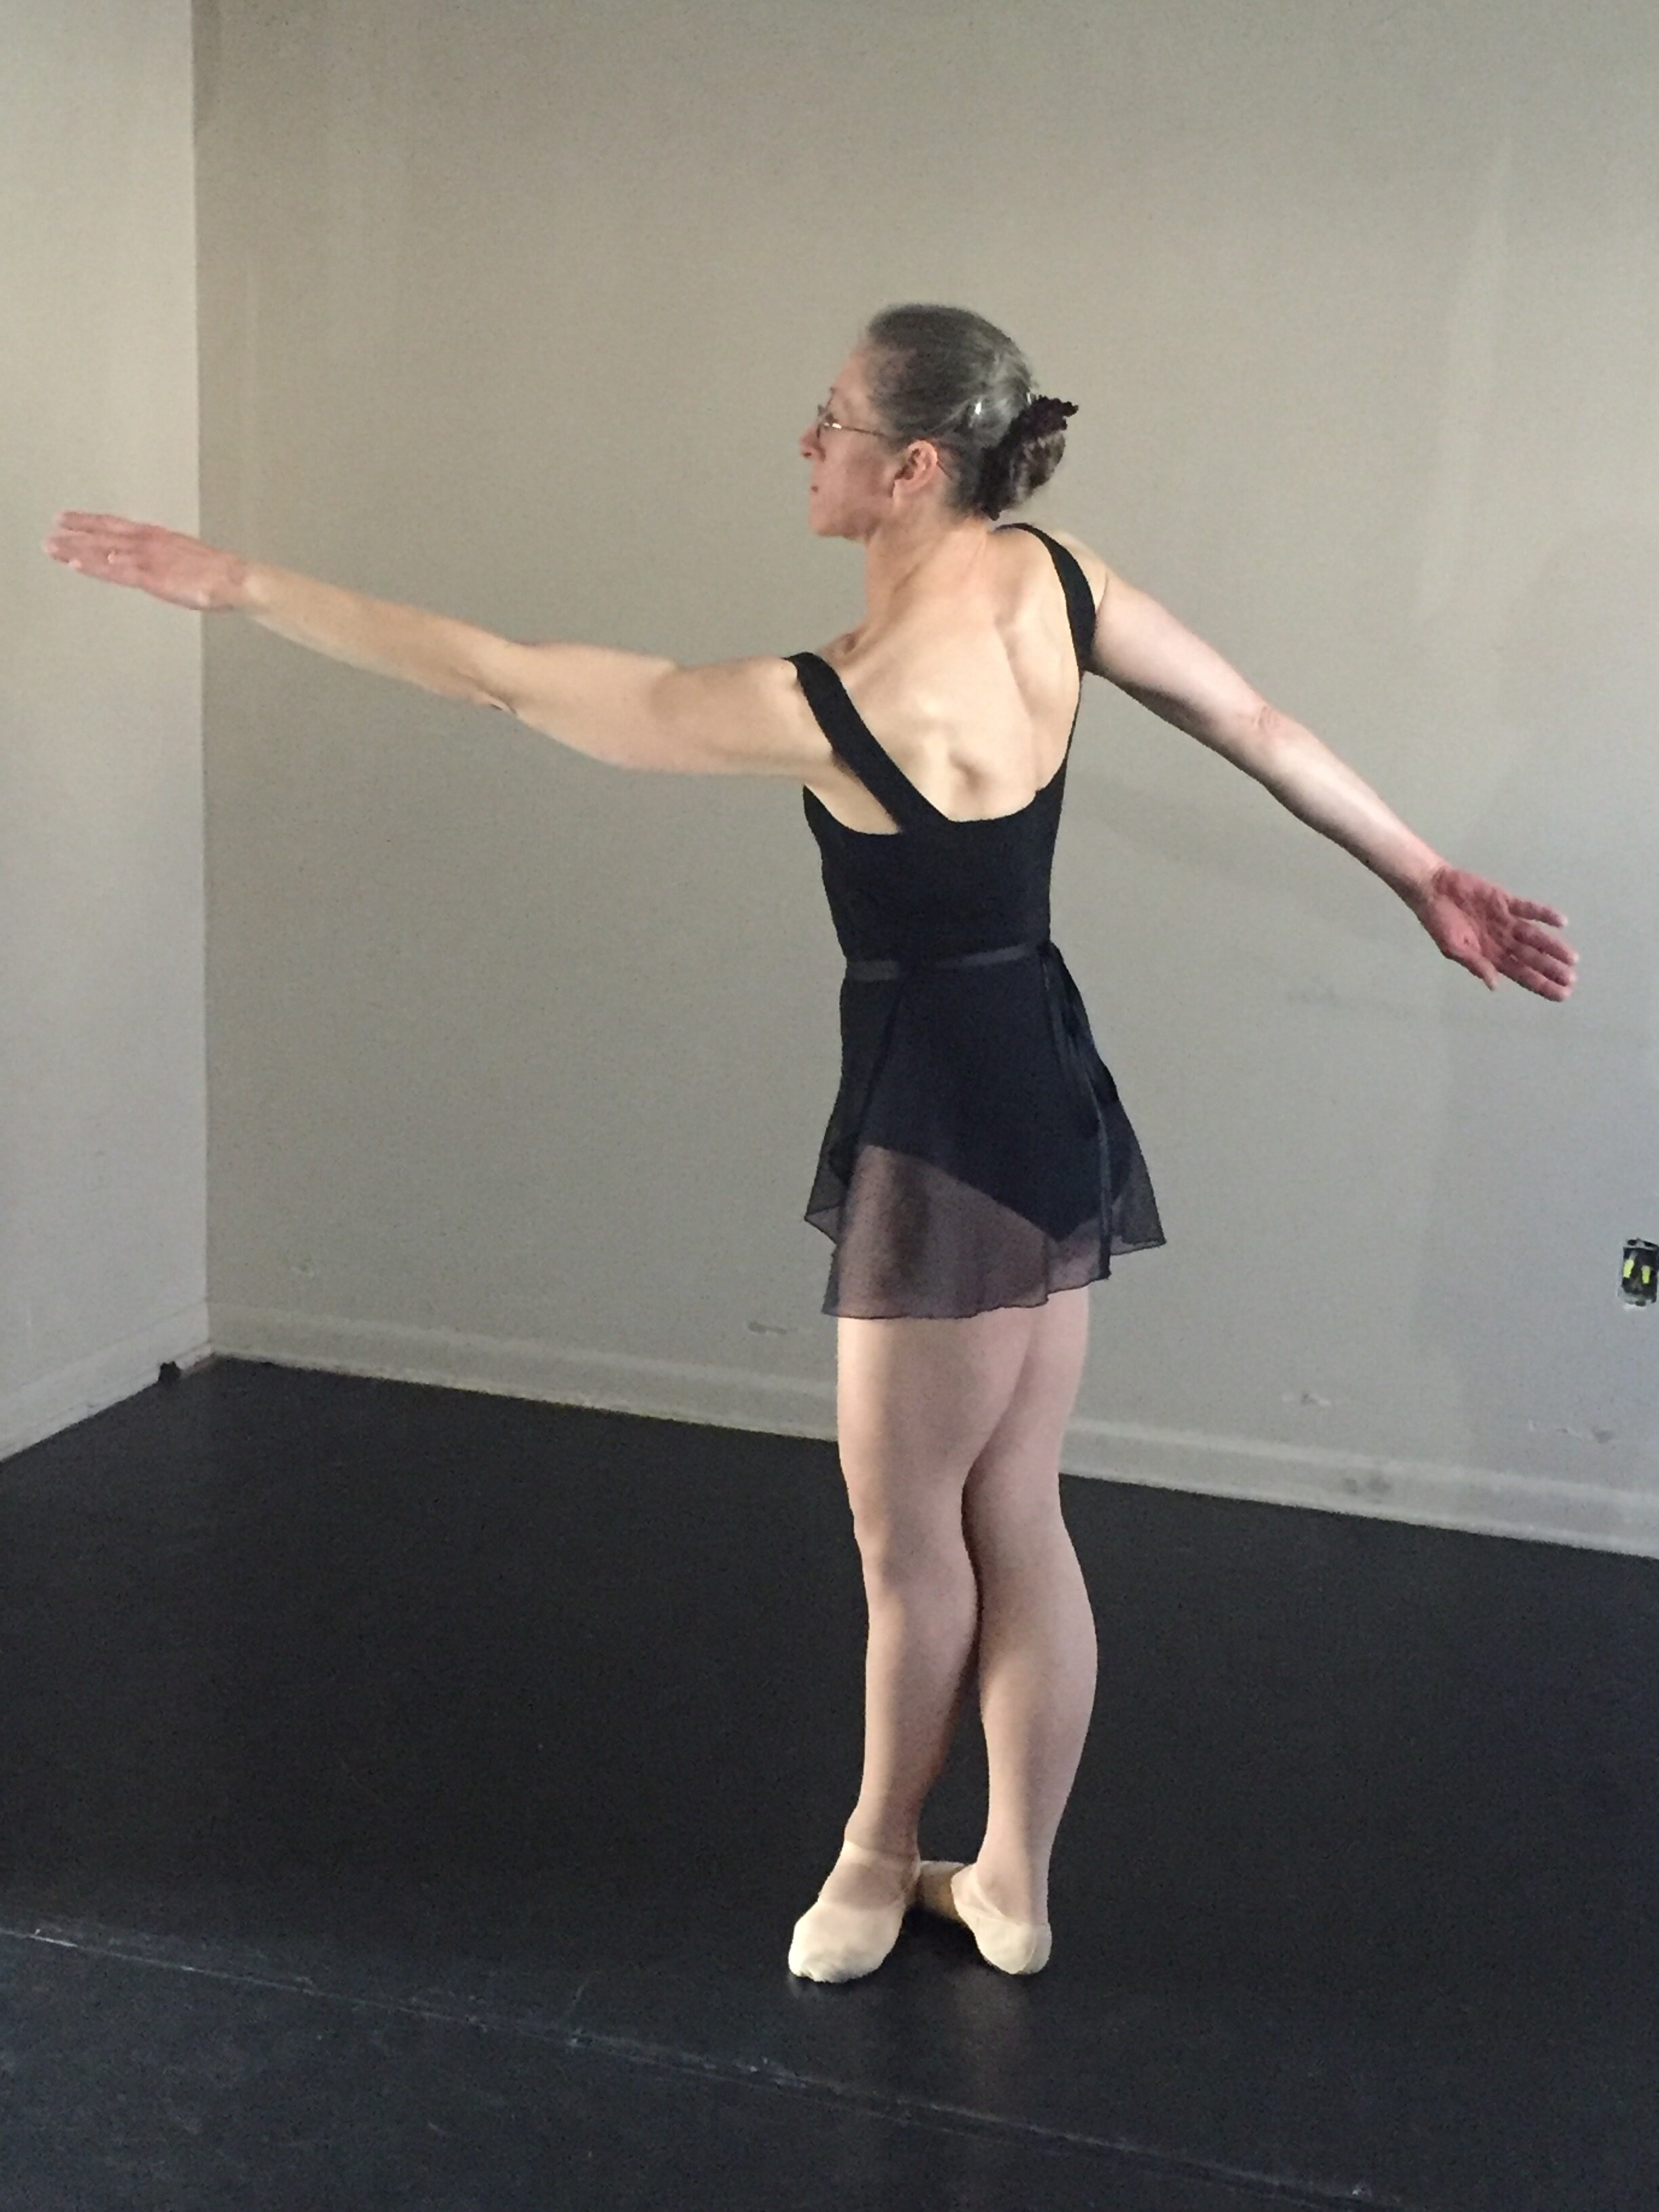
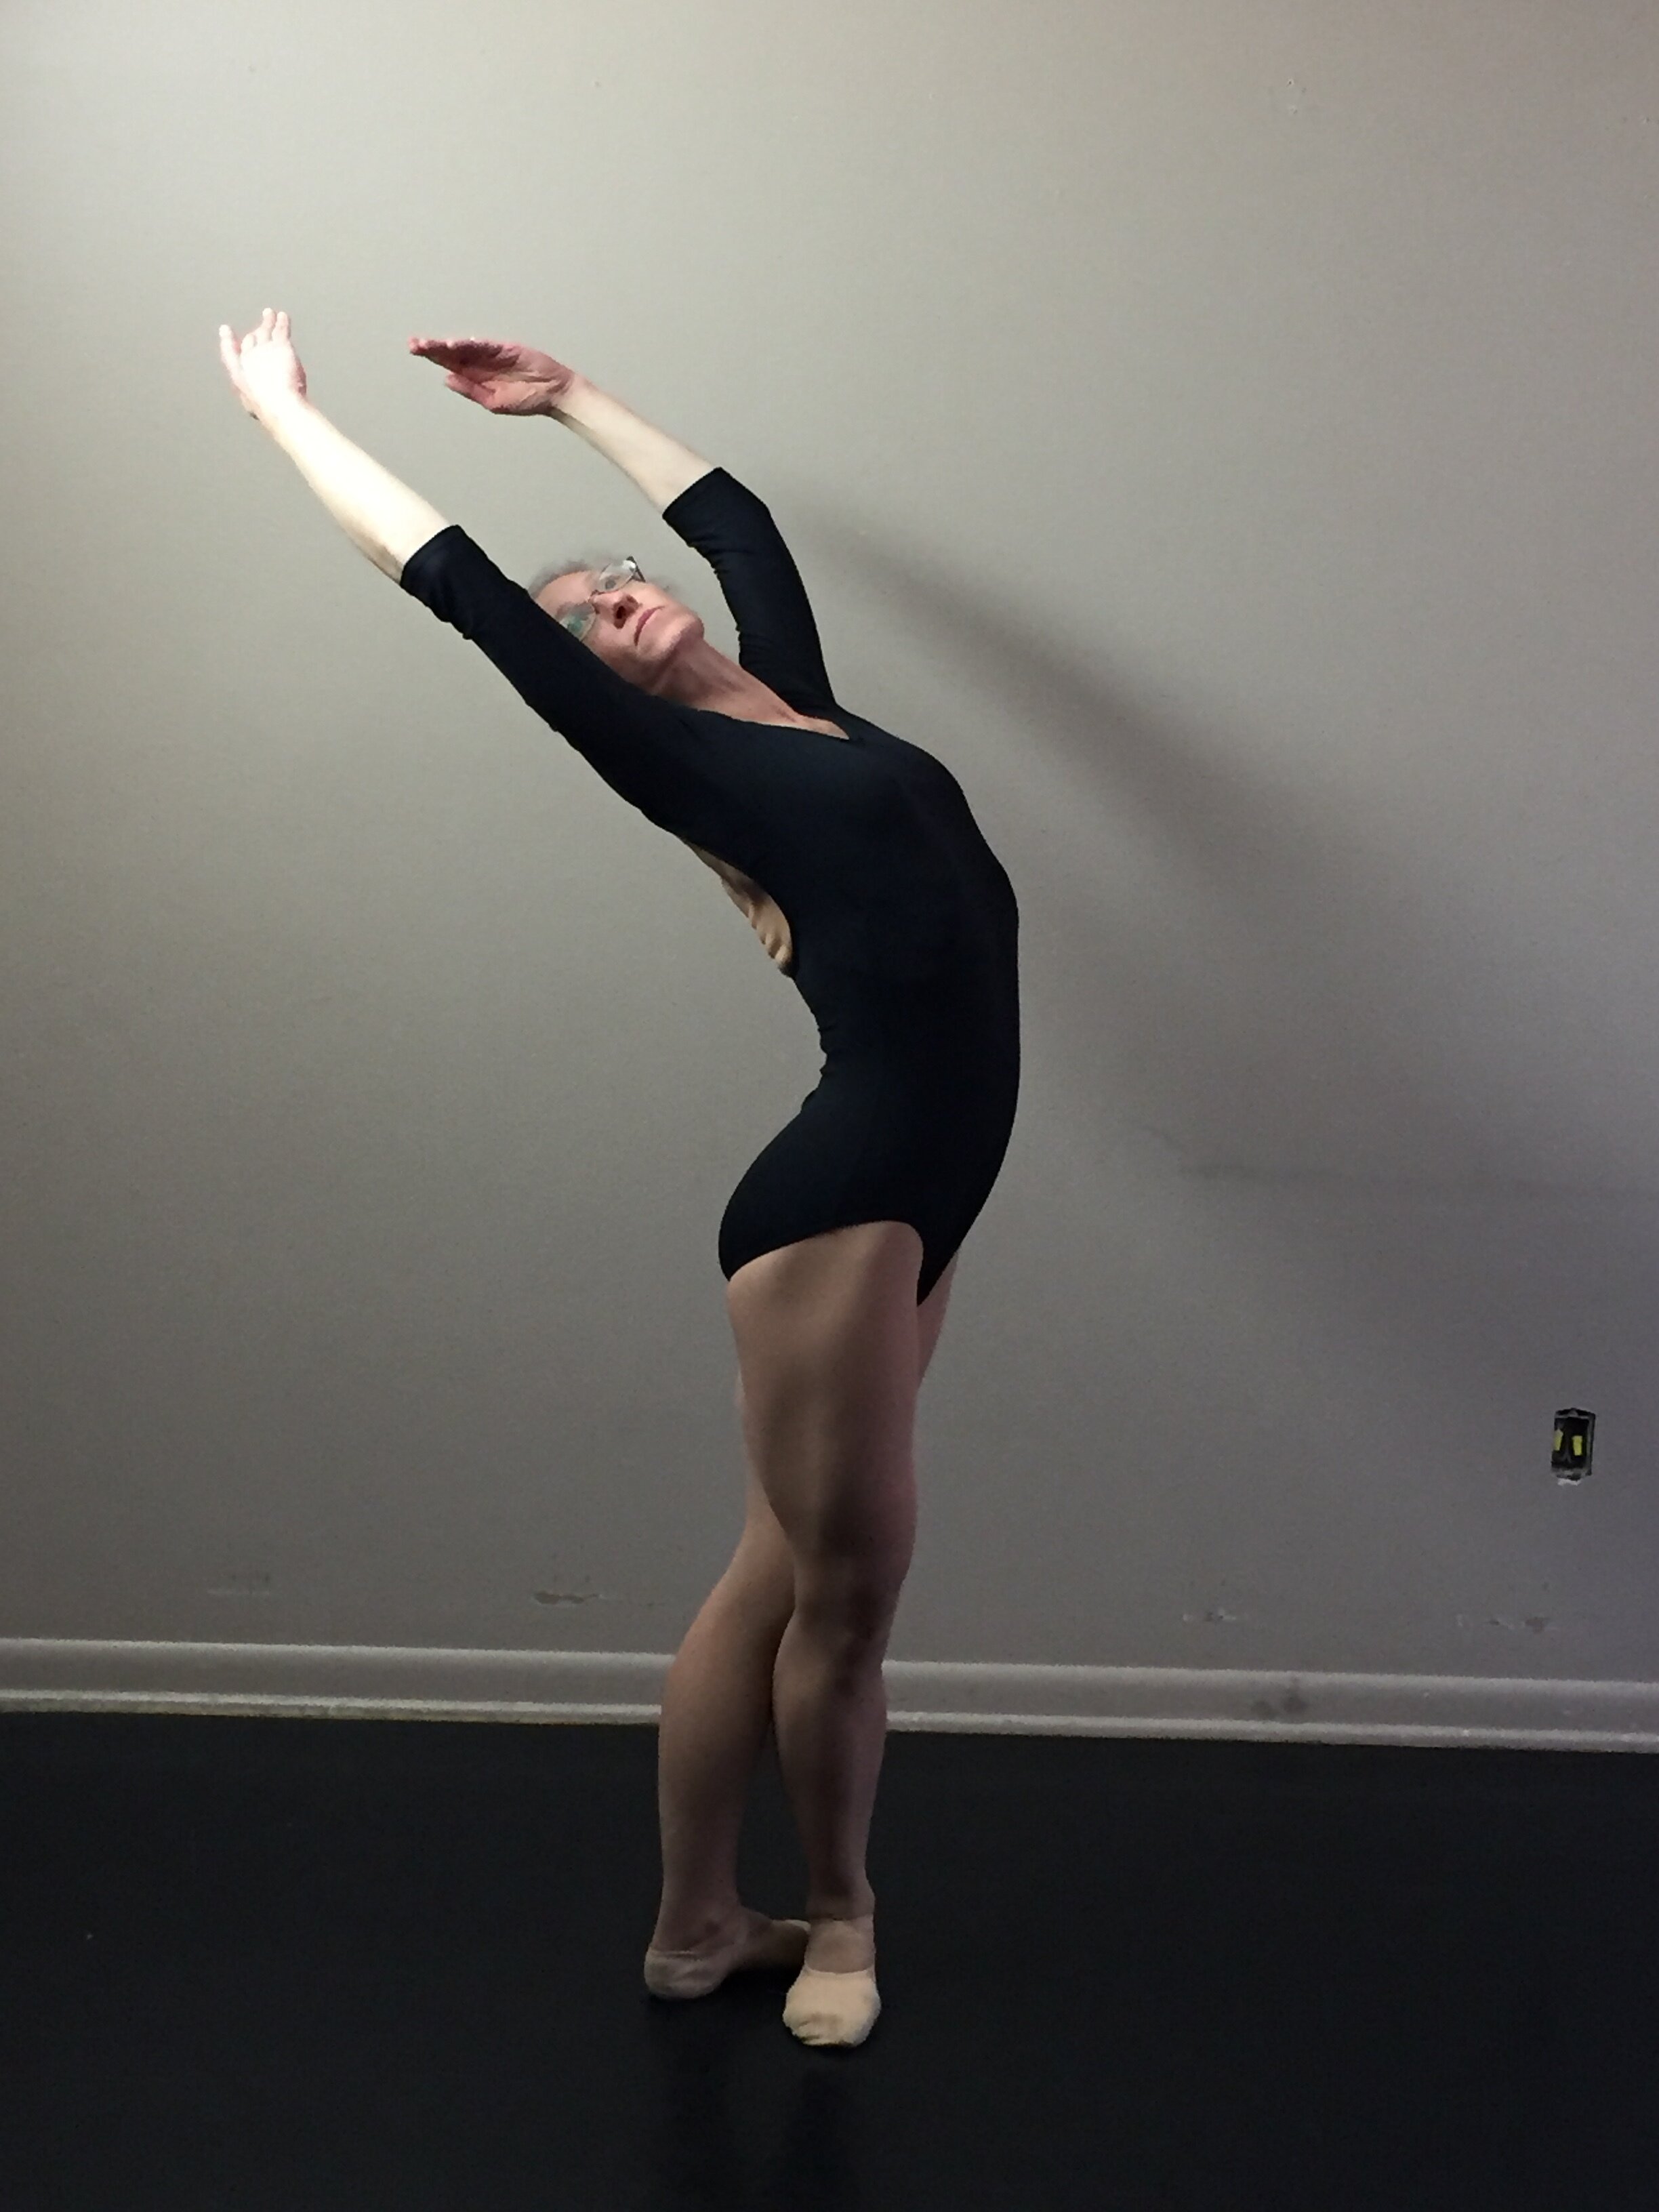
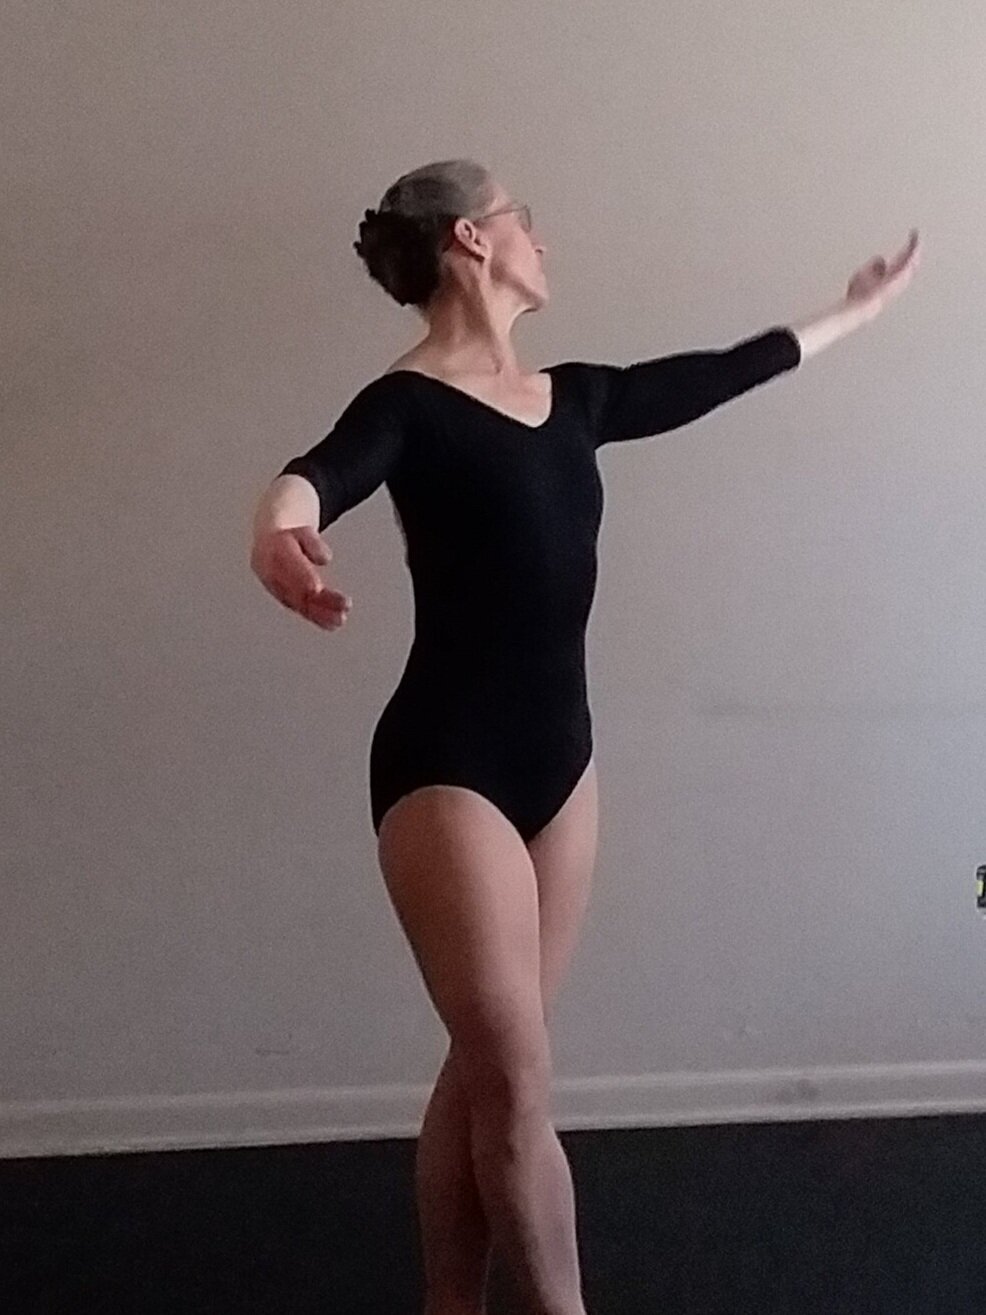
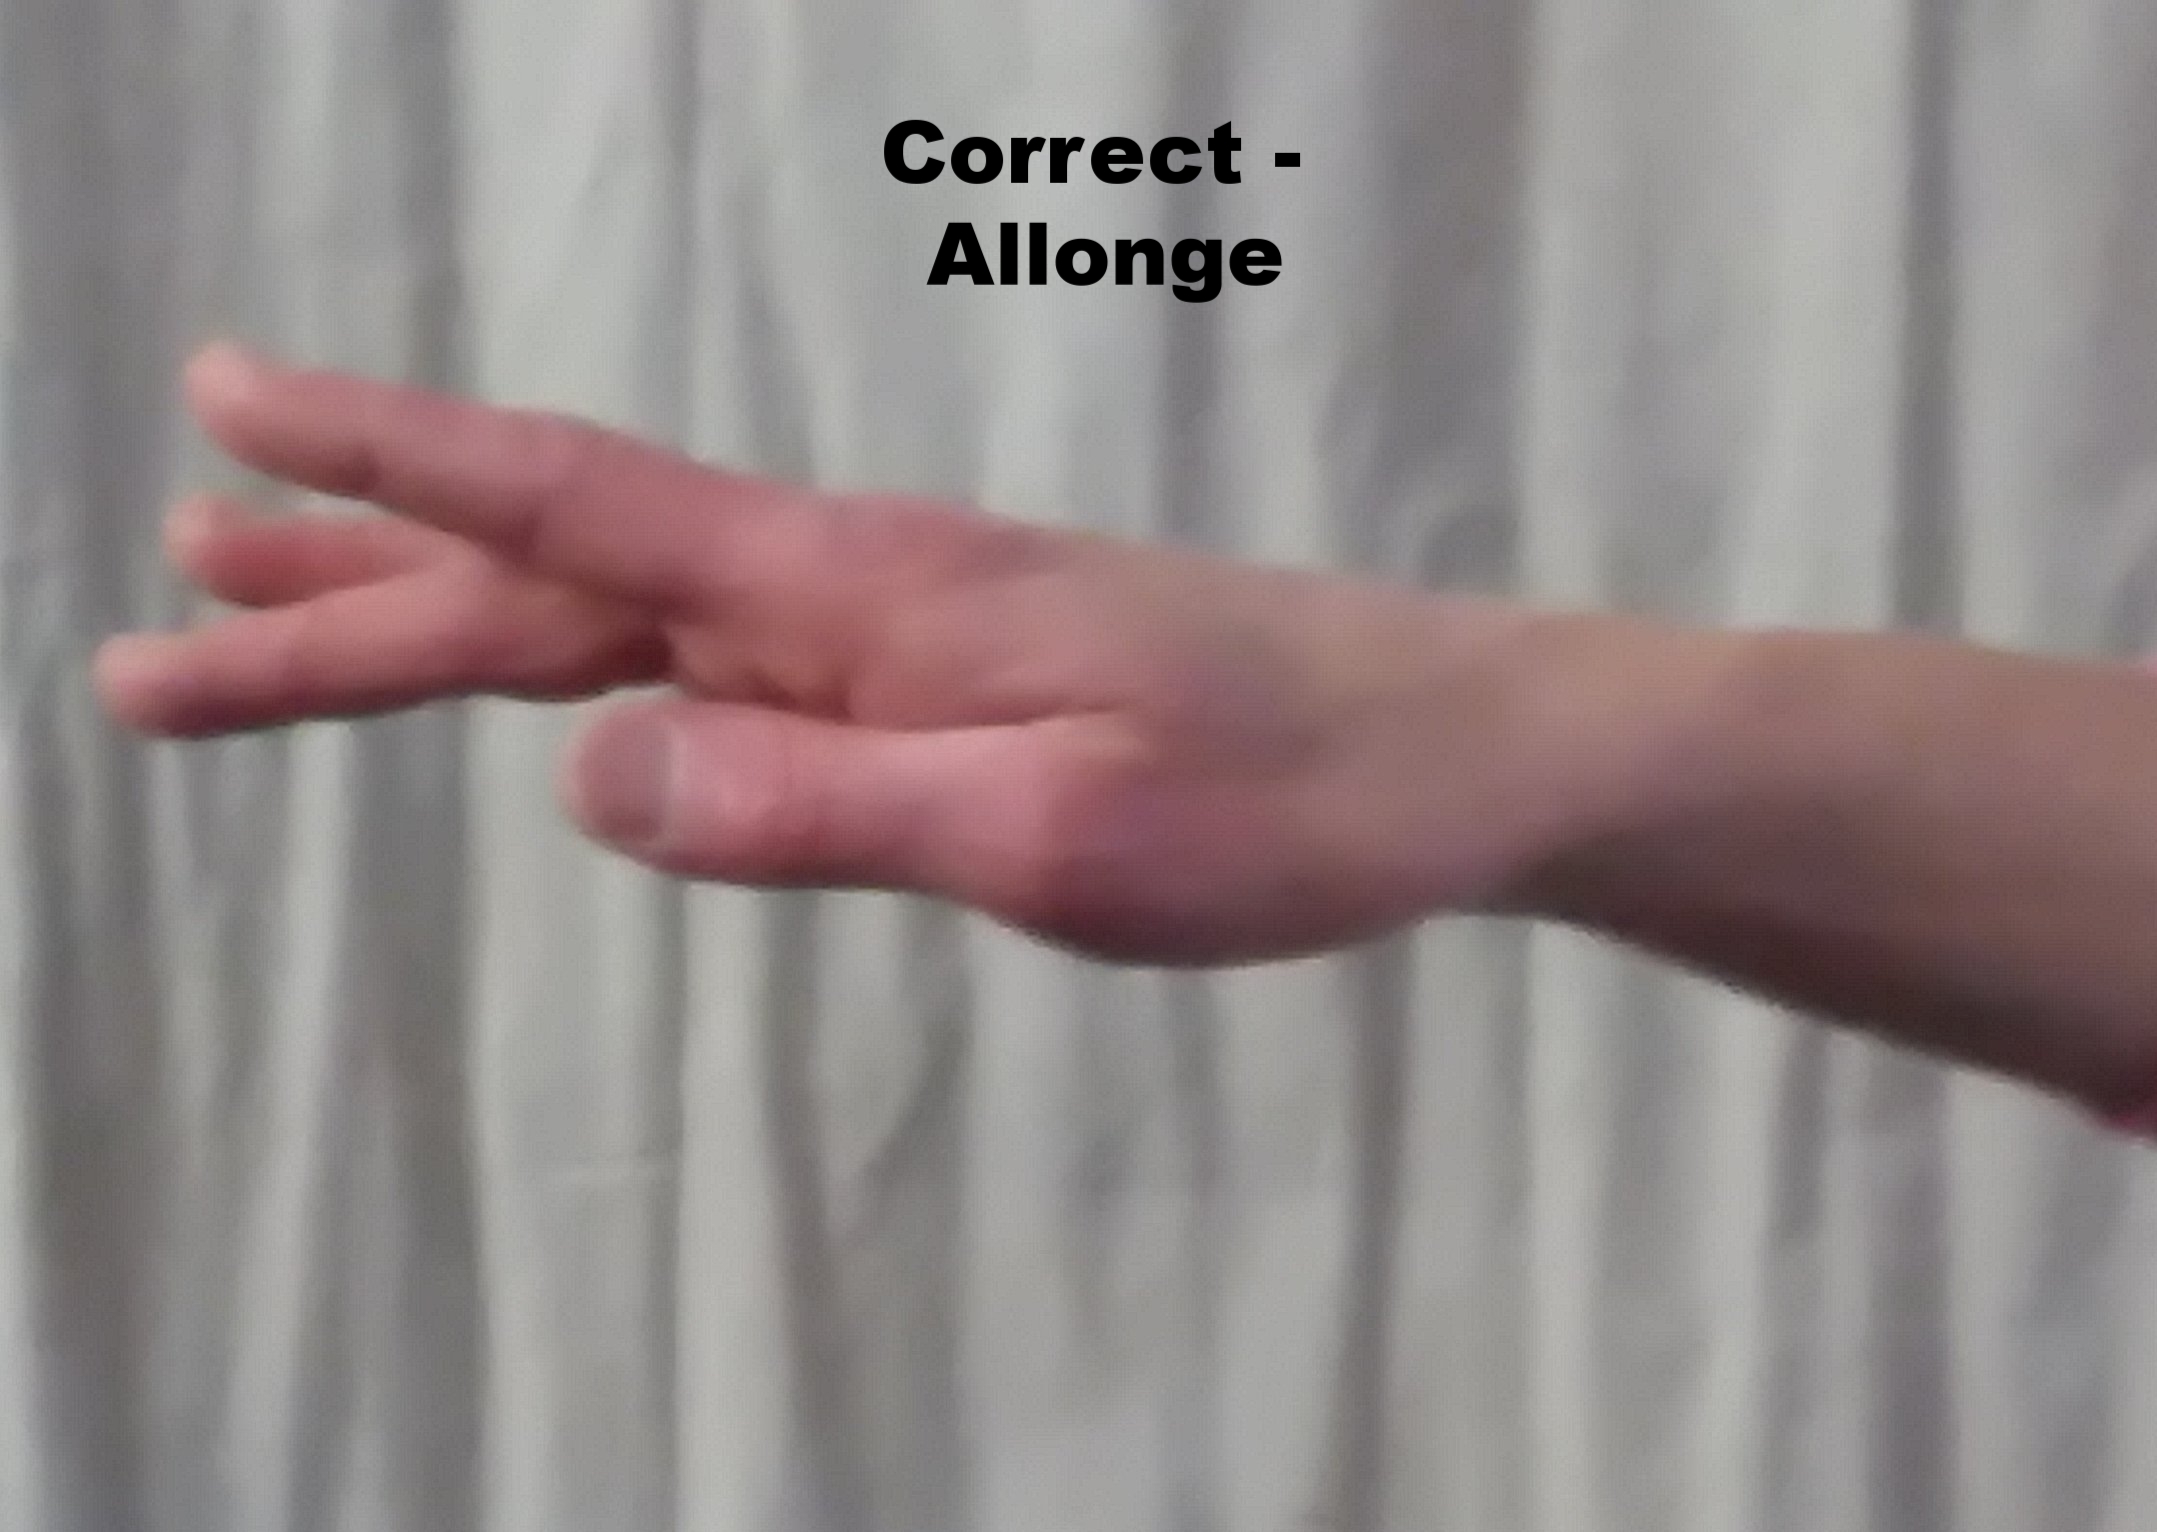
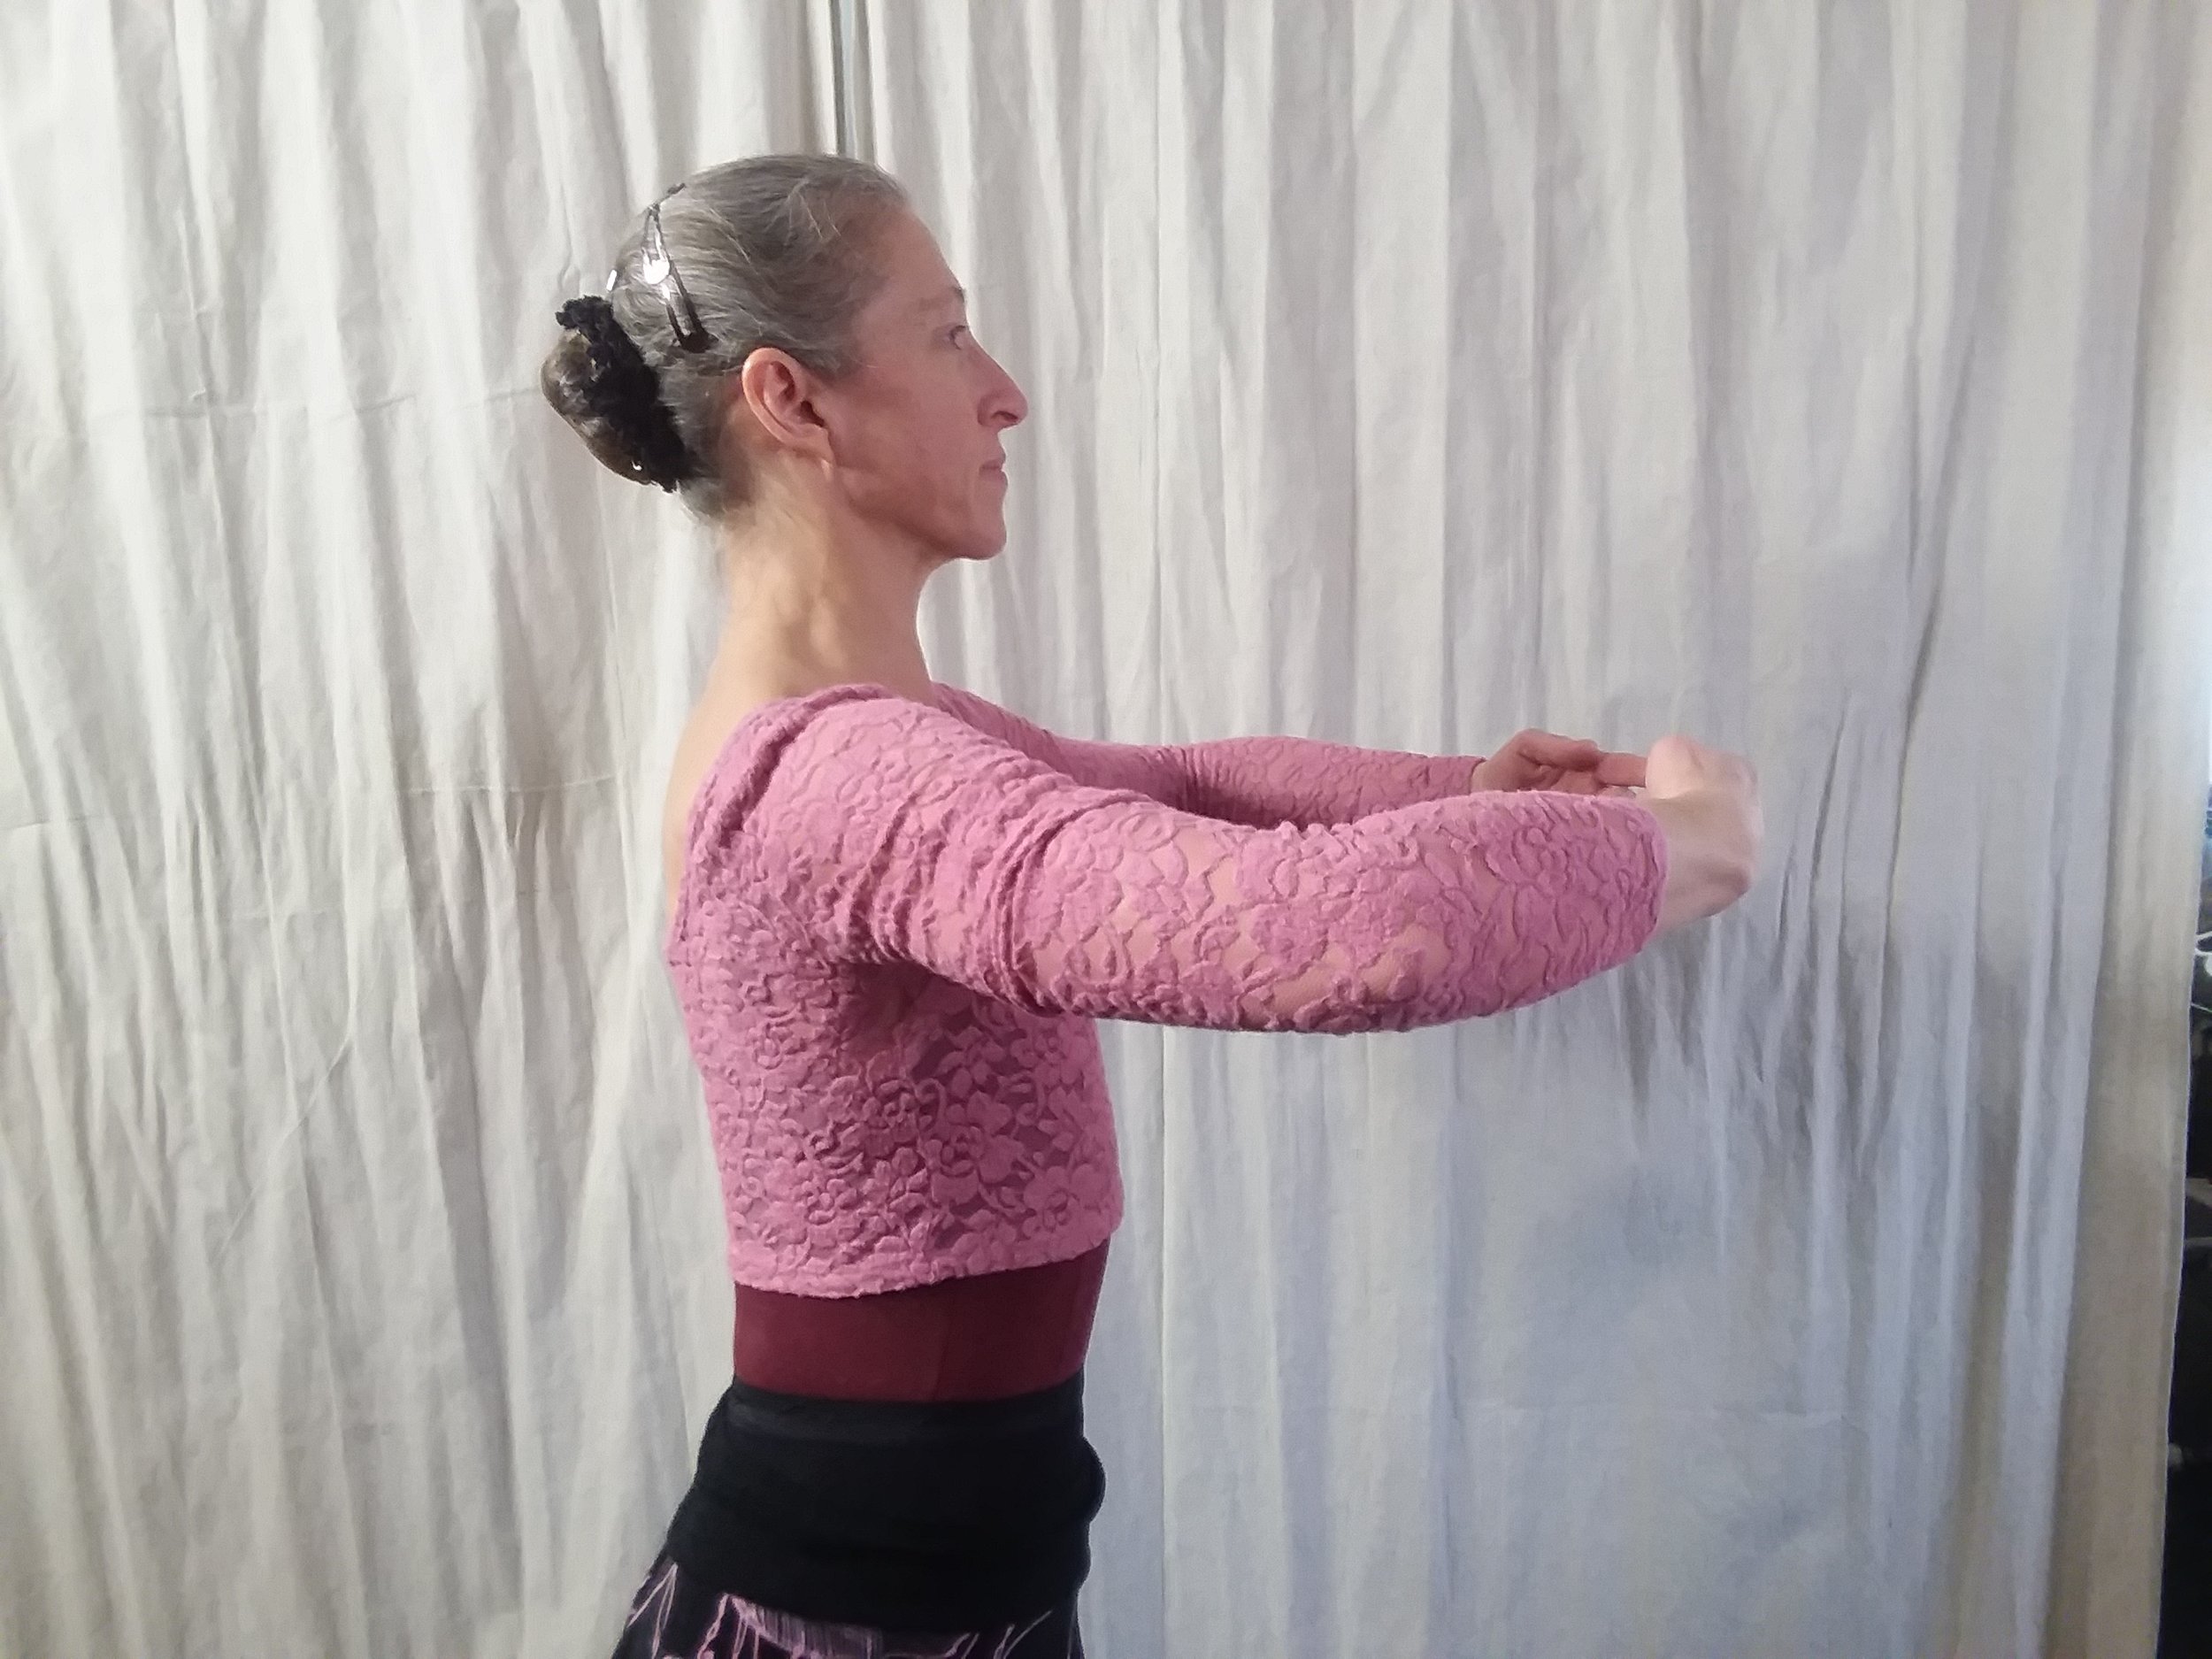
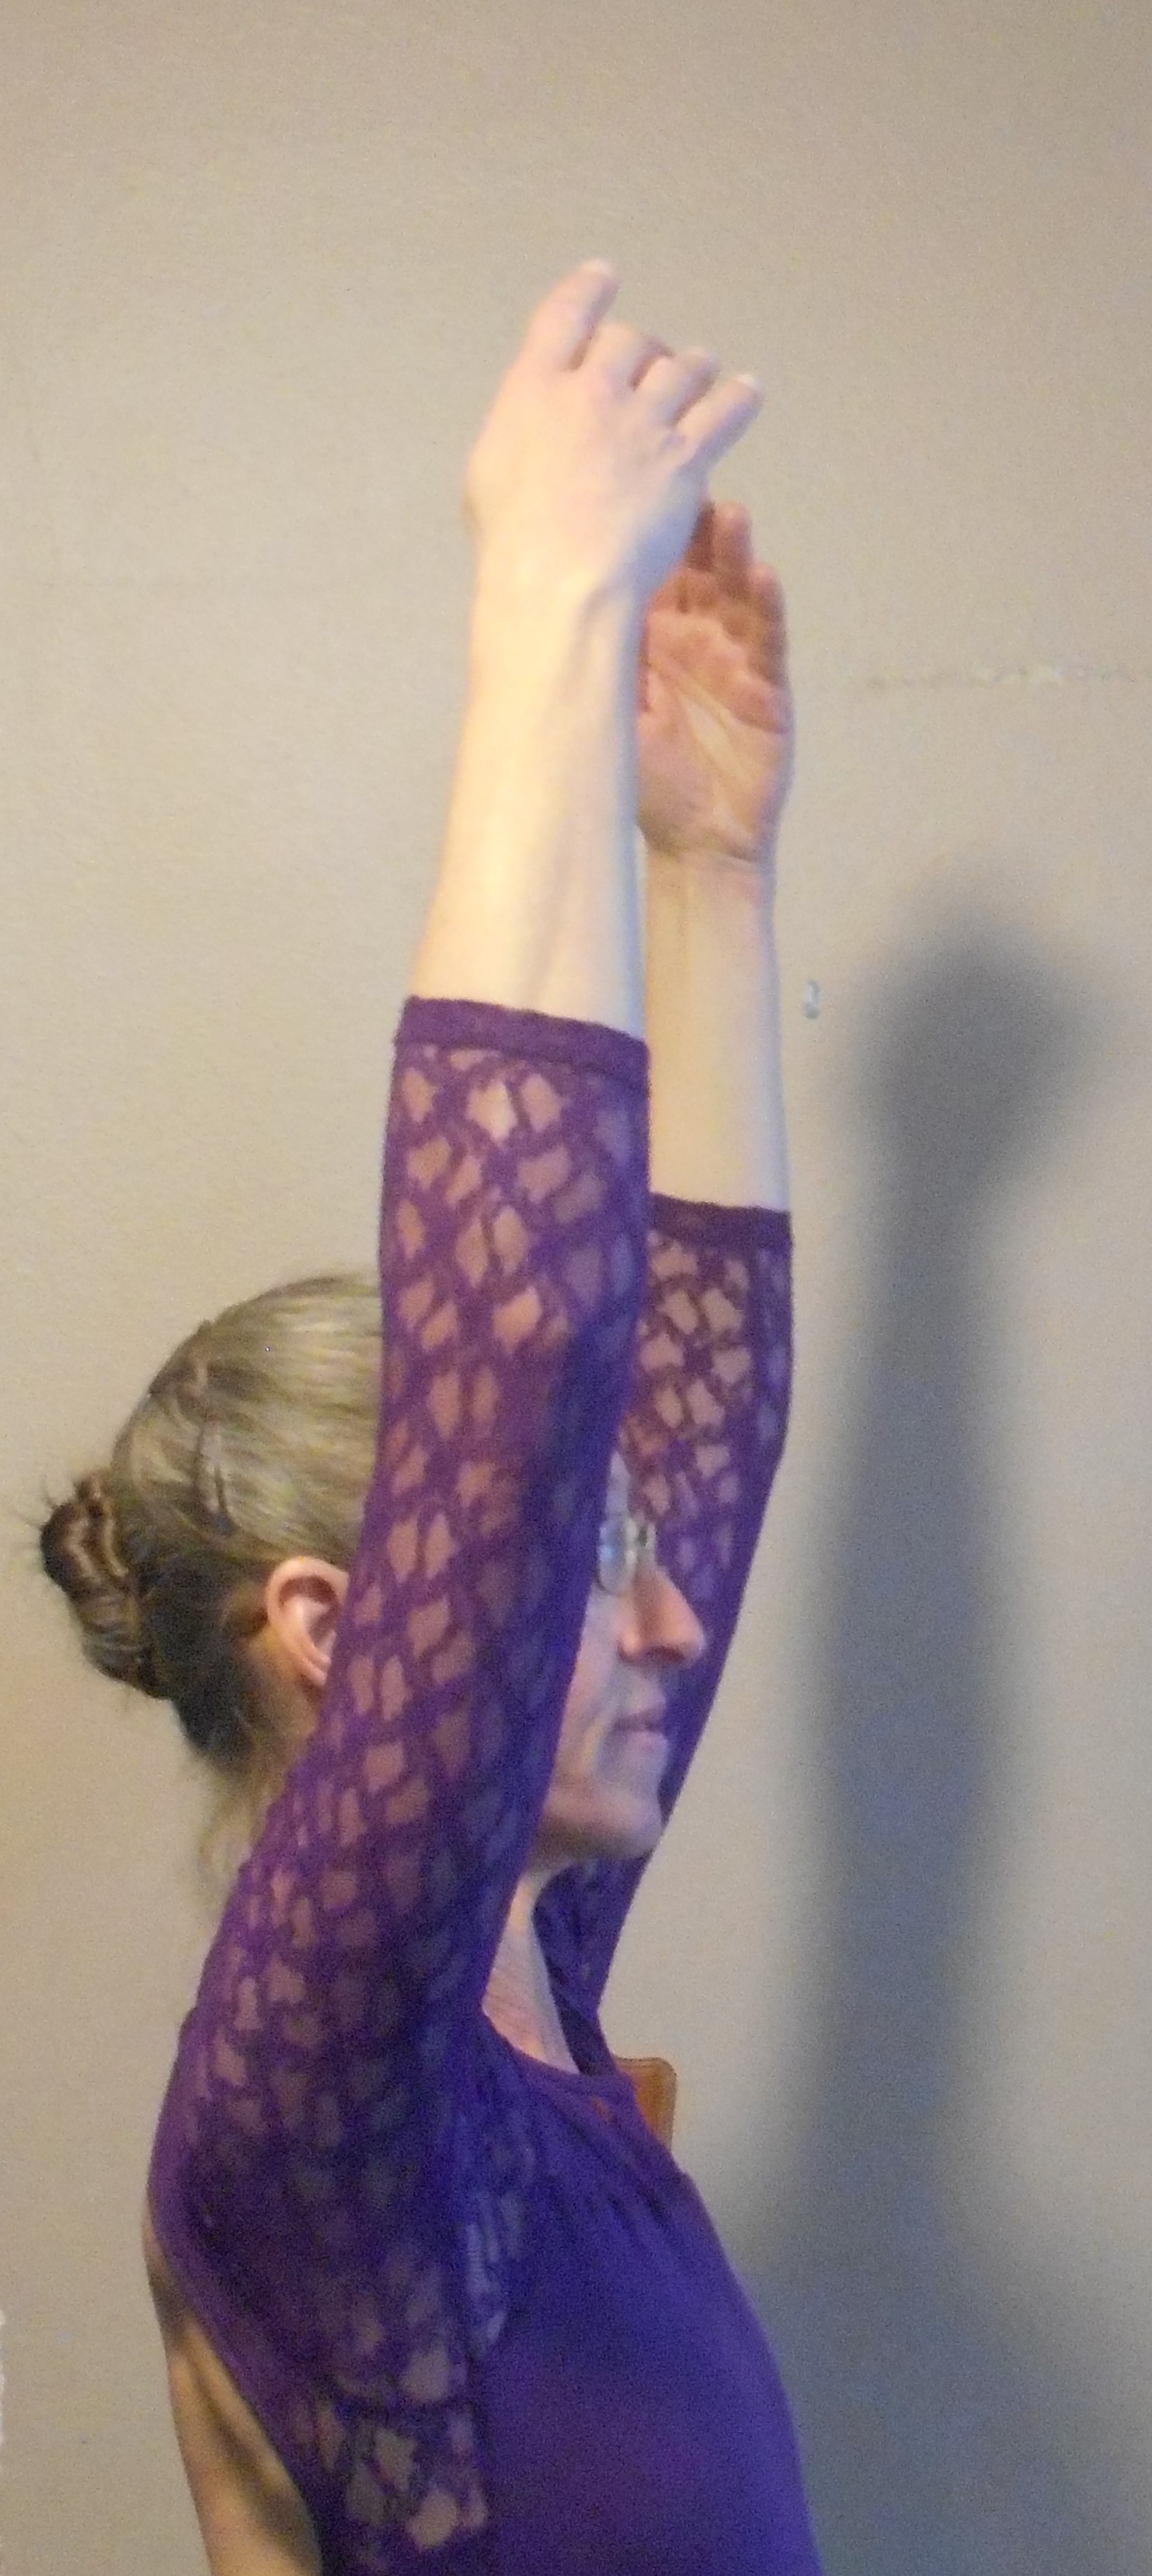
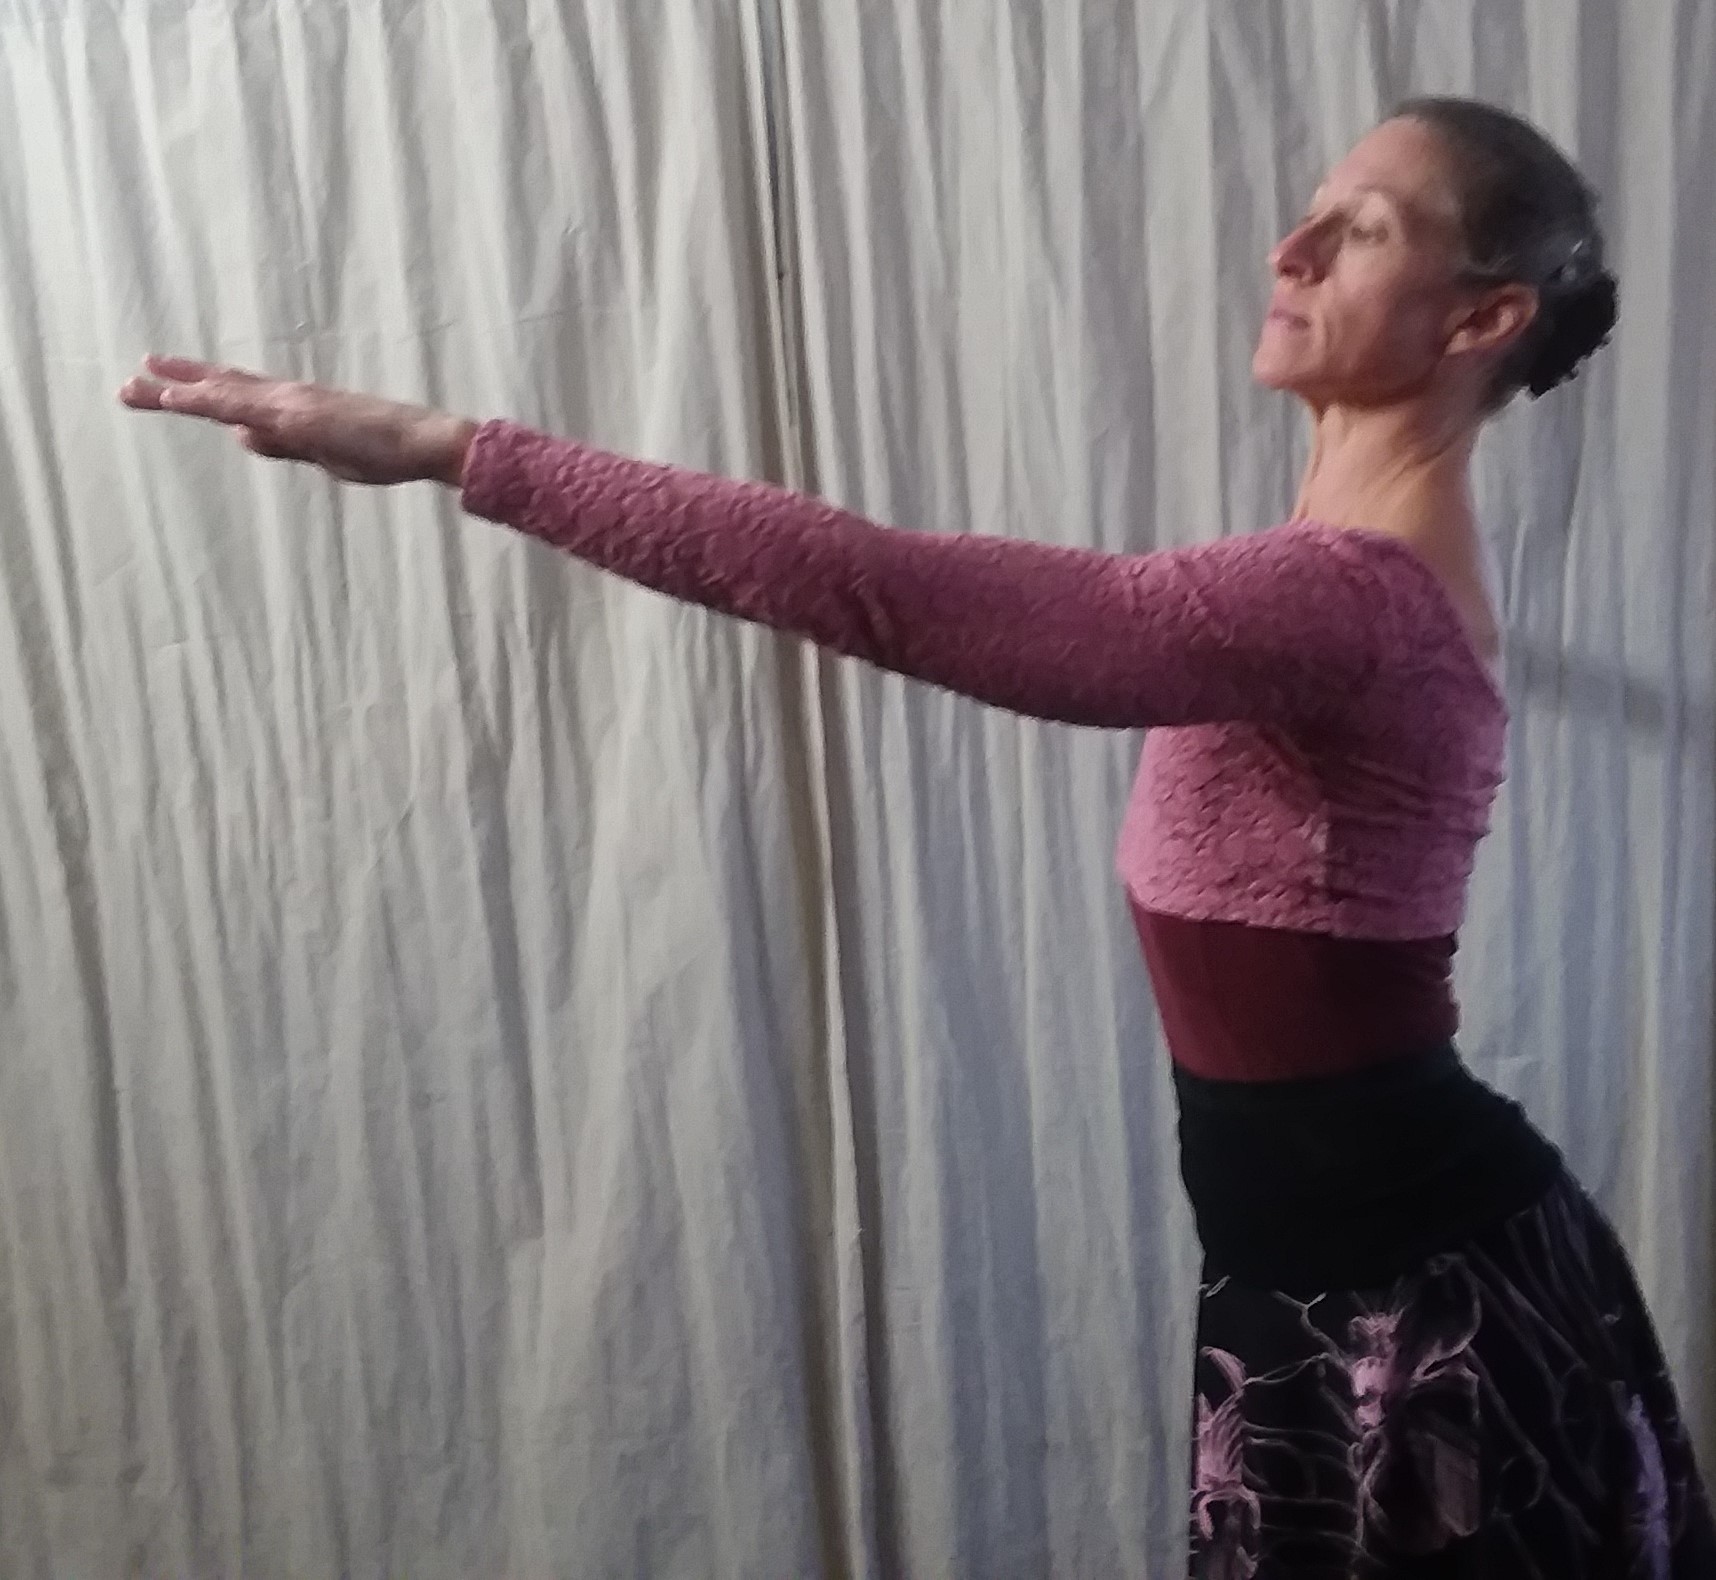
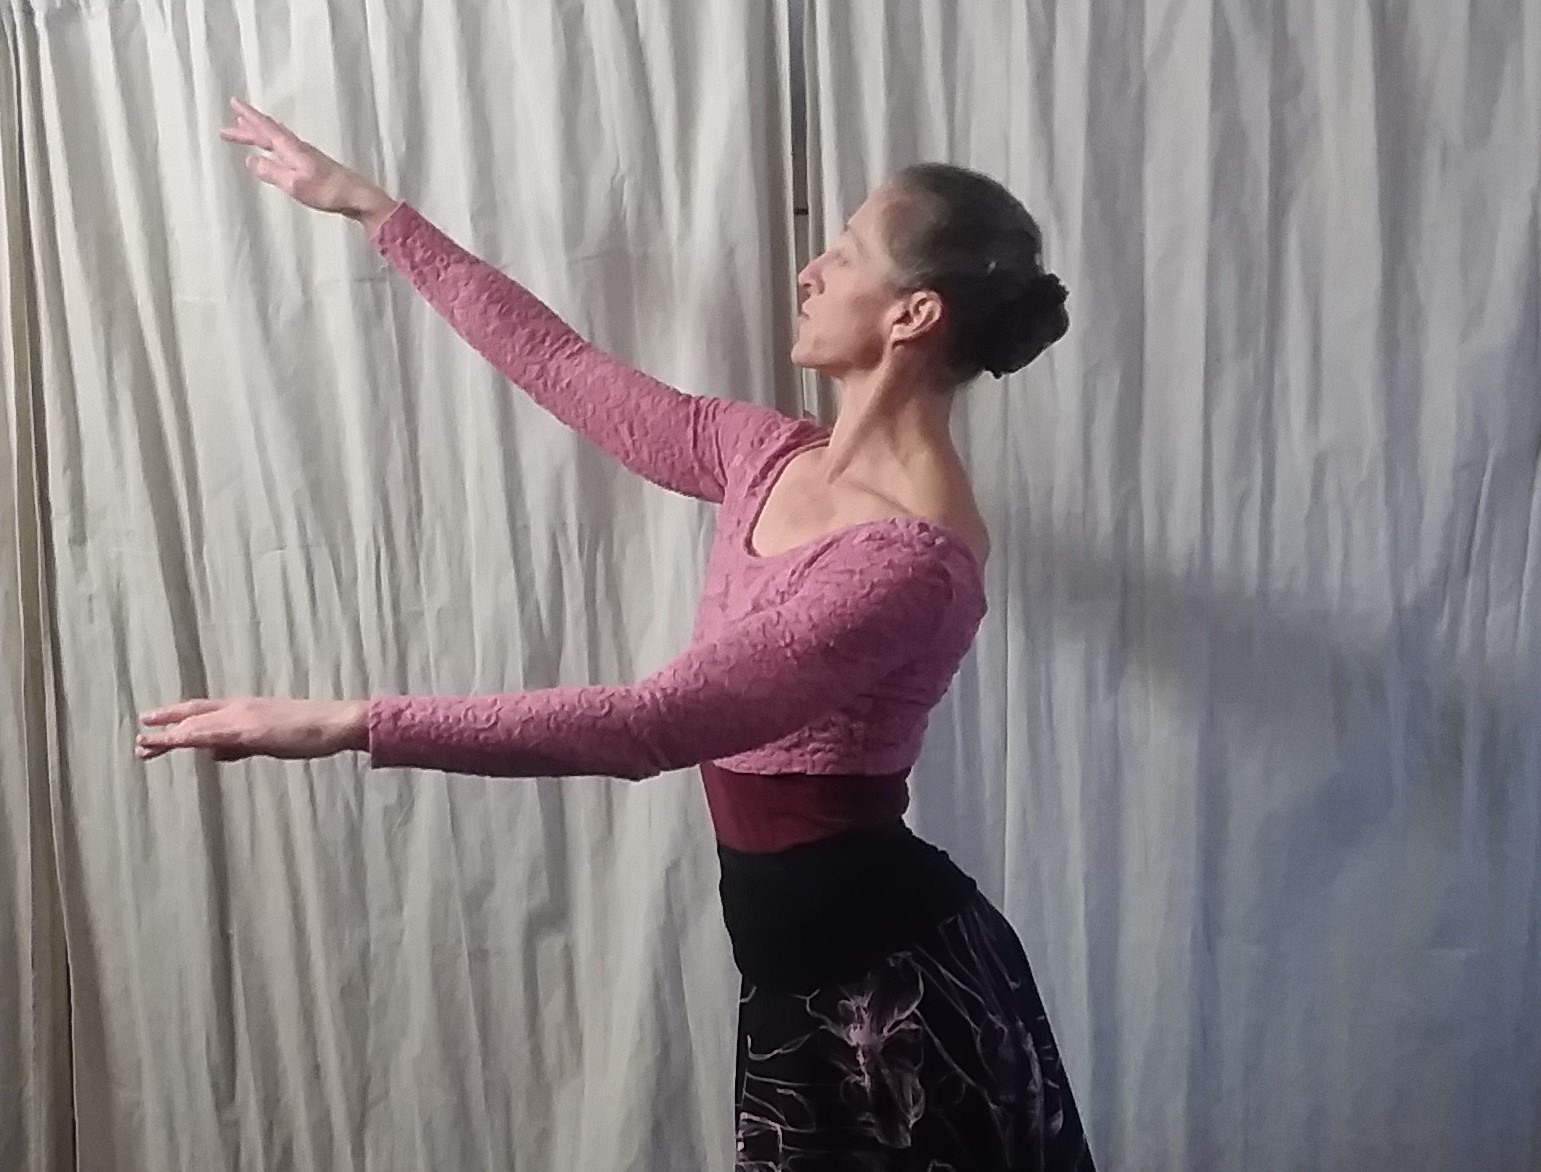
As the upstage arm nears its destination across from the shoulder, the dancer’s focus shifts back to the downstage hand as it rises from preparatory to allongé across from its shoulder. In this position, 4th arabesque, the palms of both hands are facing the floor, fingers elongated, elbows just lightly relaxed. Shoulders must be in an even line. There is a common tendency to let the upstage shoulder push upwards and this must be diligently avoided. The arms in this position are as they would be in 2nd position allongé except that the back is twisted at the waist such that the arms are reaching in what appear to be forward and backward directions. The dancer’s back should be turned strongly towards the audience. At the completion of this line, the head tilts slightly over the downstage shoulder with a minimal lift of the chin and the eyes following the line of the fingers upward towards the downstage corner.
Mistakes to watch out for…
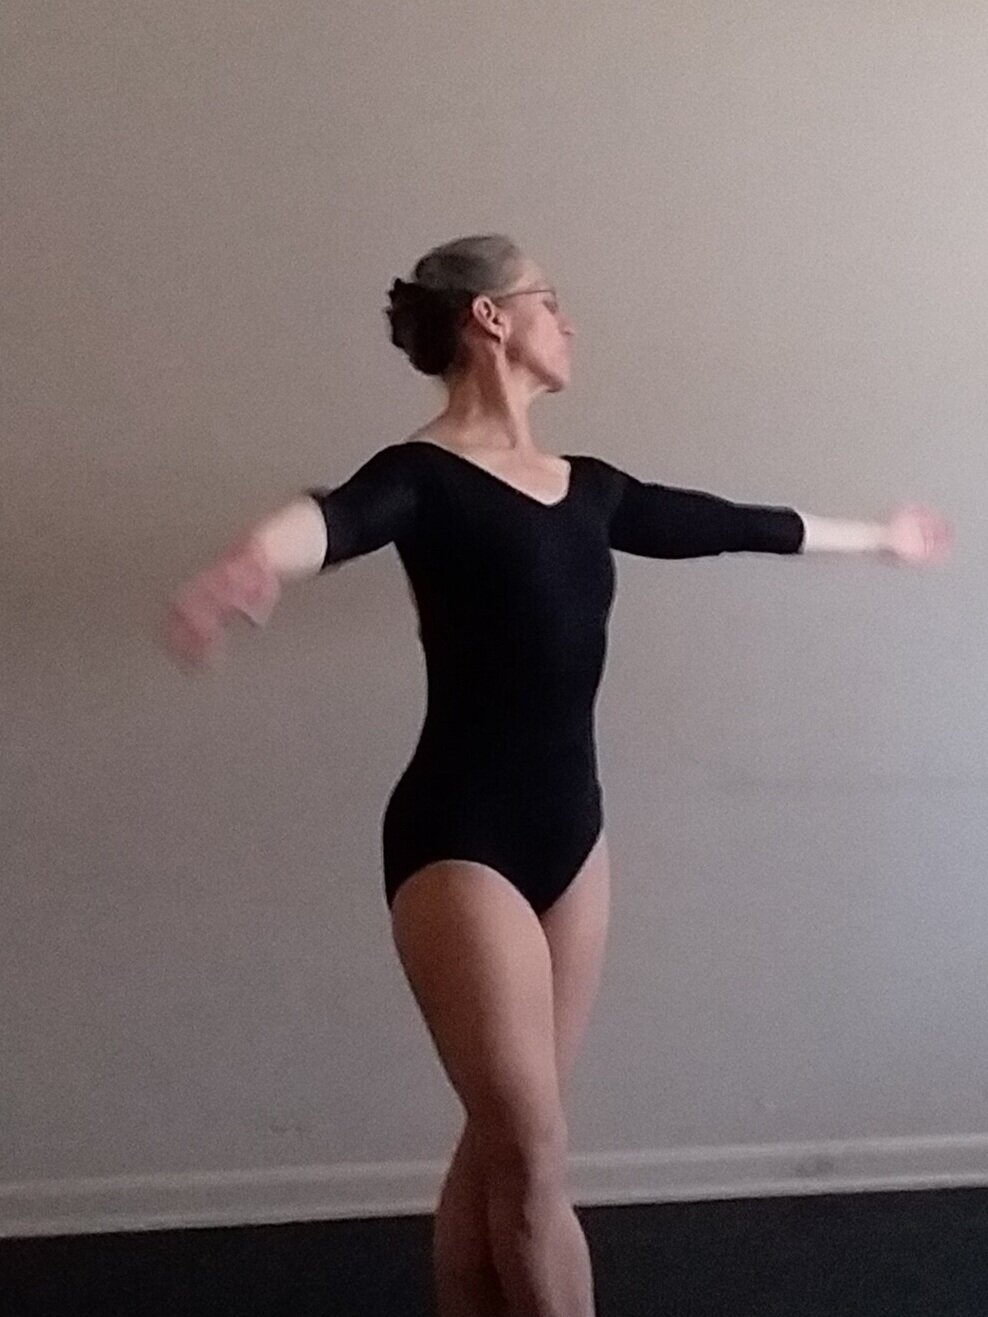
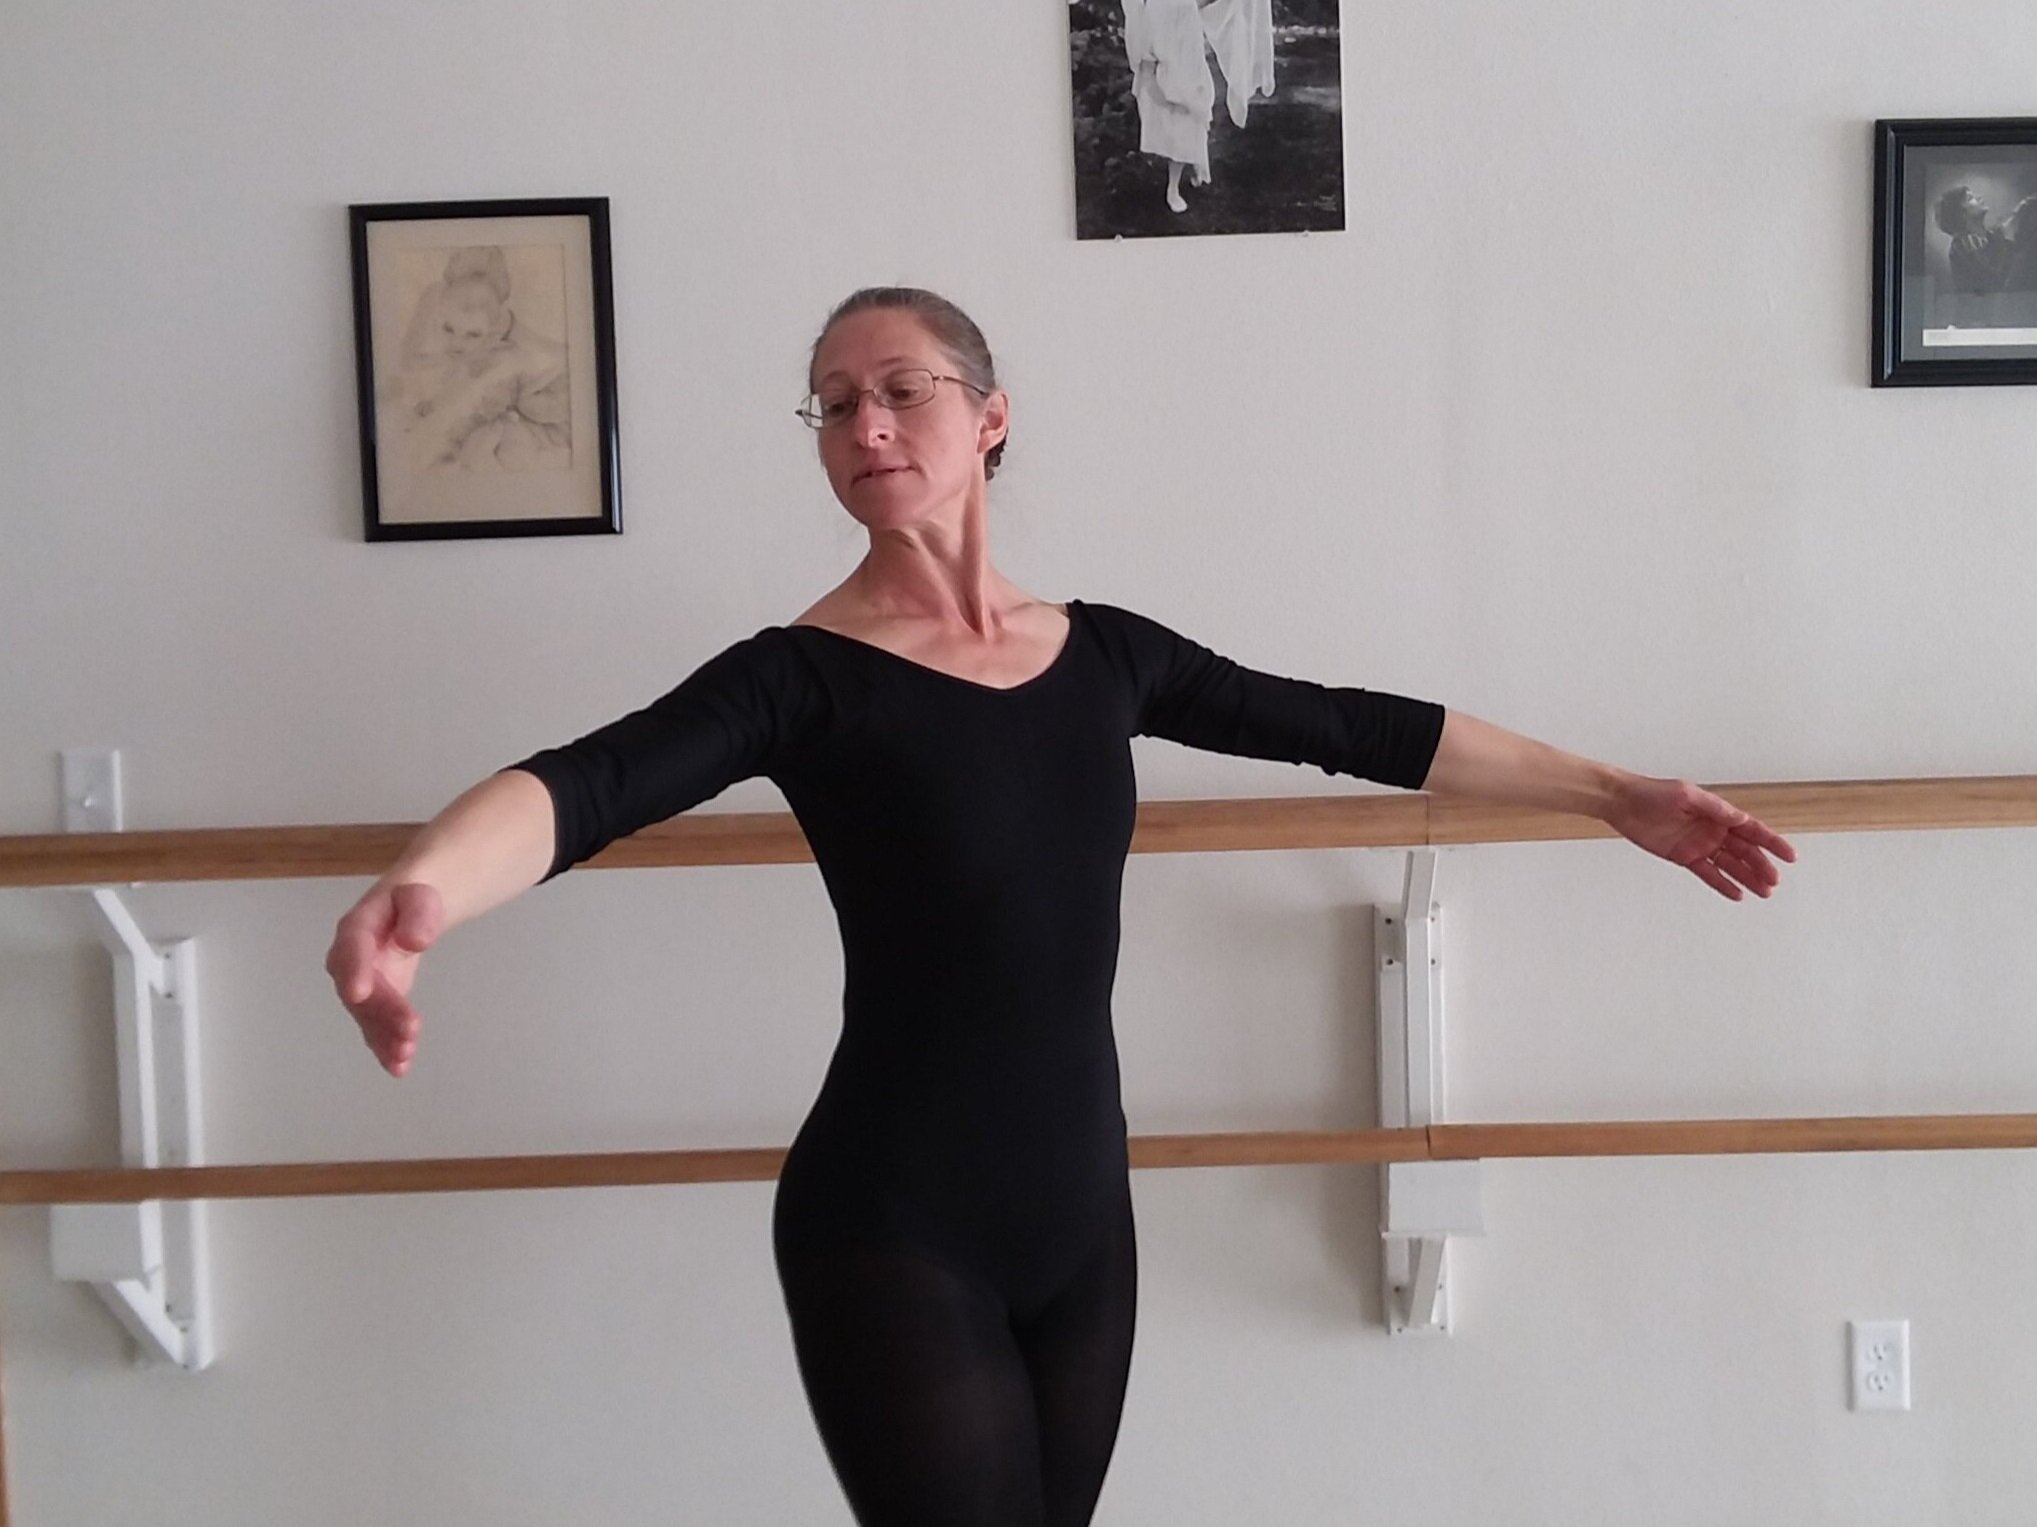
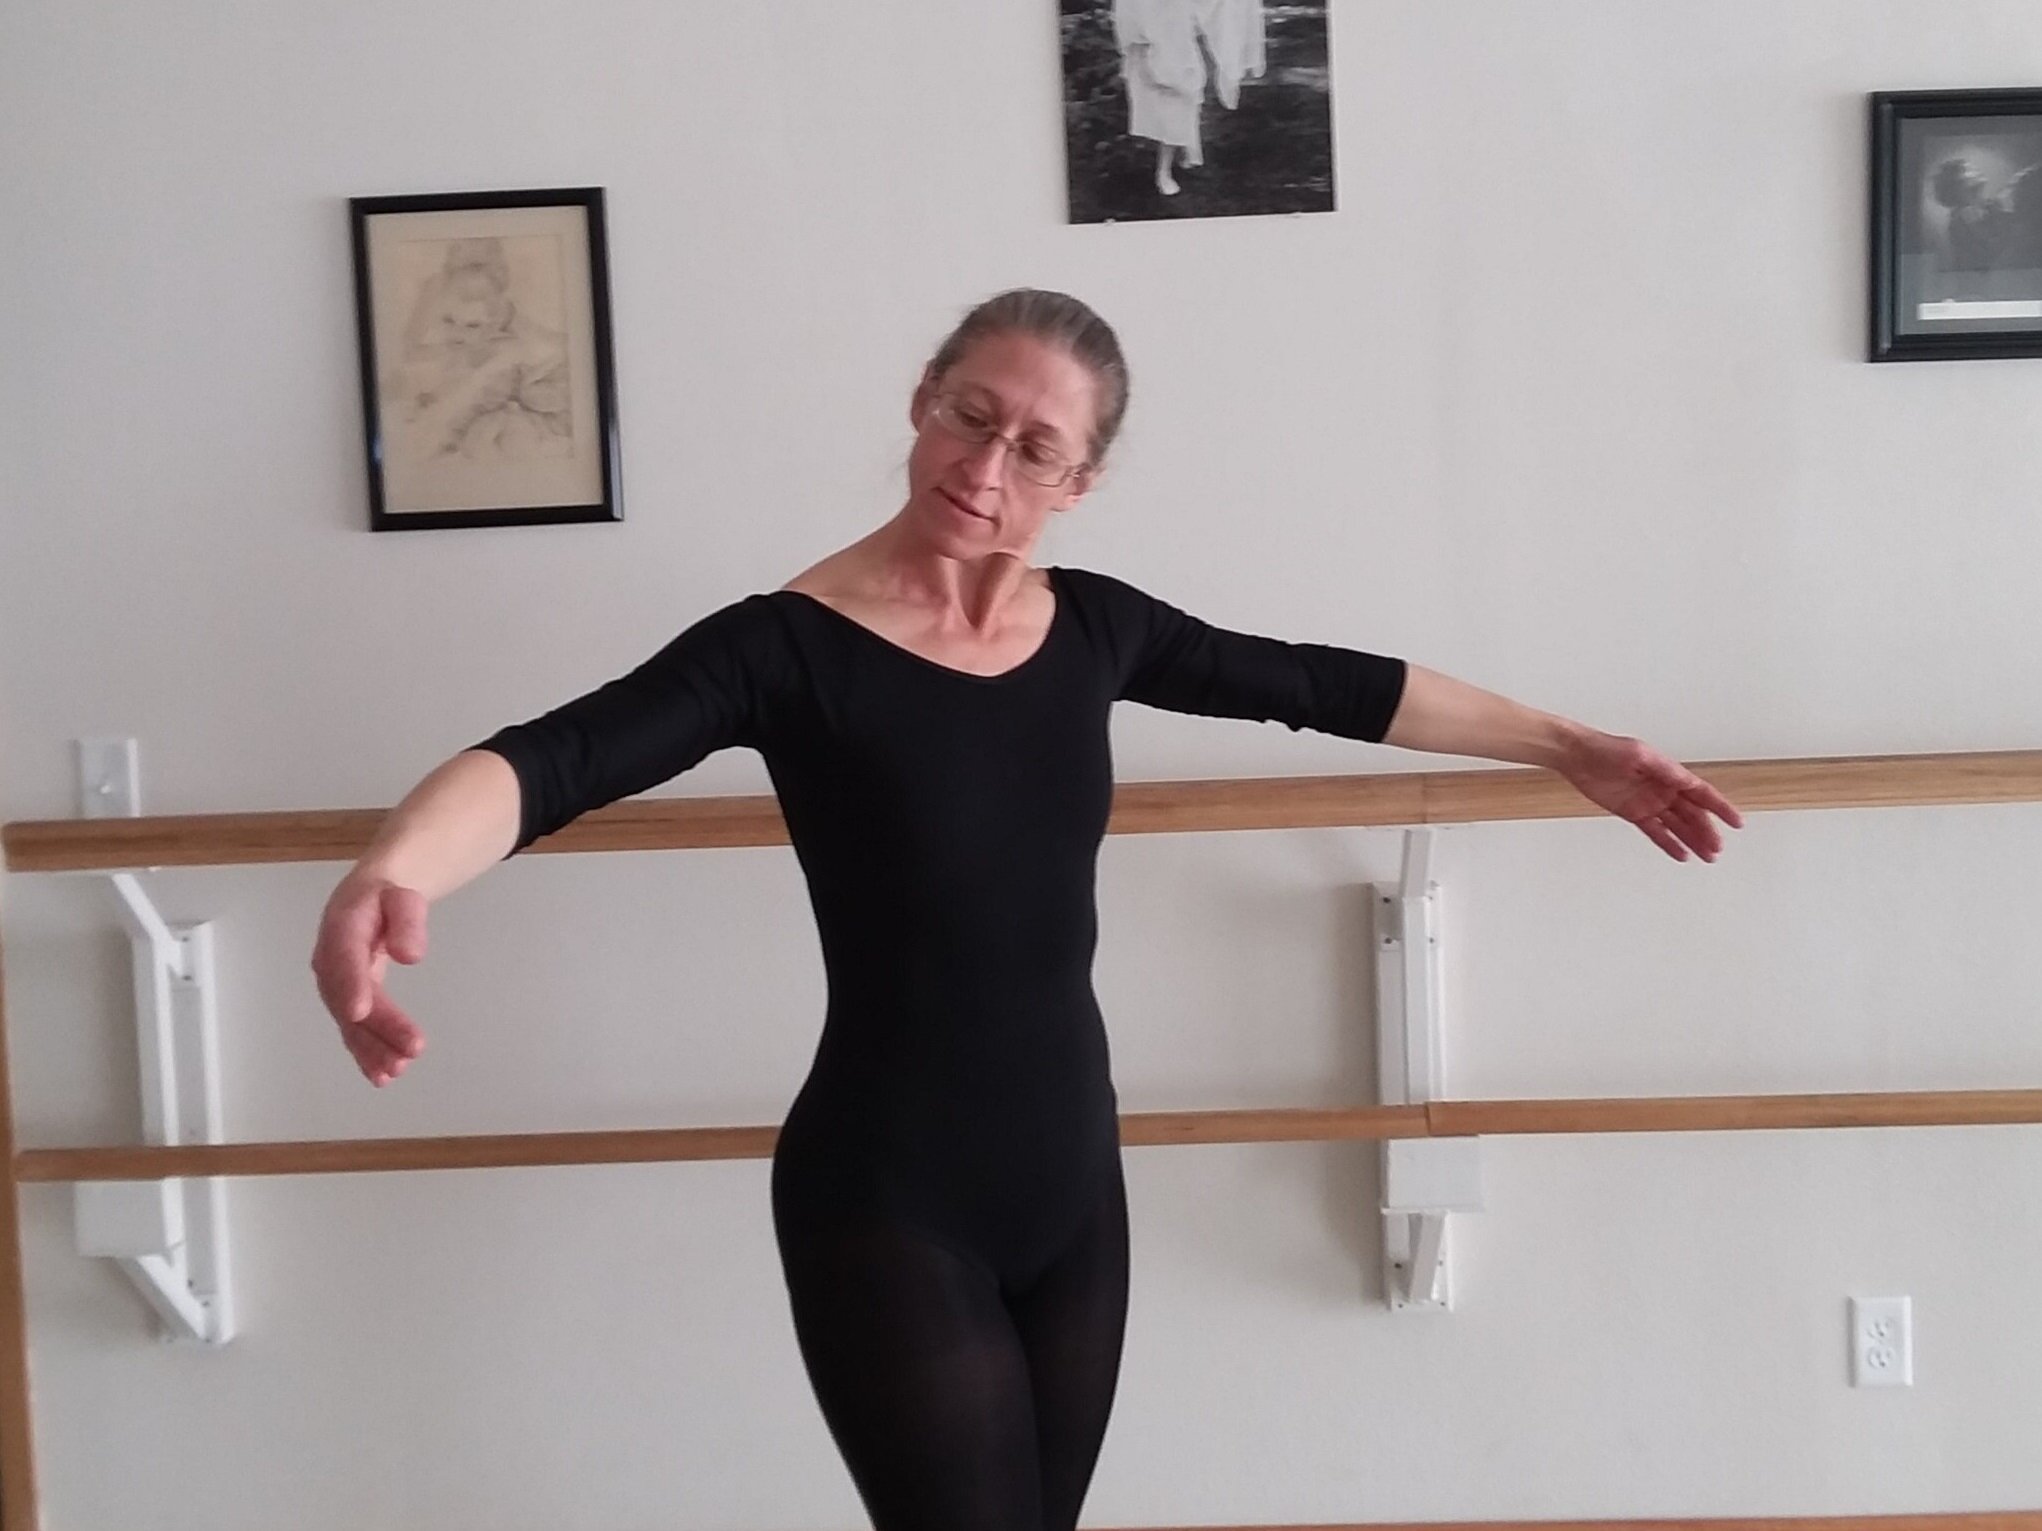
To complete the 4th Port de Bras, the upstage arm descends to preparatory and rises to meet the downstage arm in 1st position as the body returns to its original facing. The arms then open again to 3rd (upstage arm) and 2nd (downstage arm) positions.

Vaganova Third Port de Bras
Continuing our series of Port de Bras blogs, it is now time to cover Vaganova 3rd Port de Bras! In this exercise, the dancer involves the full upper body along with the arms and head. It is not only an exercise in developing the grace of the arms and the coordinated movement of the head, but also the control of the core and the flexibility of the hamstrings and the back.

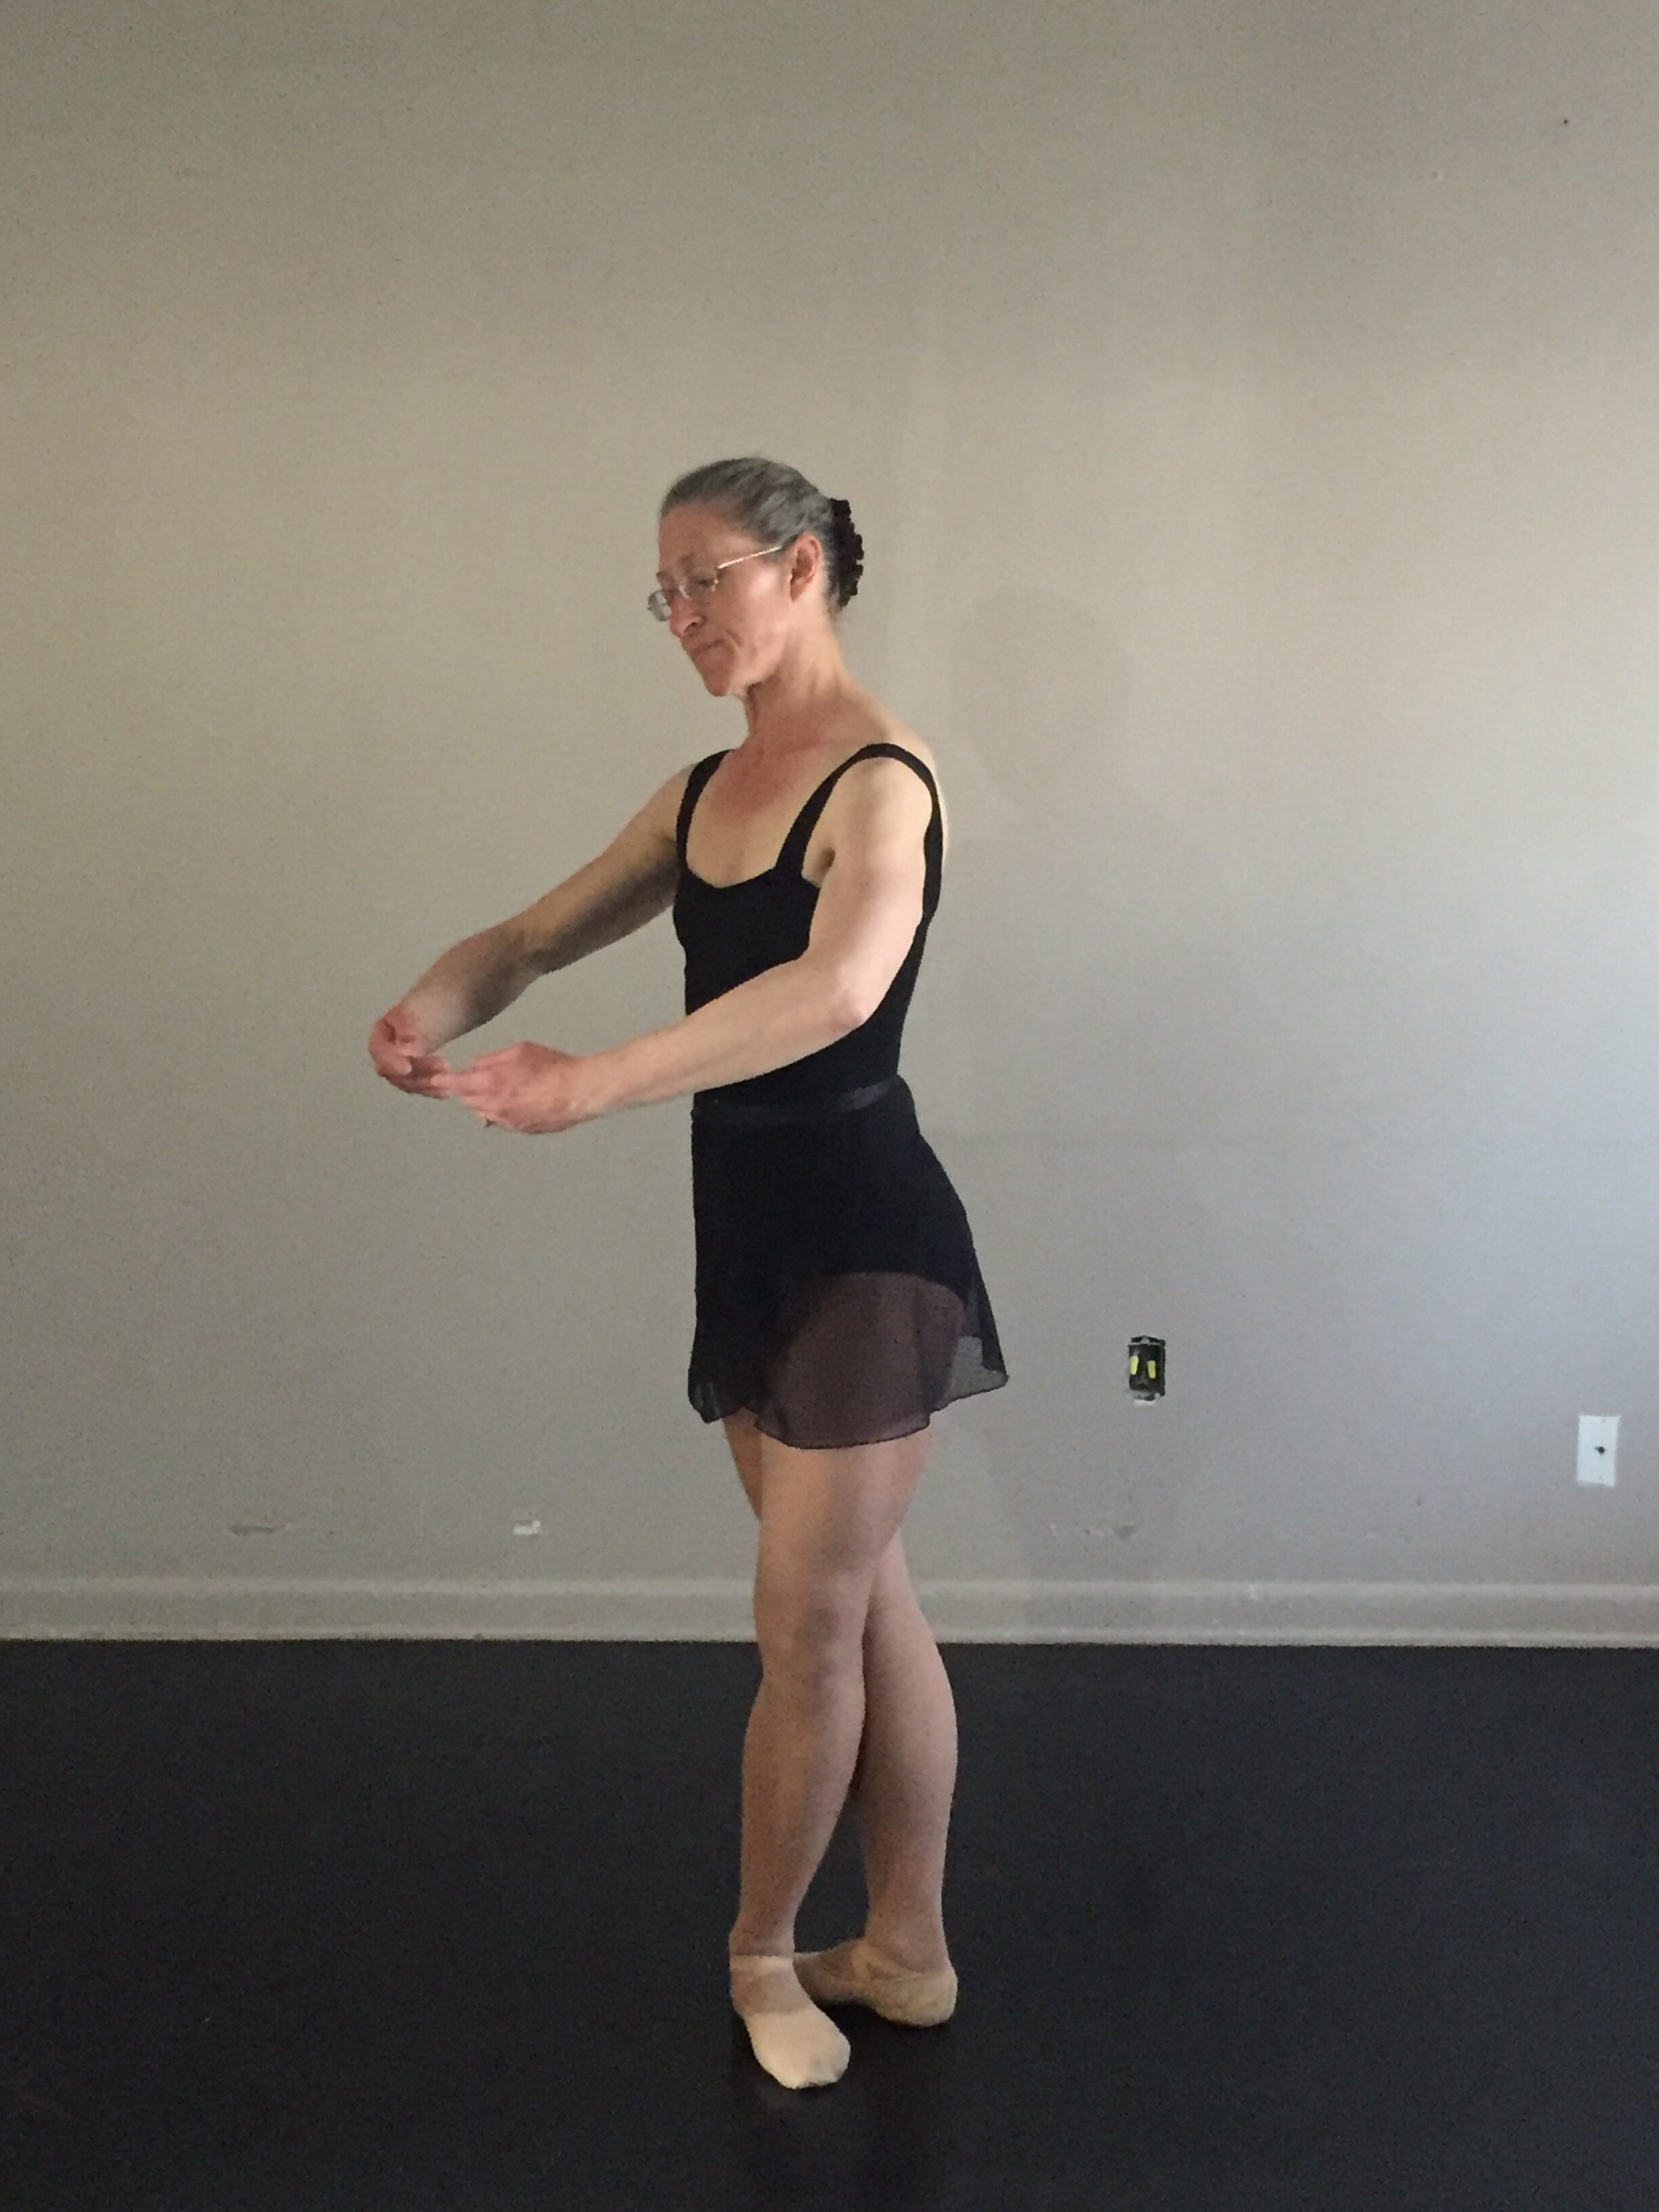
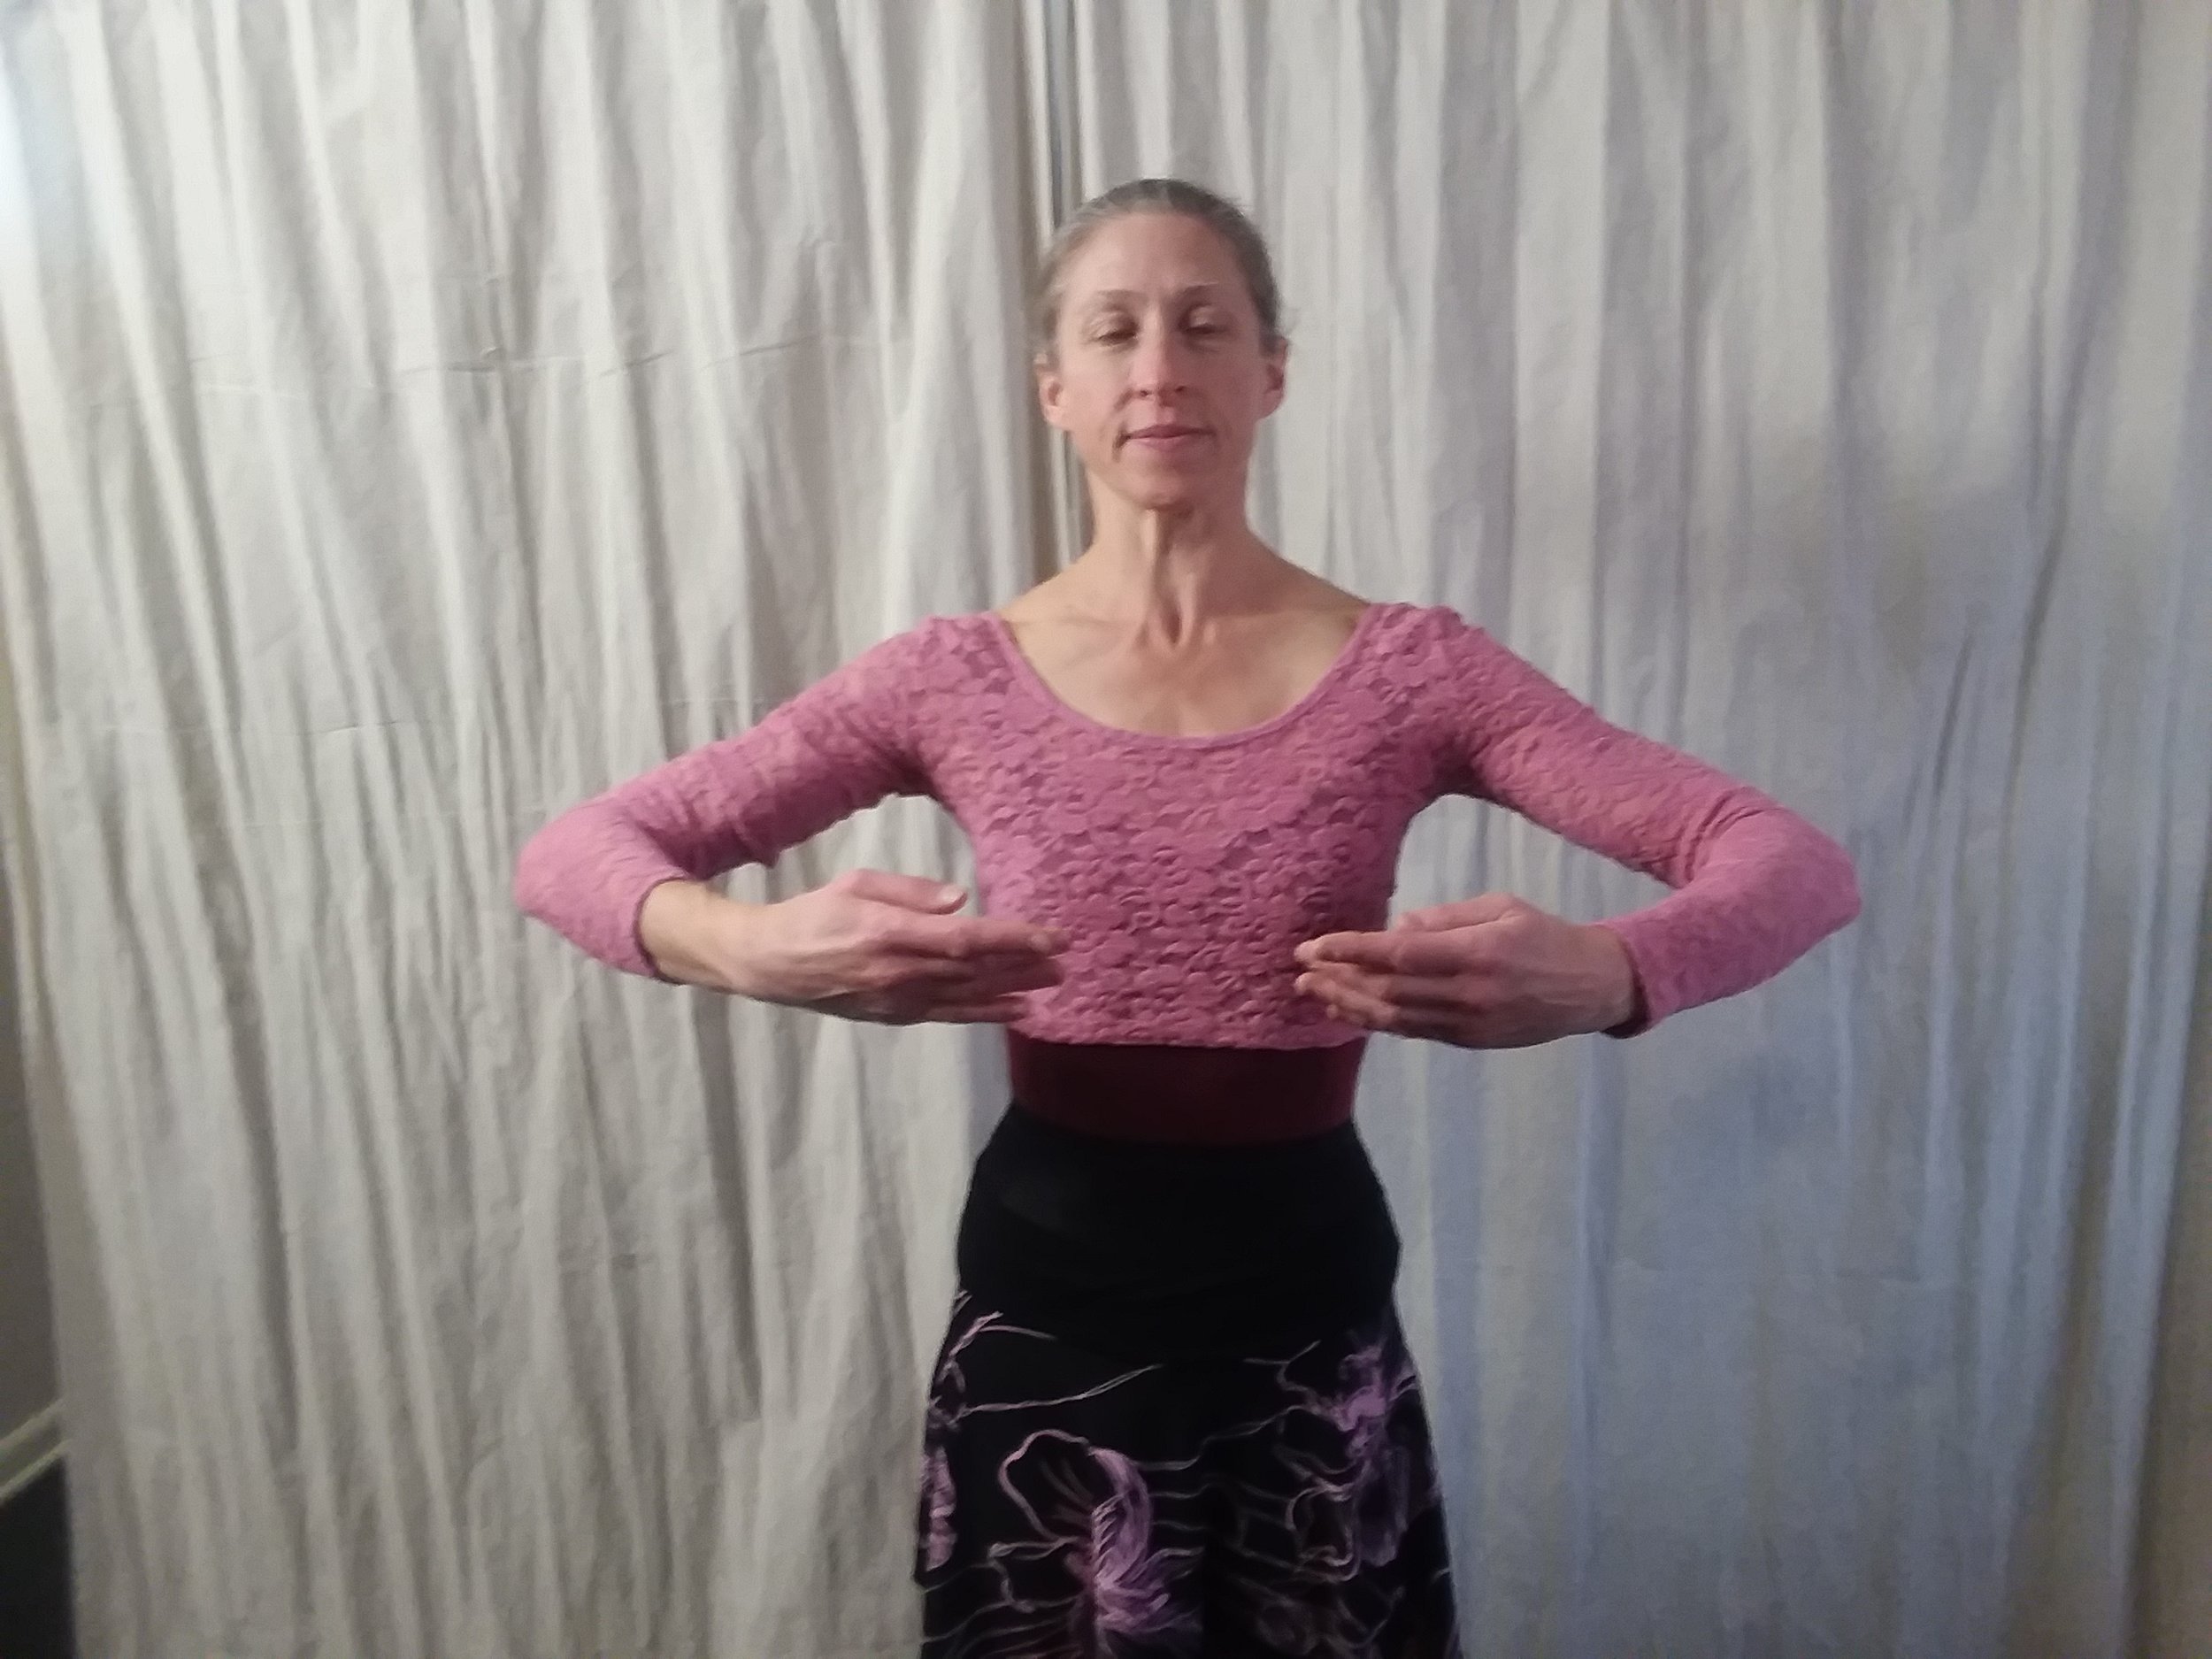
The dancer begins standing with feet in 3rd or 5th position croisé with the arms a la seconde (2nd position). The movement begins with a small breath of the upper body that causes the hands and elbows to turn over such that the palms now face the floor and the elbows drop just slightly. With this breath, the eyes are on the downstage hand and the head tilts slightly back with a very small lift of the chin.
“Breath” before bending forward
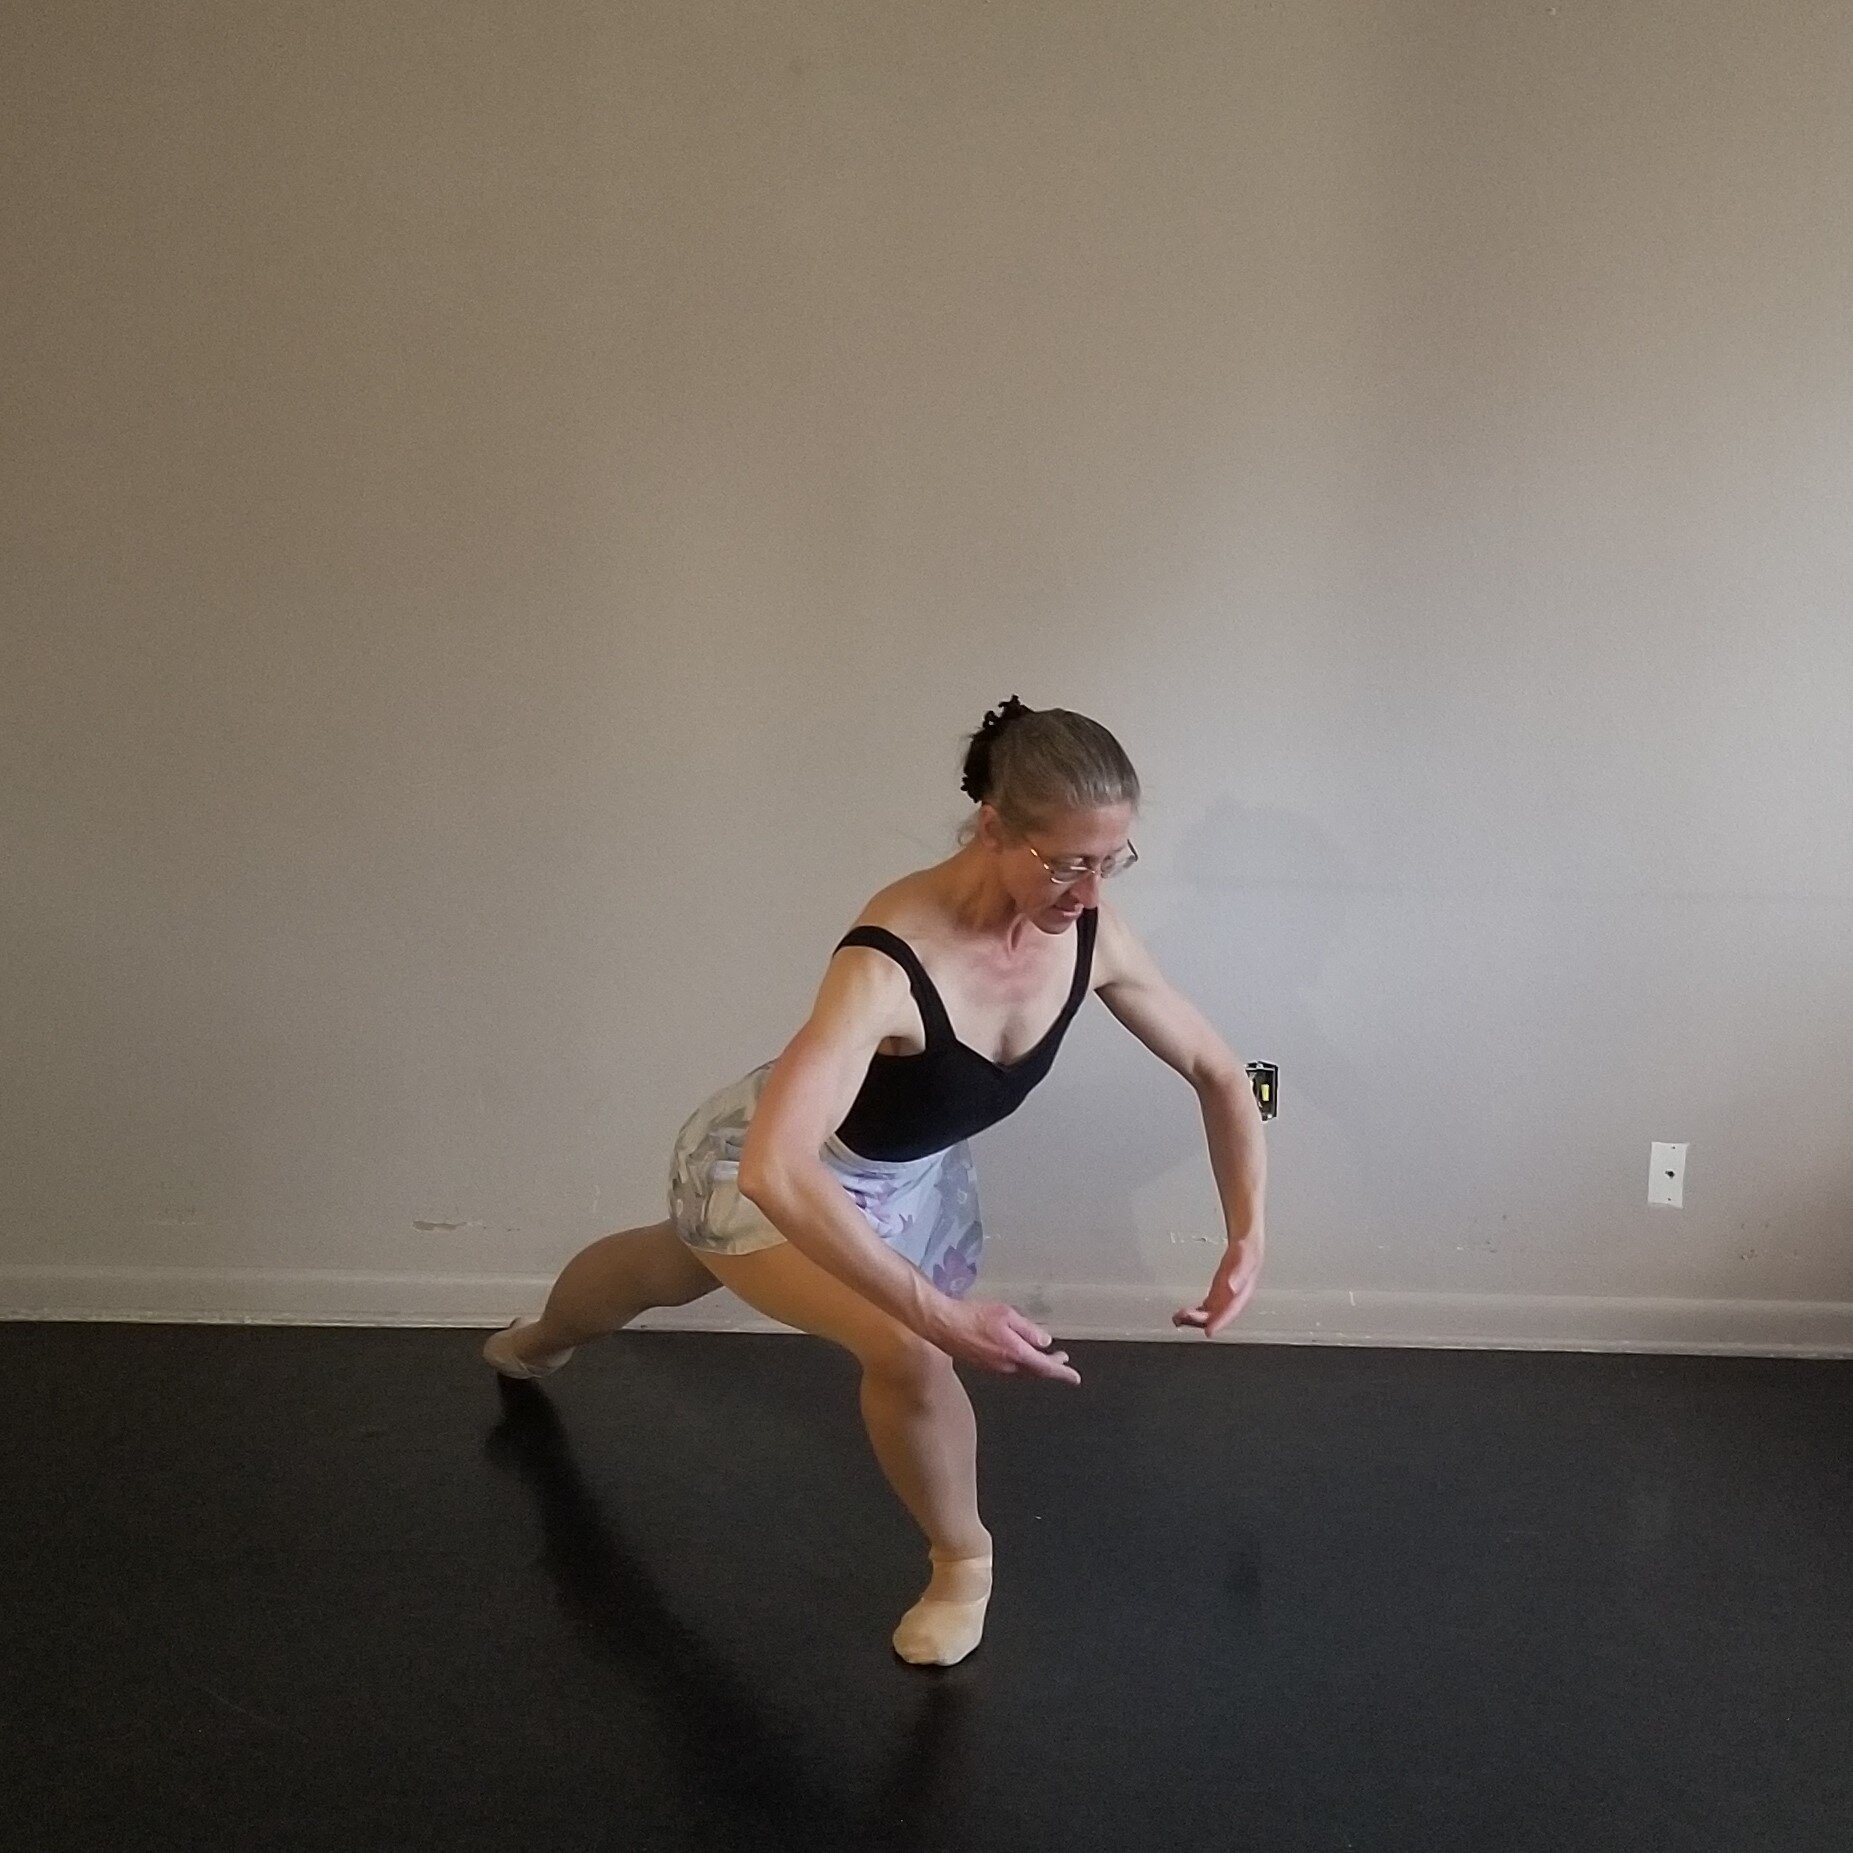
The dancer begins to fold forward by drawing the abdominals inward and bending very slightly at the waist to reduce the natural curve of the spine into a flatter back. The dancer must be careful not to arch the back at the beginning of this folding forward. To do so releases the engagement of the abdominals and sends the hips backward.

Correct - Abdominals drawn in at beginning of forward bend

Incorrect - Back arching at beginning of forward bend
After drawing in the abdominals to begin the forward bend, the movement flows into a folding at the hip joint until the dancer’s chest is as close to the legs as possible. Meanwhile, the arms are folding down with the body such that they arrive in “preparatory” position (i.e. they are in an oval shape with the hands nearly or completely touching the floor at the bottom) at the same moment that the dancer has reached the full body bend downward. The dancer should be careful not to let the arms hang behind the body as the body begins to fold forward. At the bottom of this stretch, the dancer should let his/her head face into the legs rather than looking at the floor or the feet. This completion of the bend with the head gives a further stretch up the backs of the legs as well as completing the flow of movement and the line.
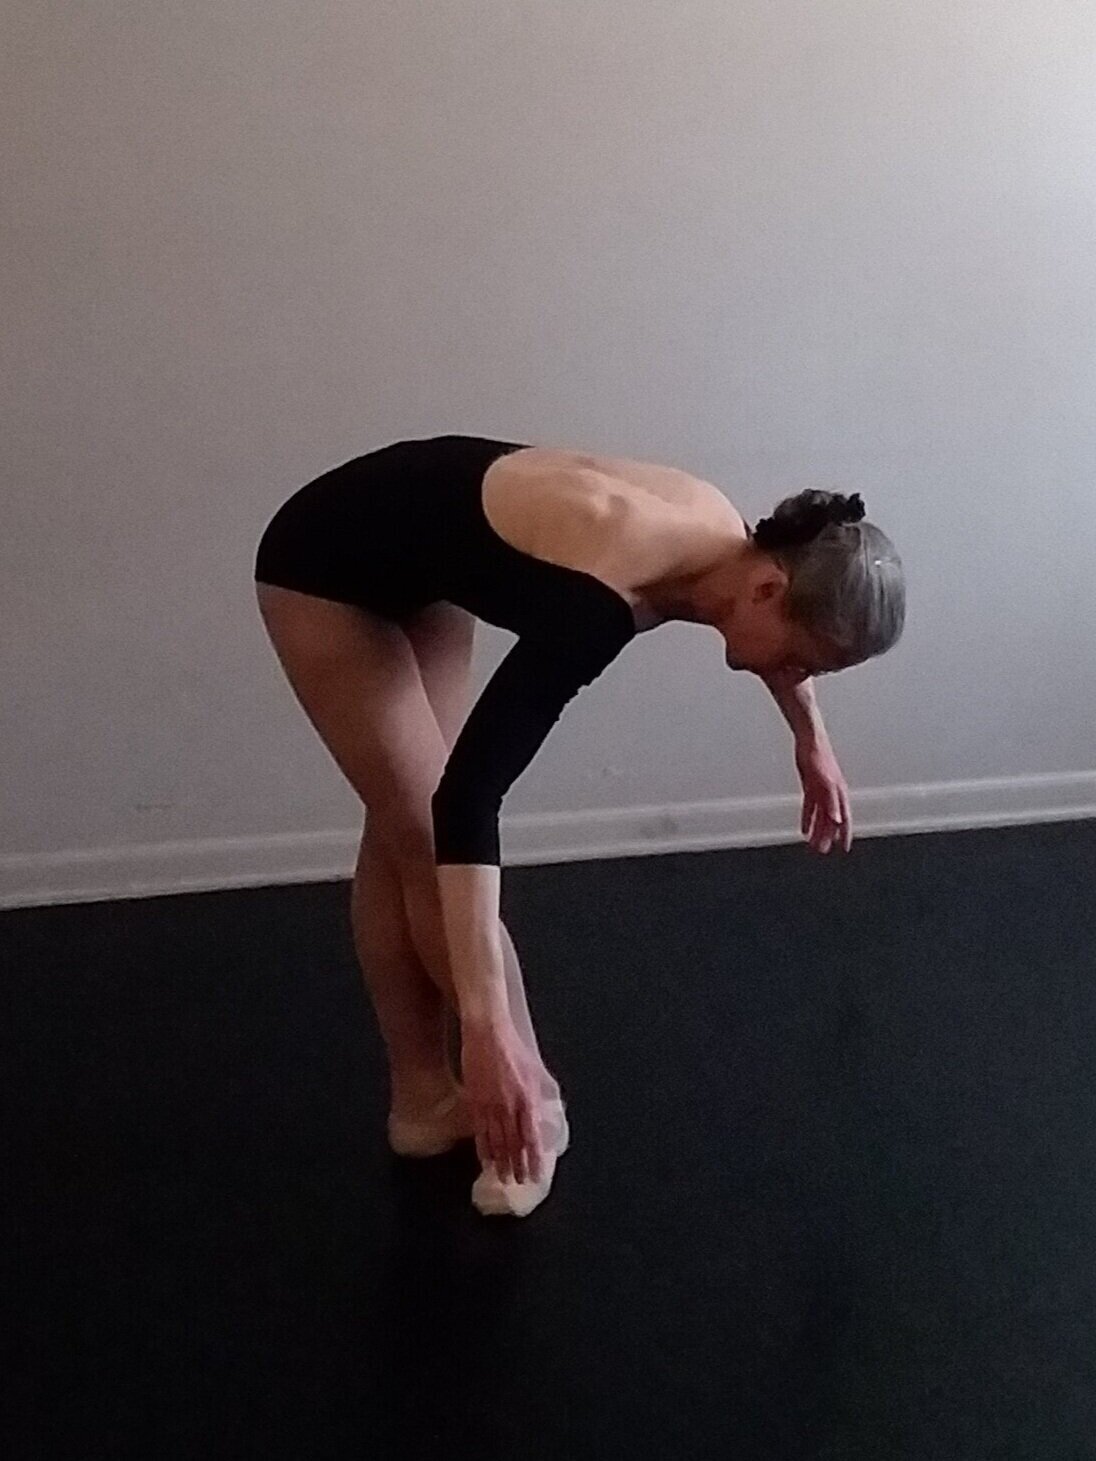
Arms come down with the body as dancer bends forward

Focus is towards legs at the bottom of the forward bend
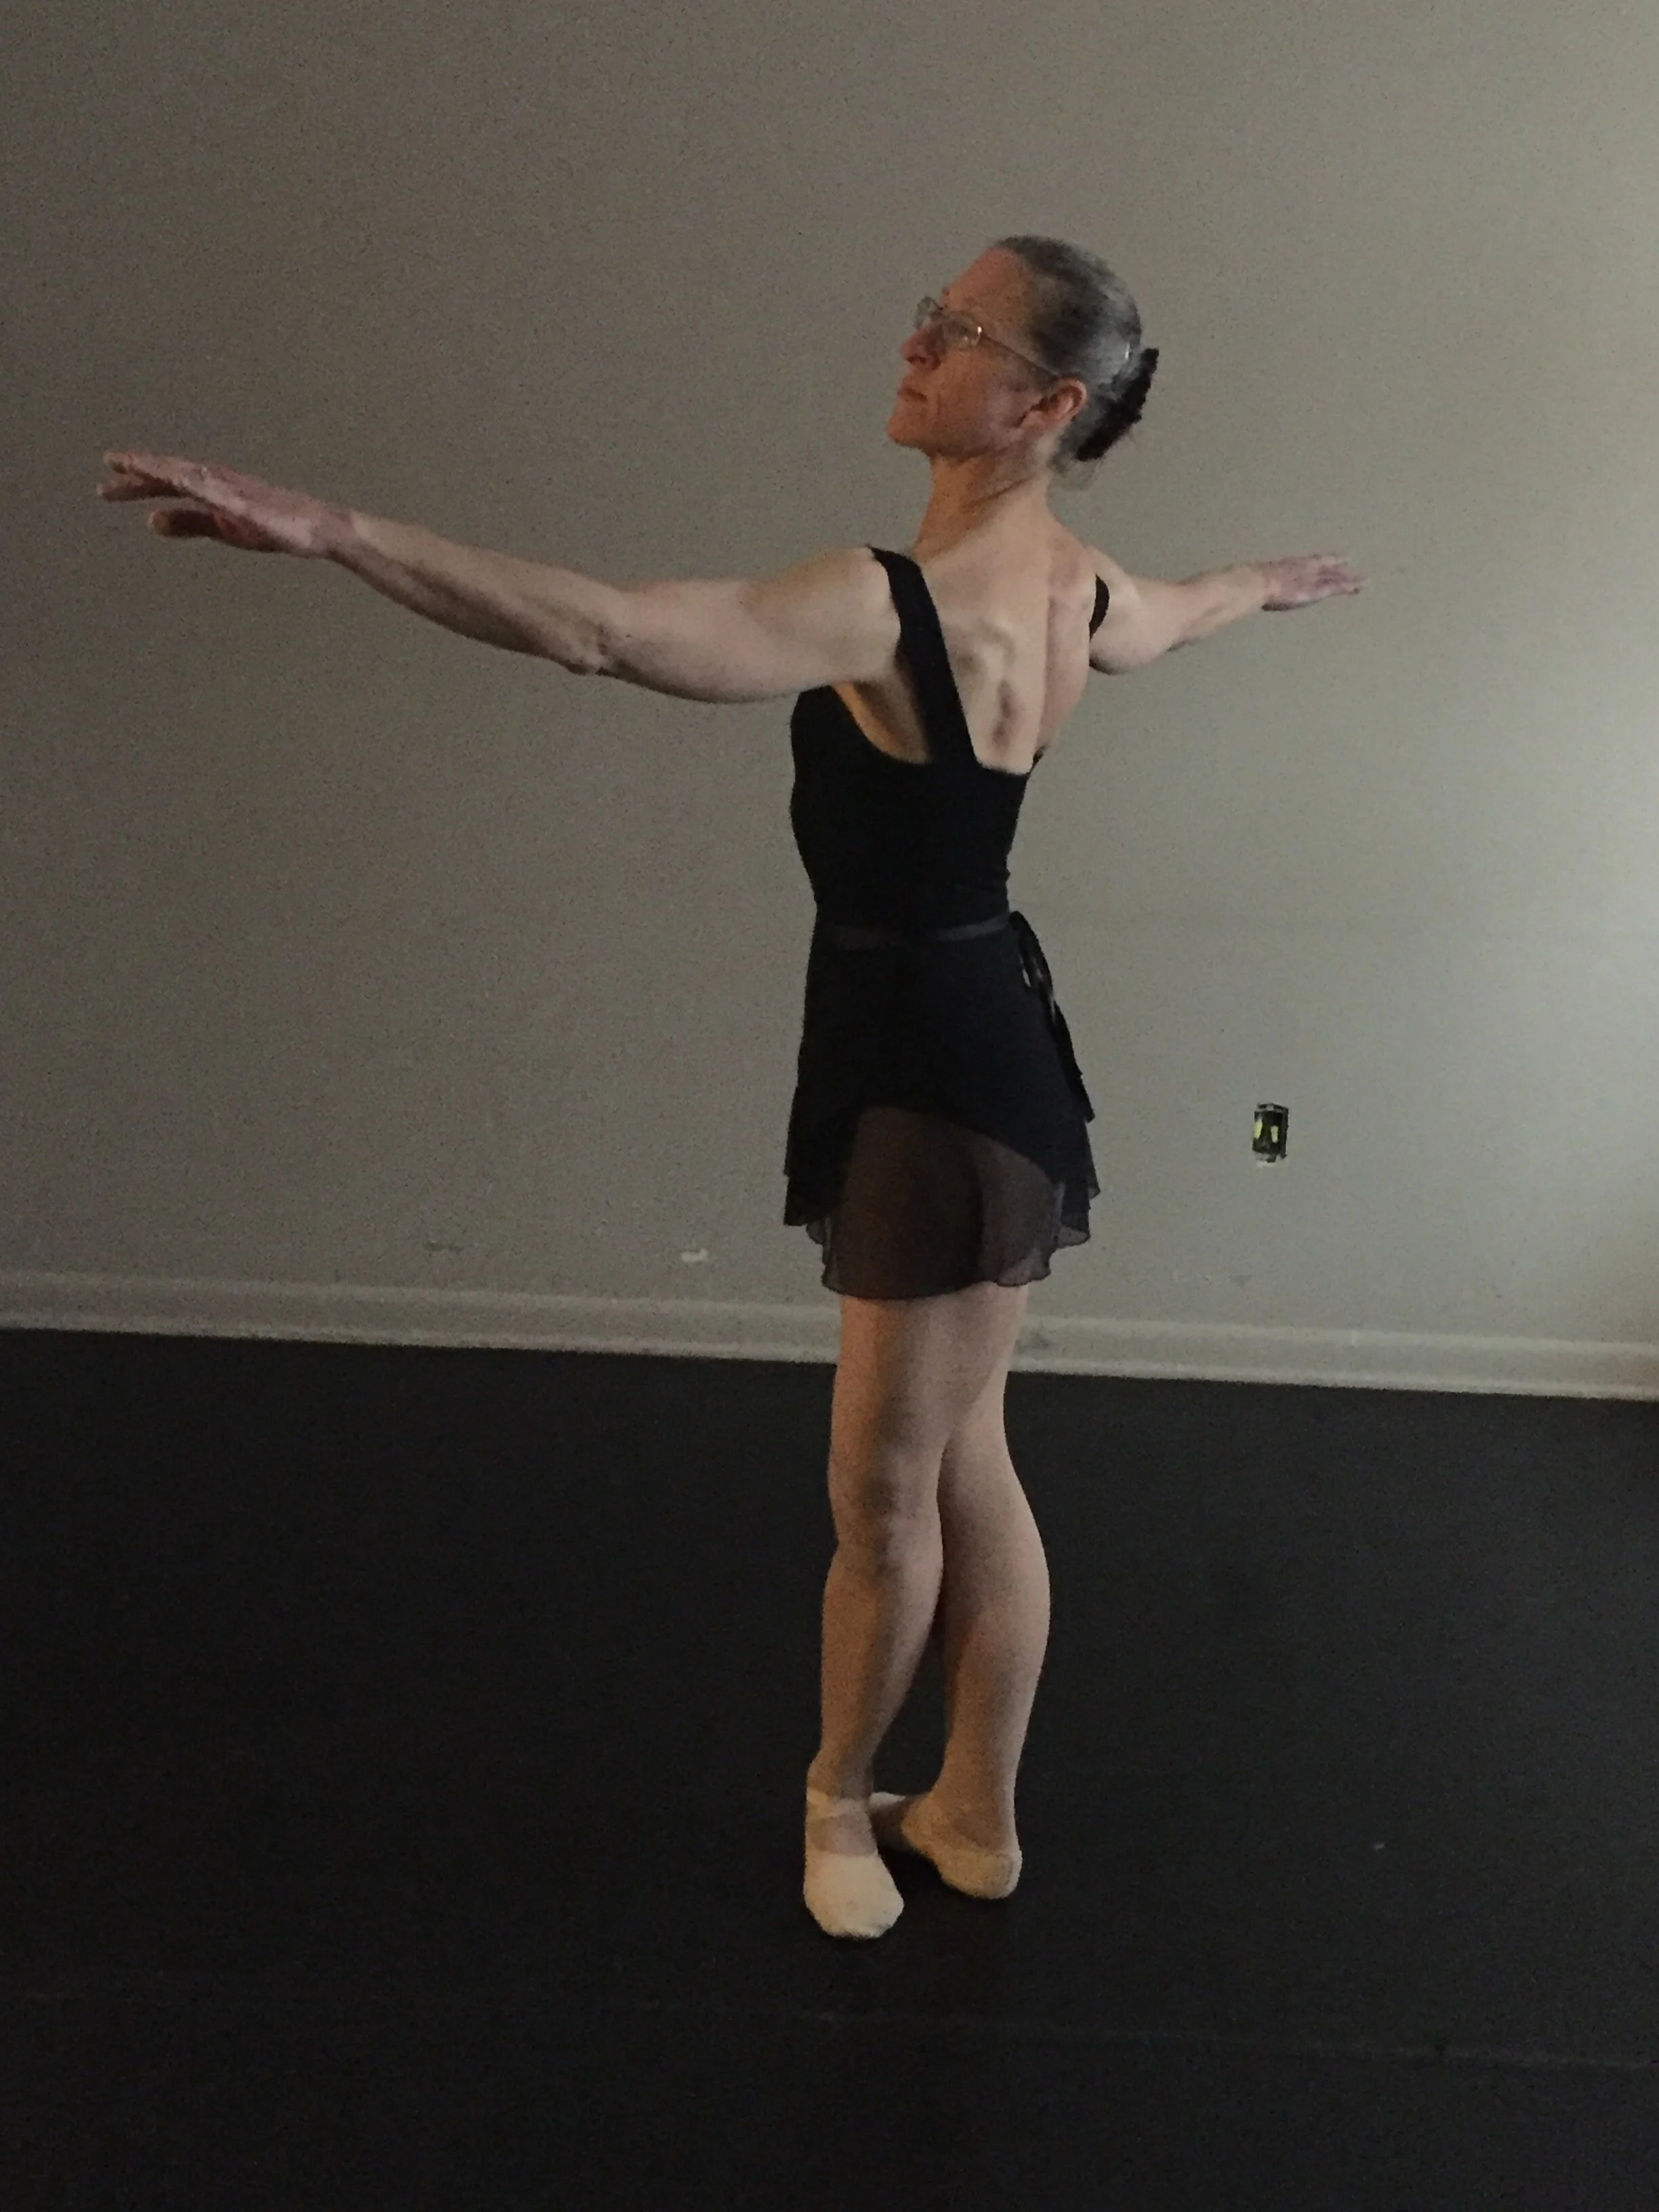
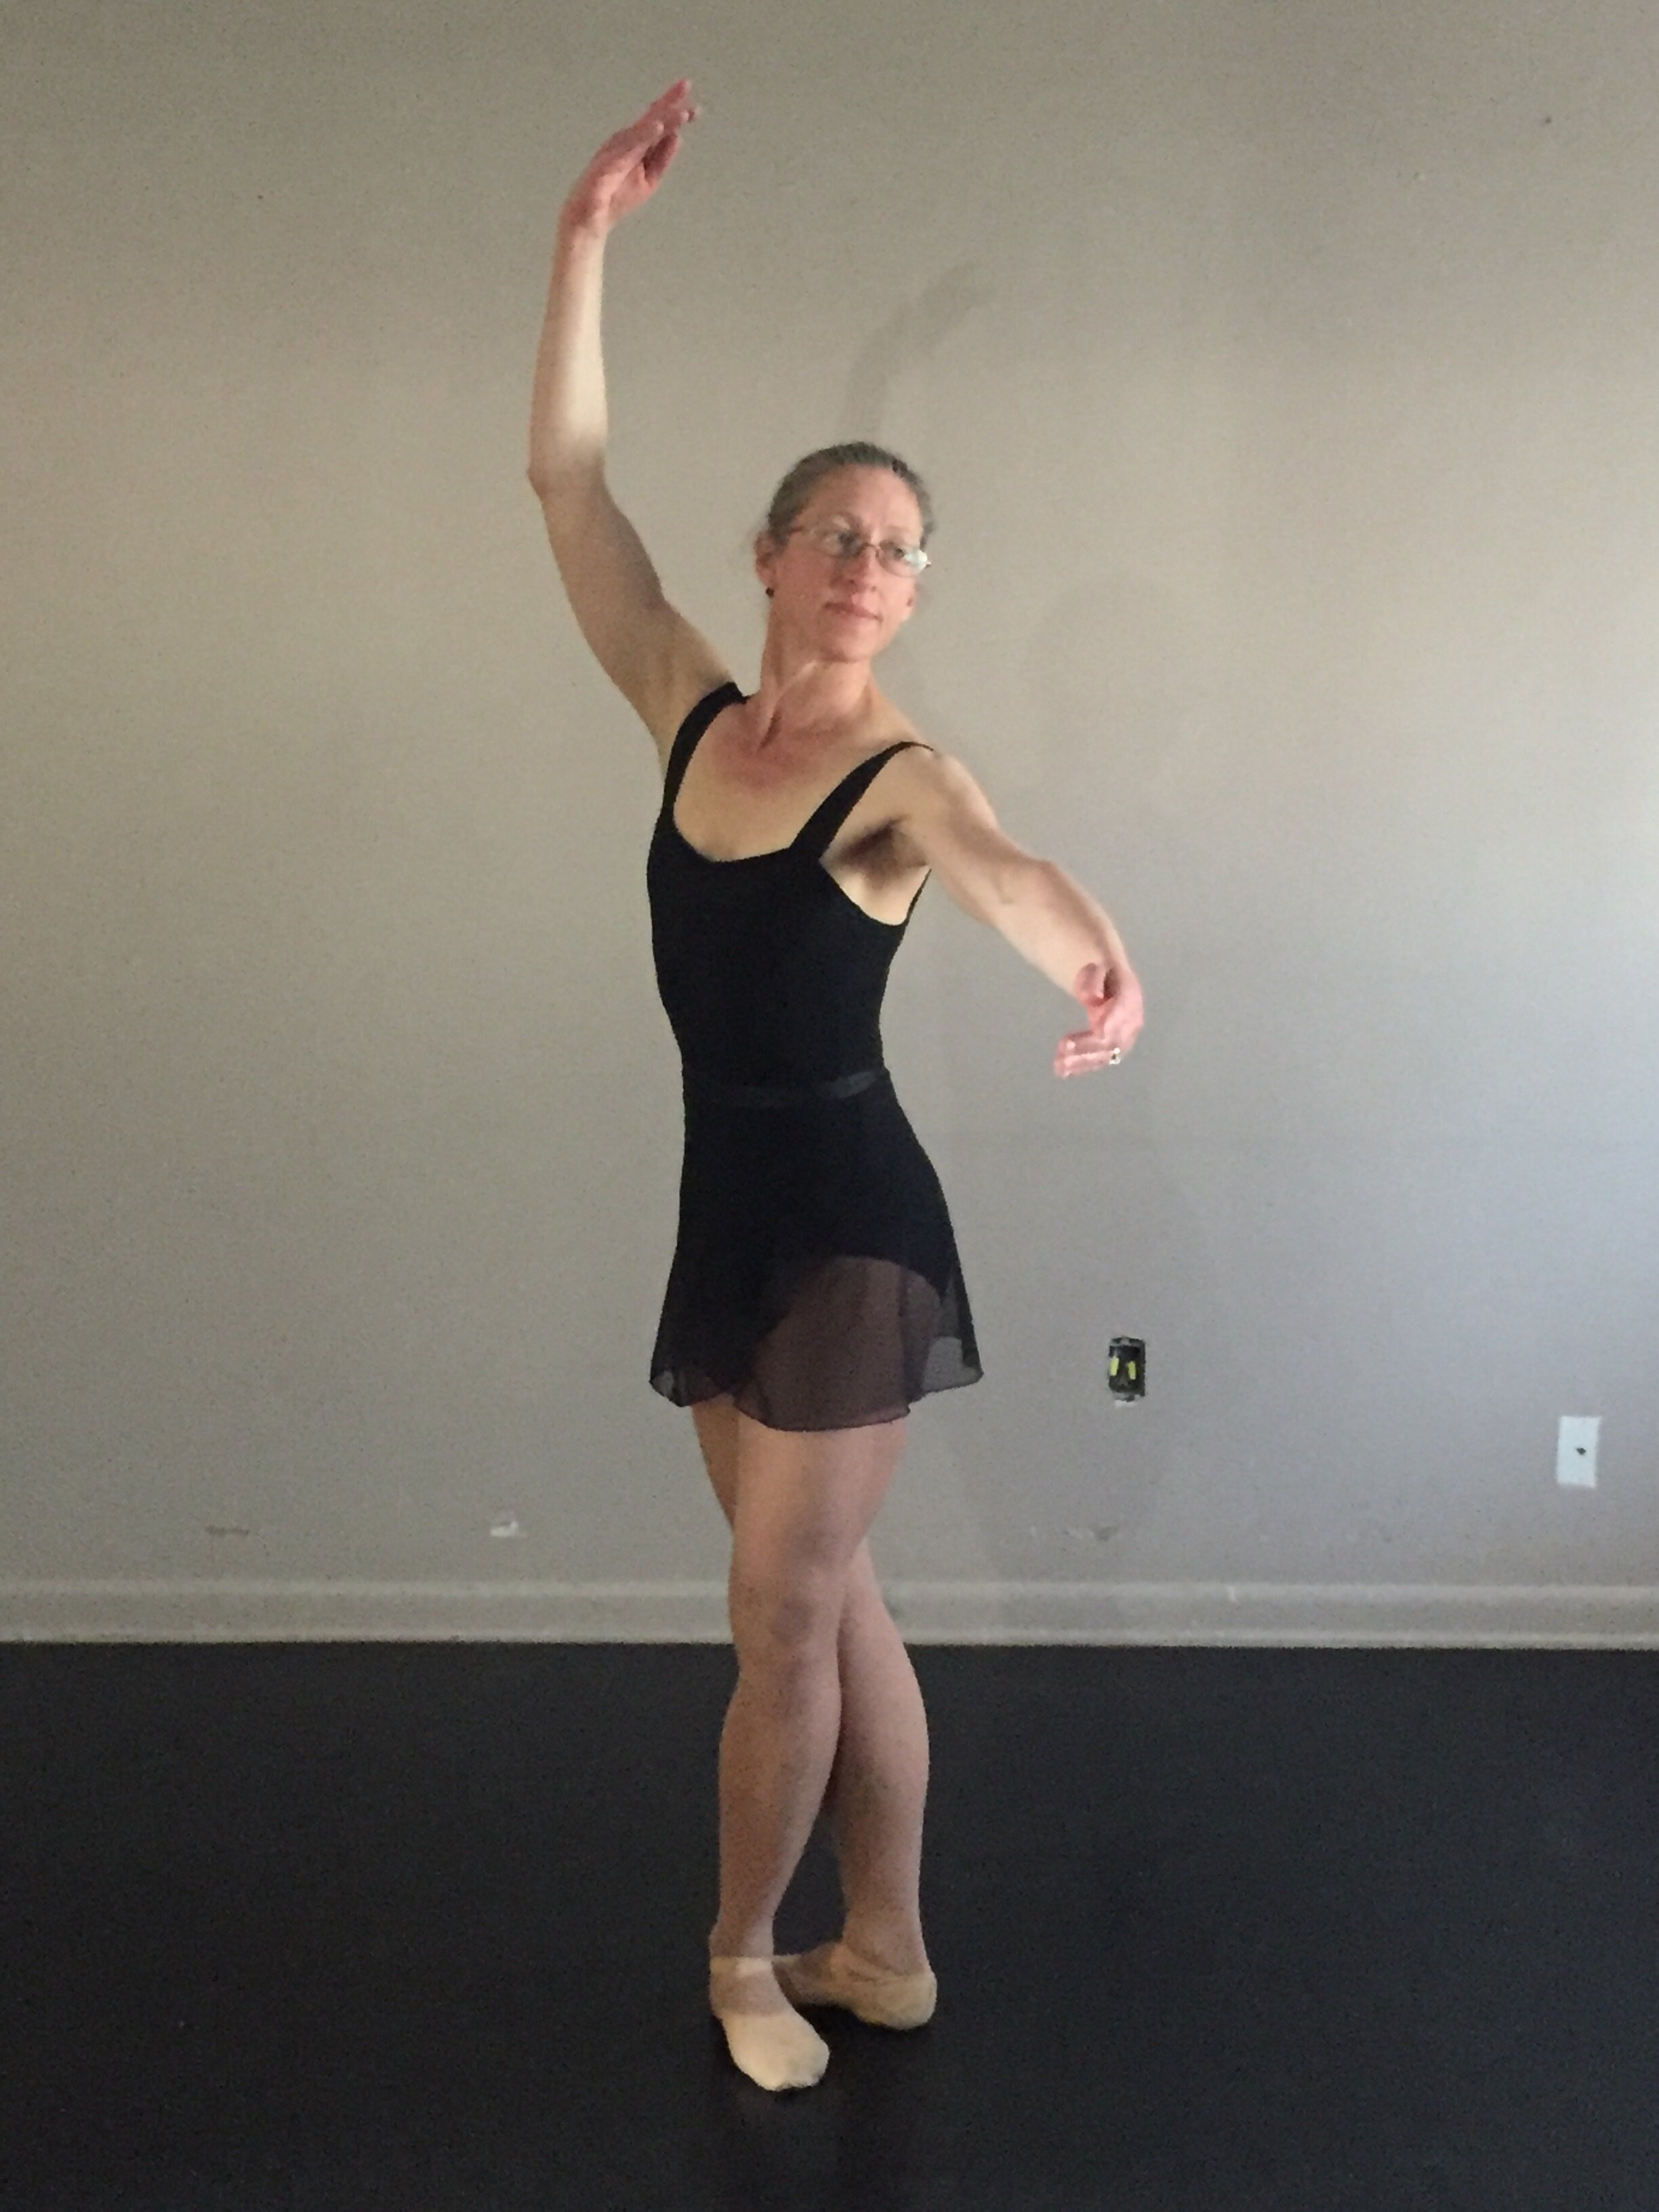
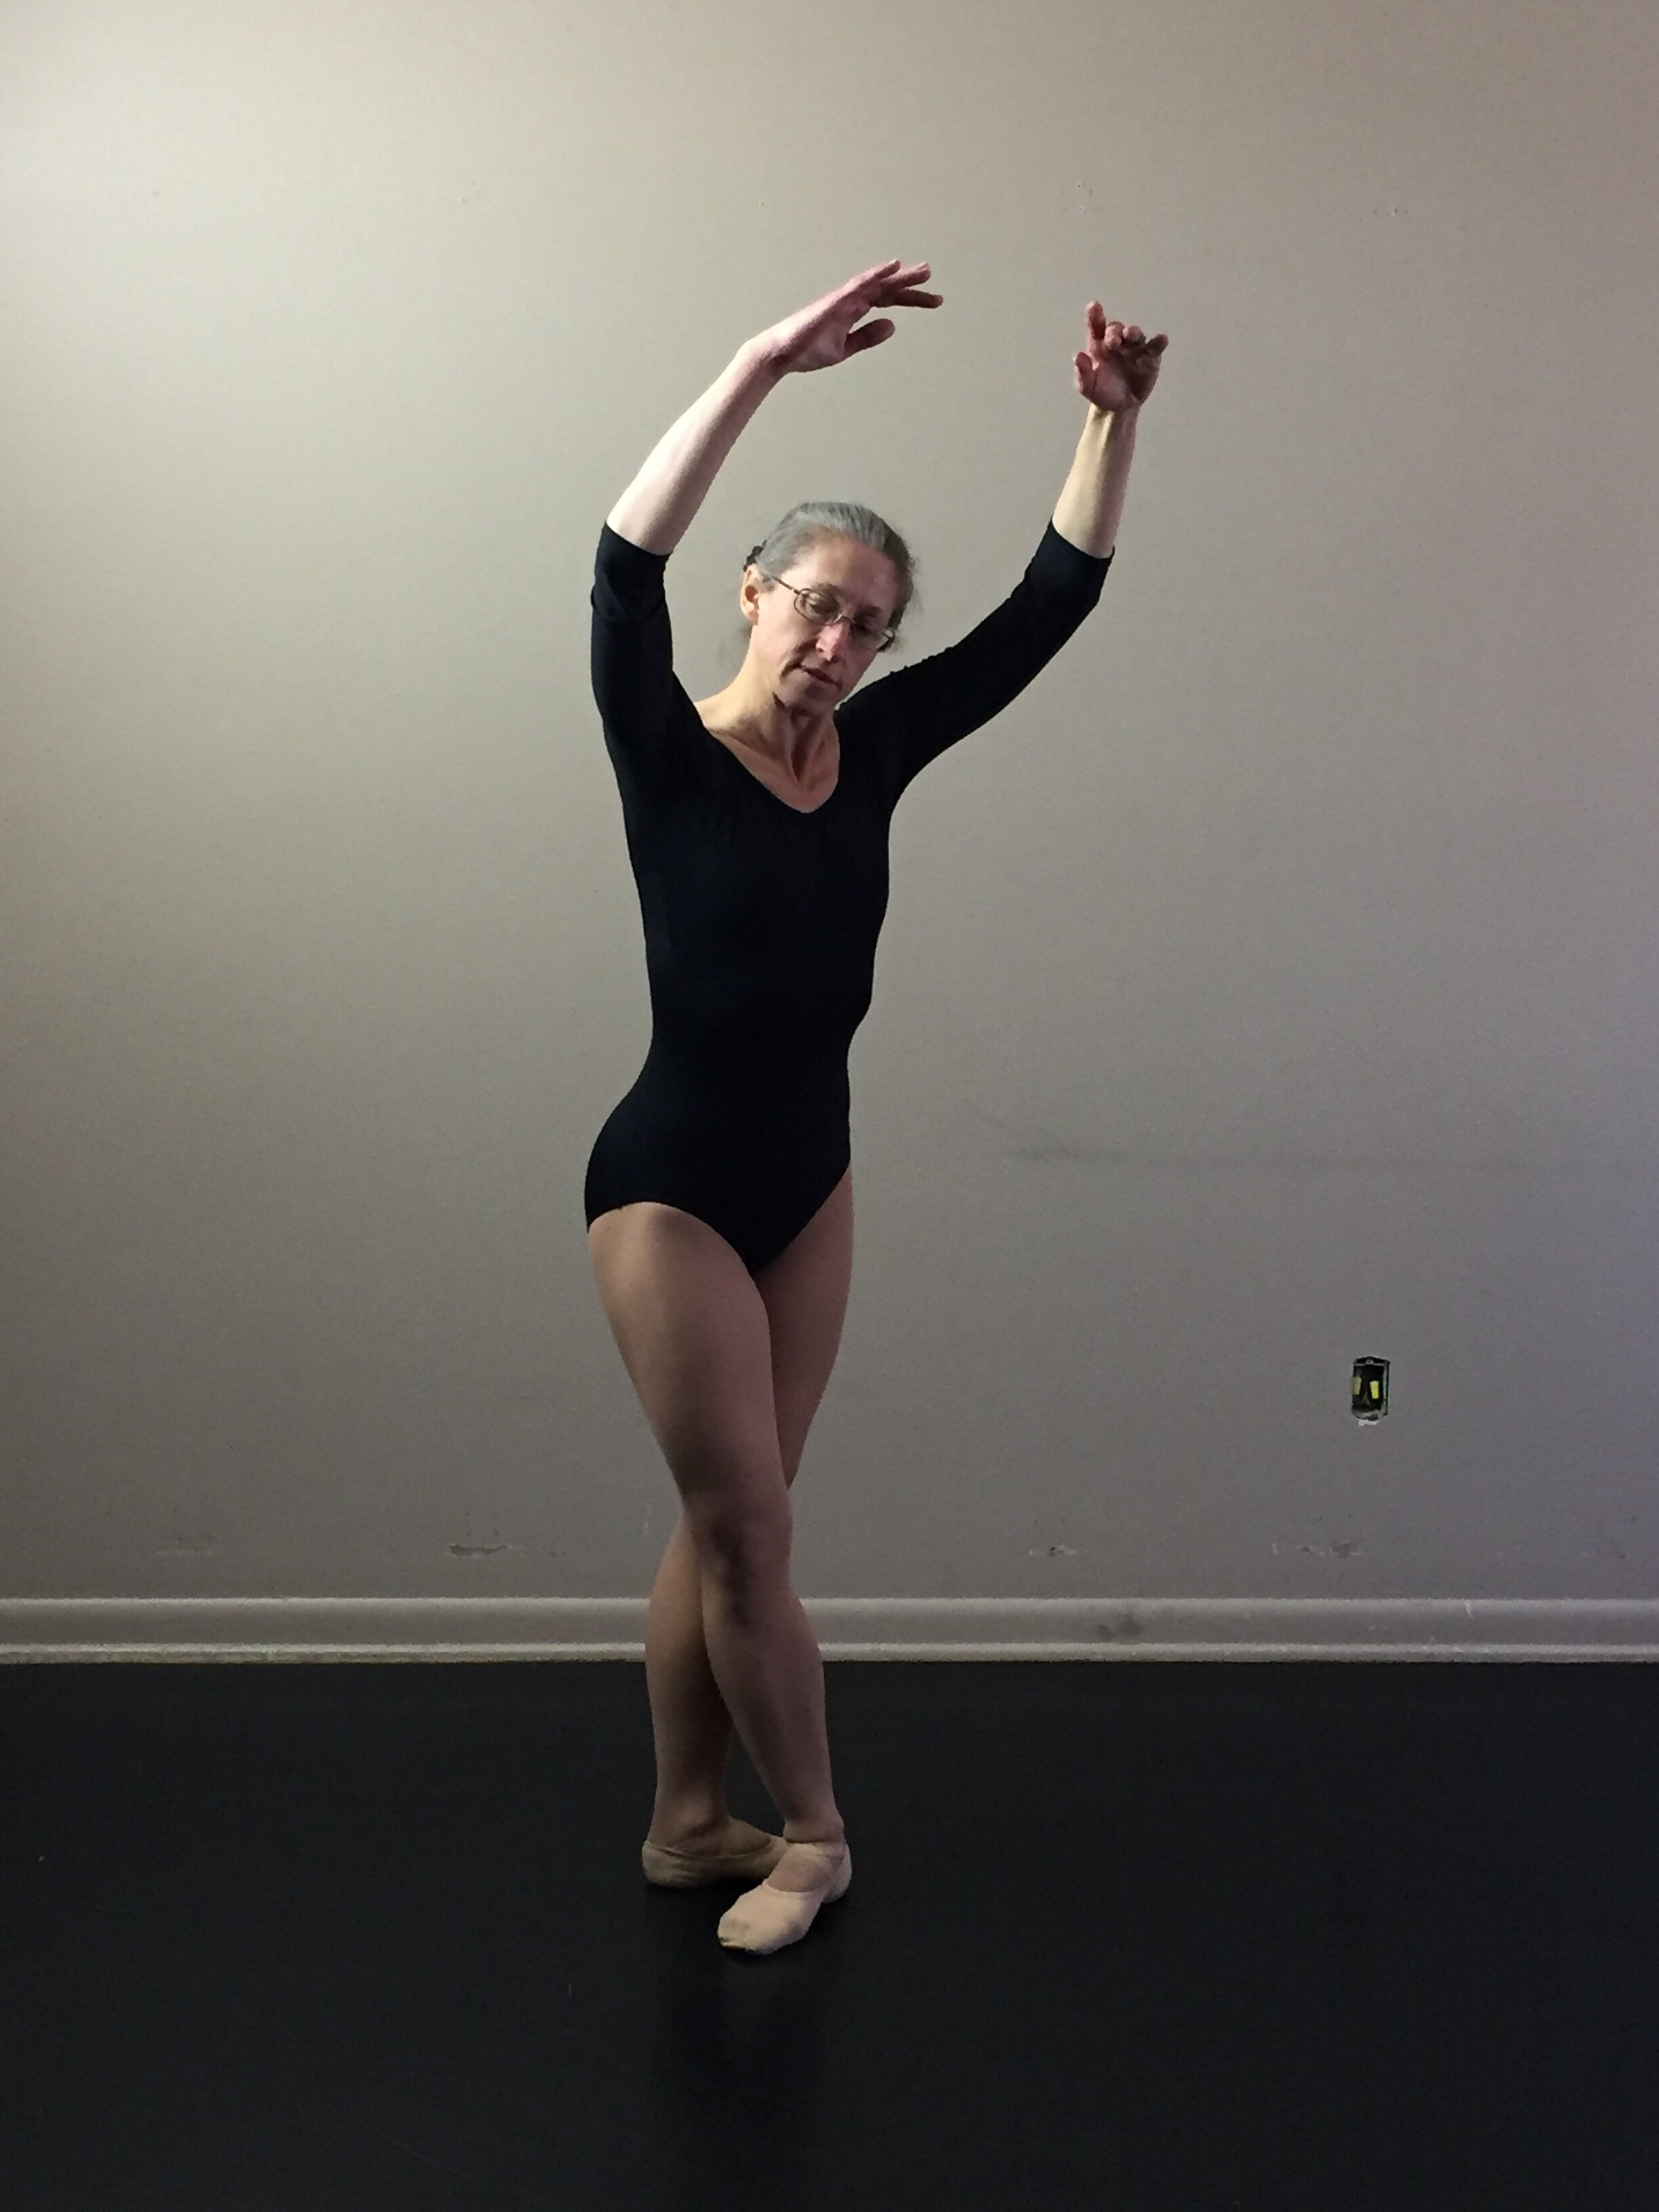
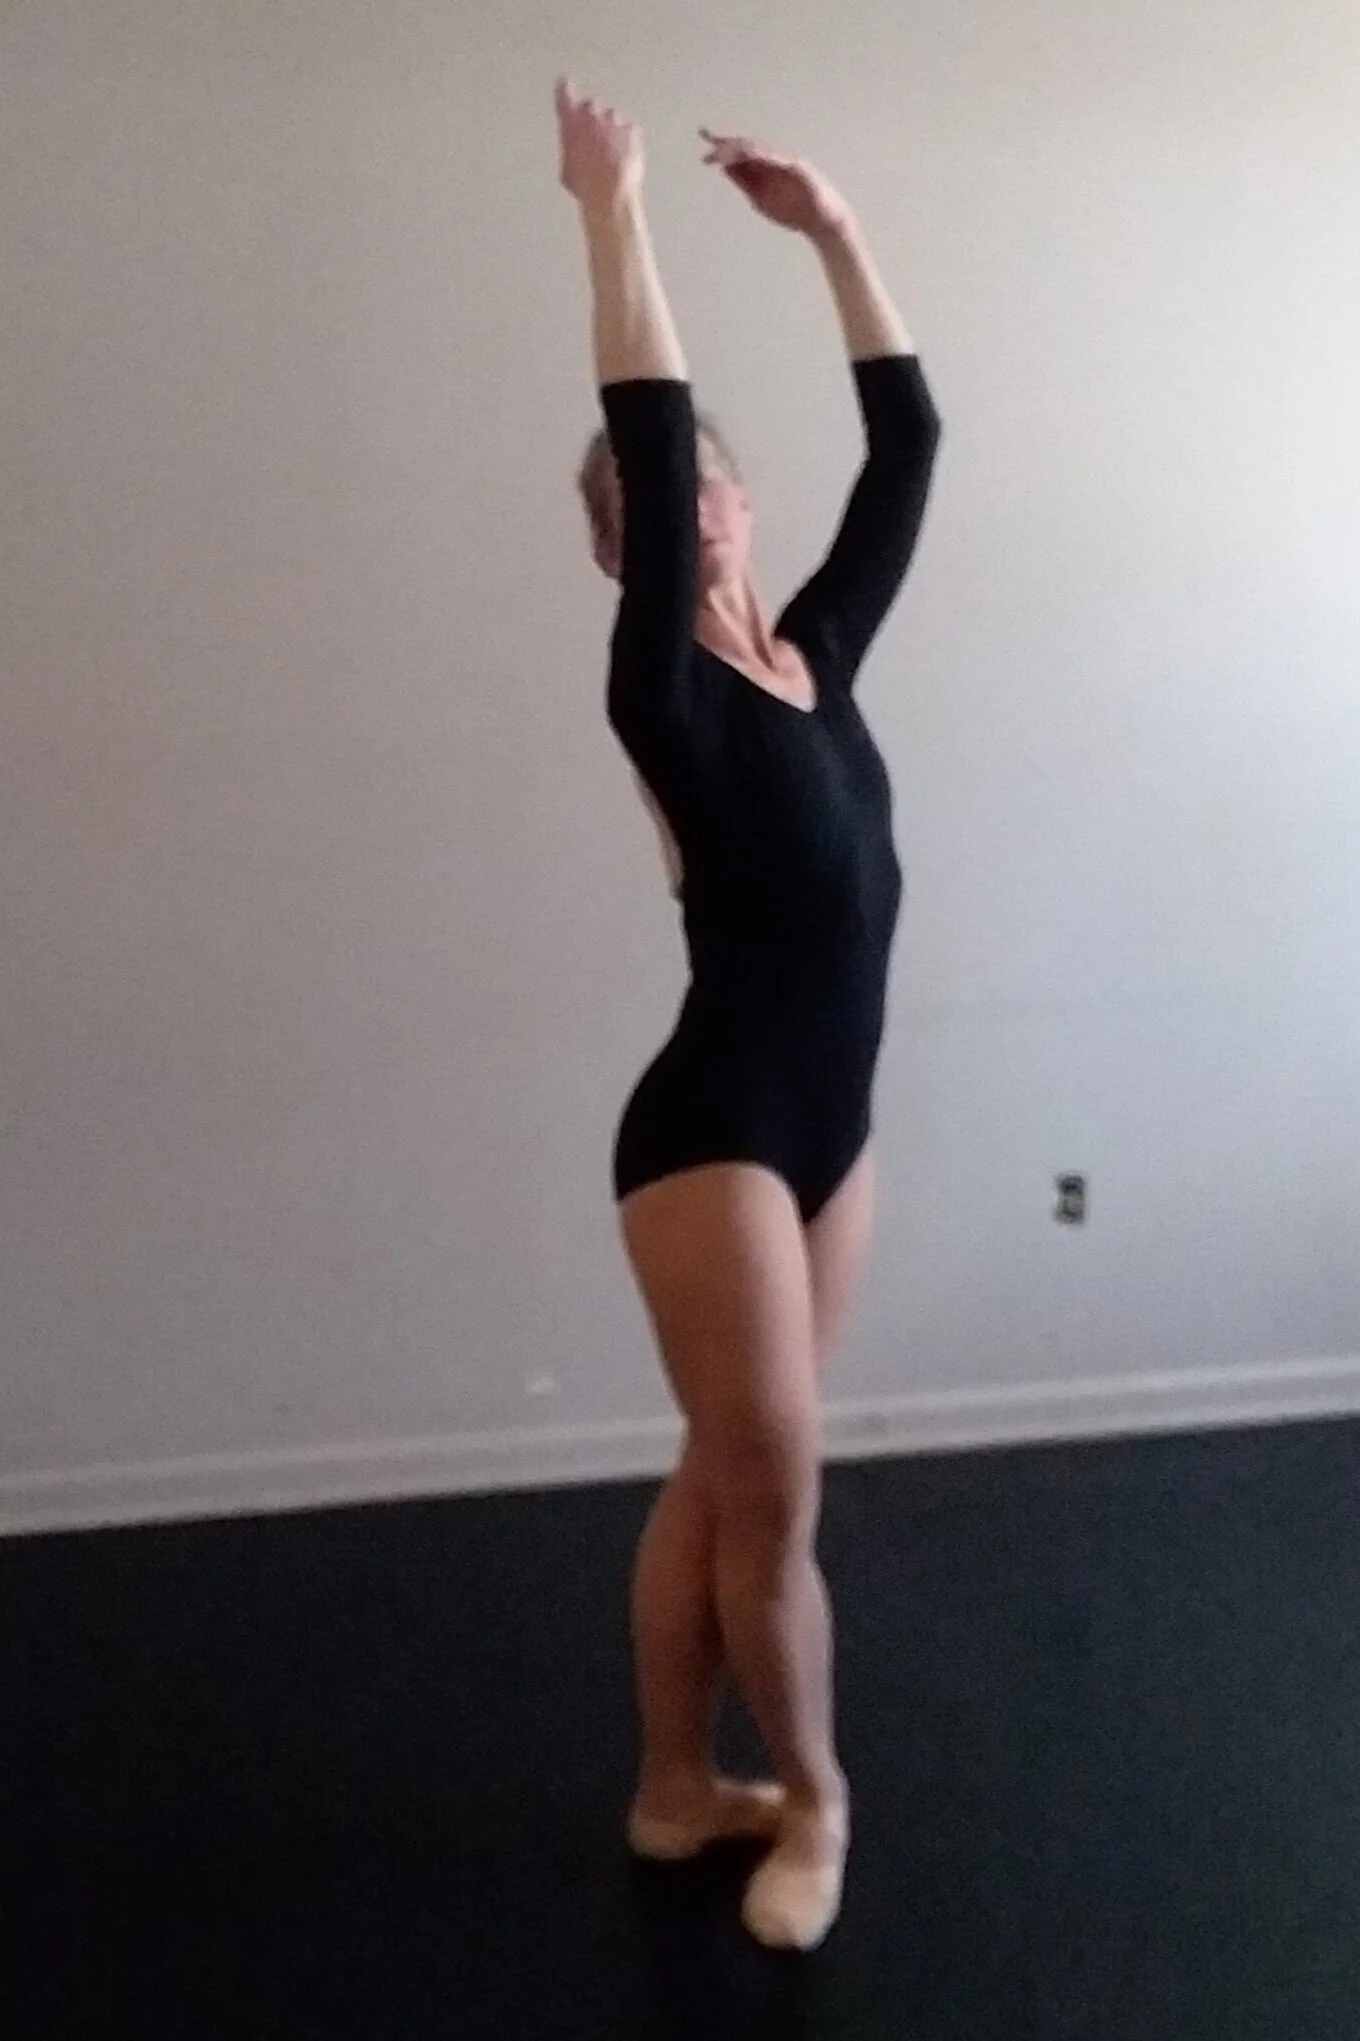
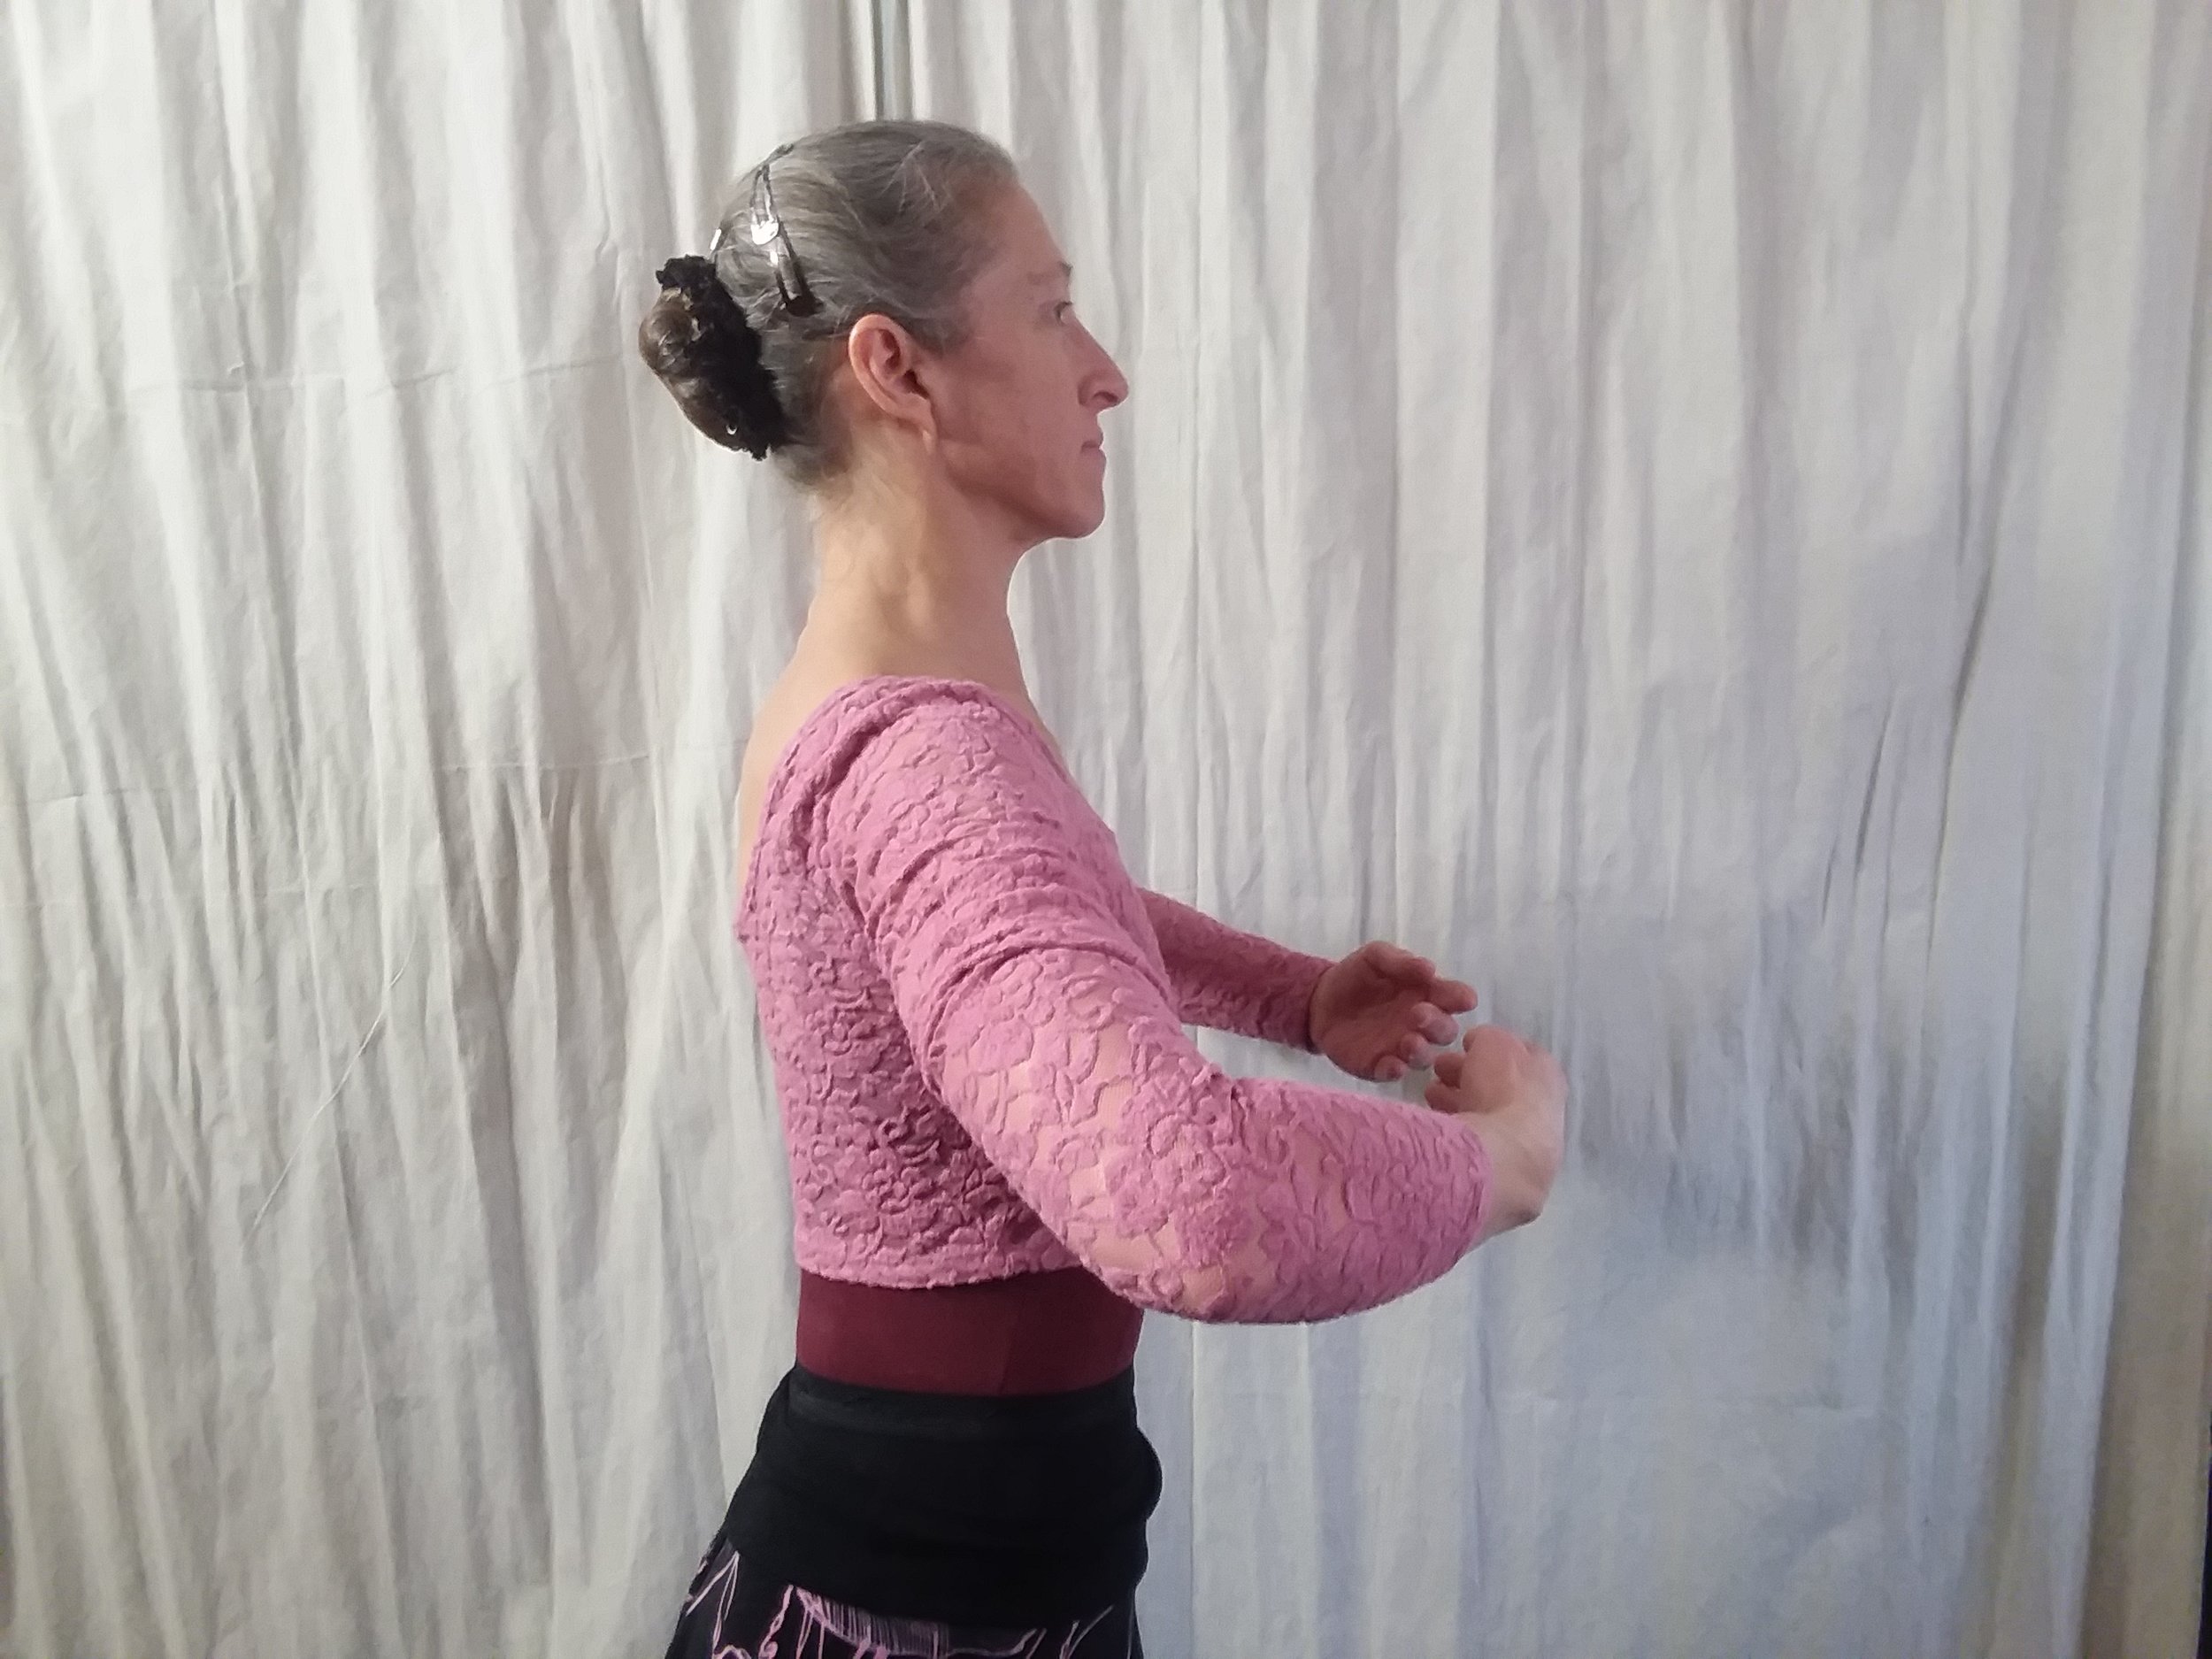
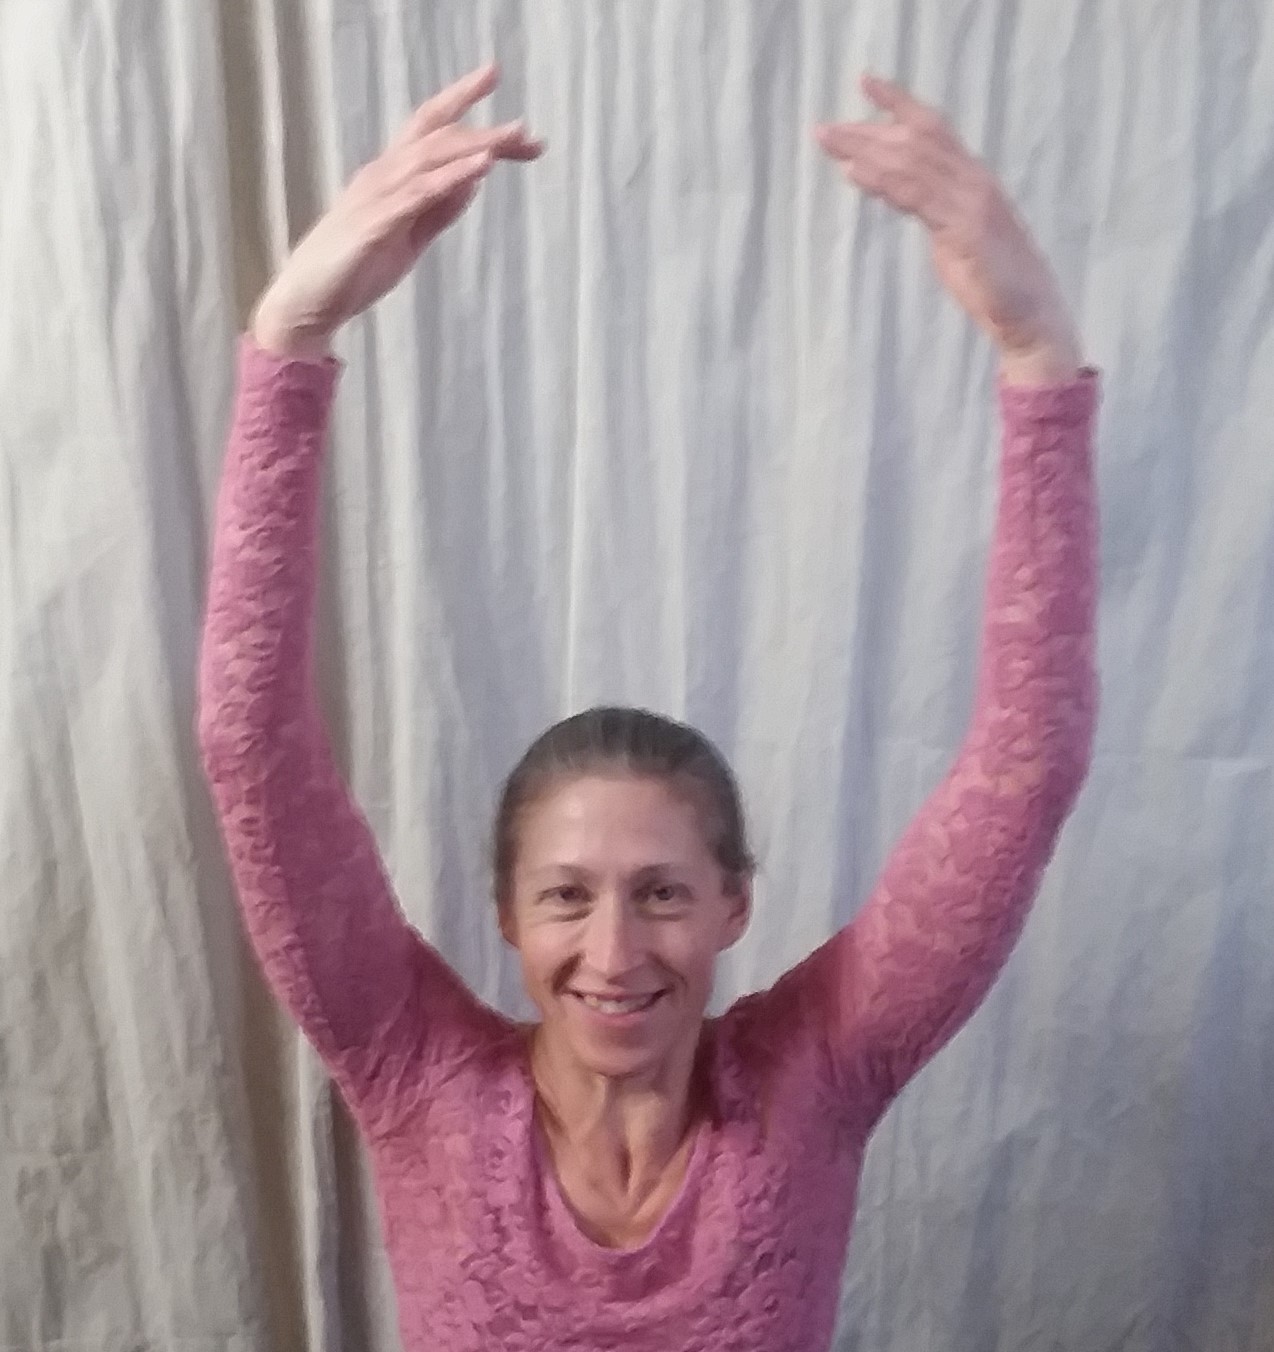
Having achieved the full forward bend of the body, the dancer now begins to return the upper body to its vertical alignment. This begins with the engagement of the core and back muscles bringing the upper body into a flat back position with the arms across from the diaphragm in a circular 1st position. The hamstrings and glutes and rotators then engage to draw the dancer the remainder of the way up to vertical as the arms continue their trajectory upward, arriving in 3rd position overhead as the dancer’s upper body reaches vertical. The head is now turned downstage with the eyes turned to the forearm of the downstage arm.

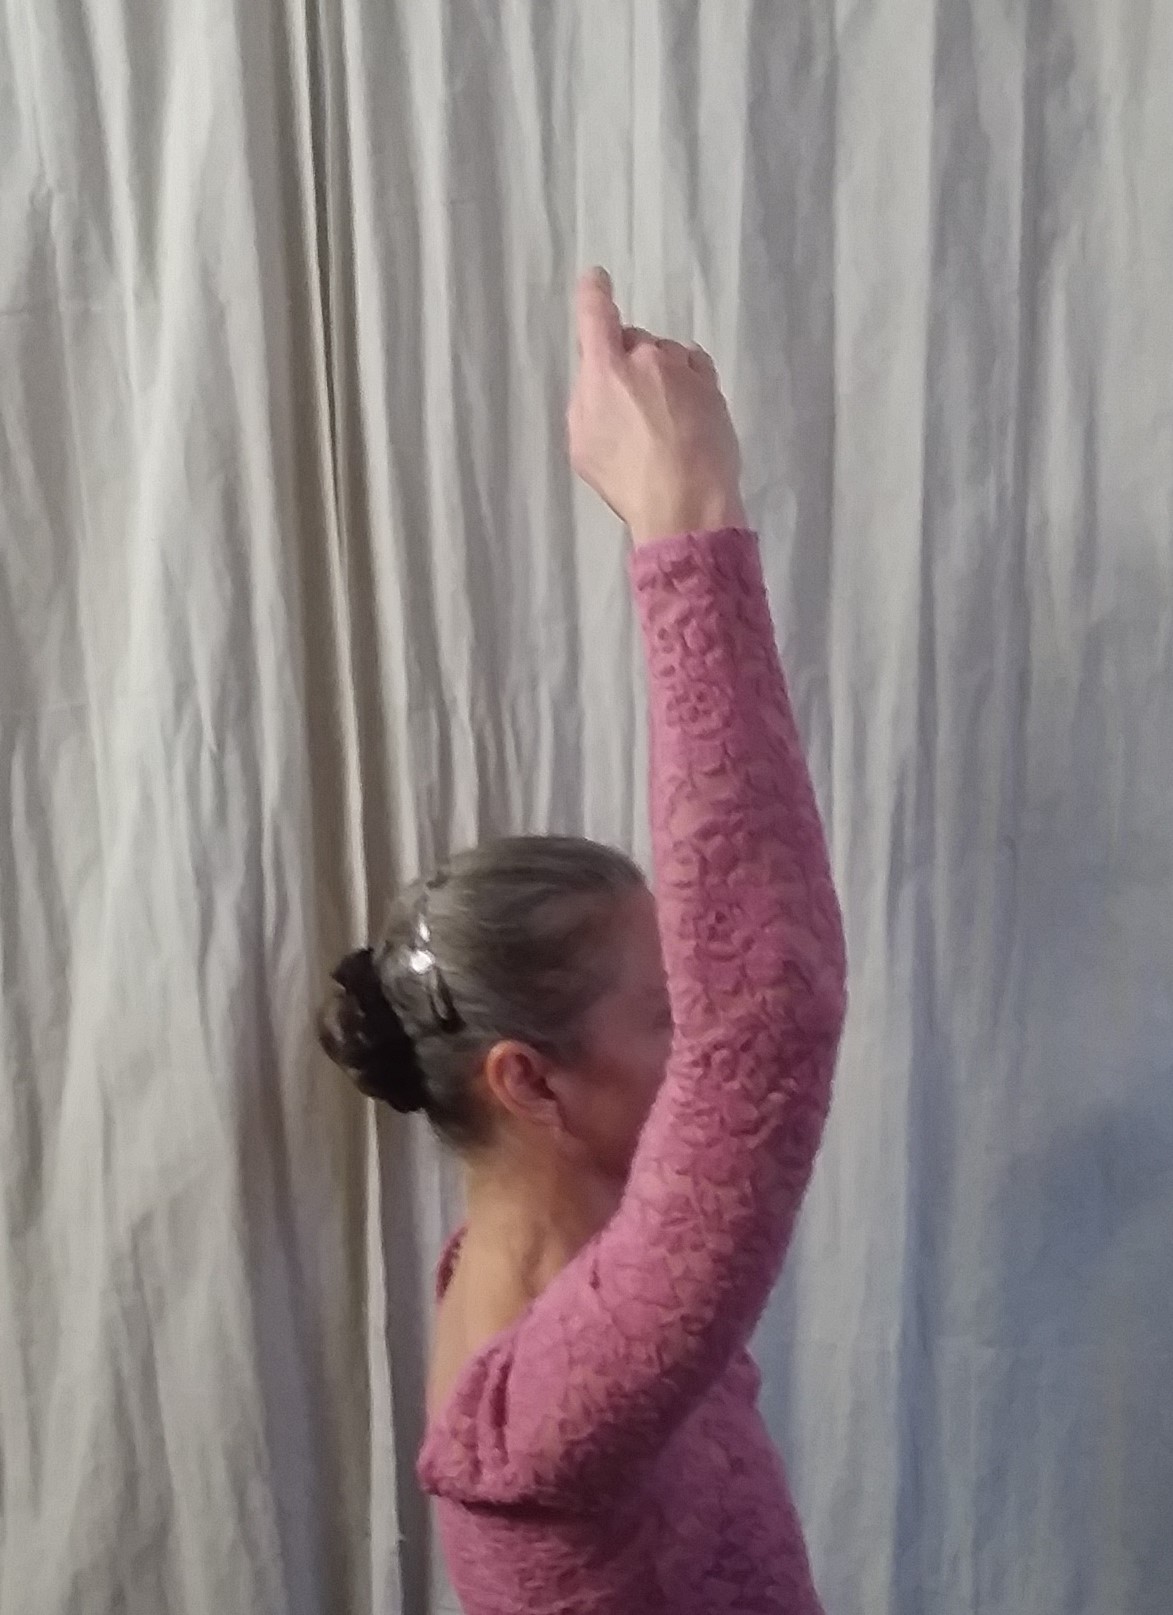
Upon returning to vertical, the focus is on the downstage forearm before beginning the cambre back

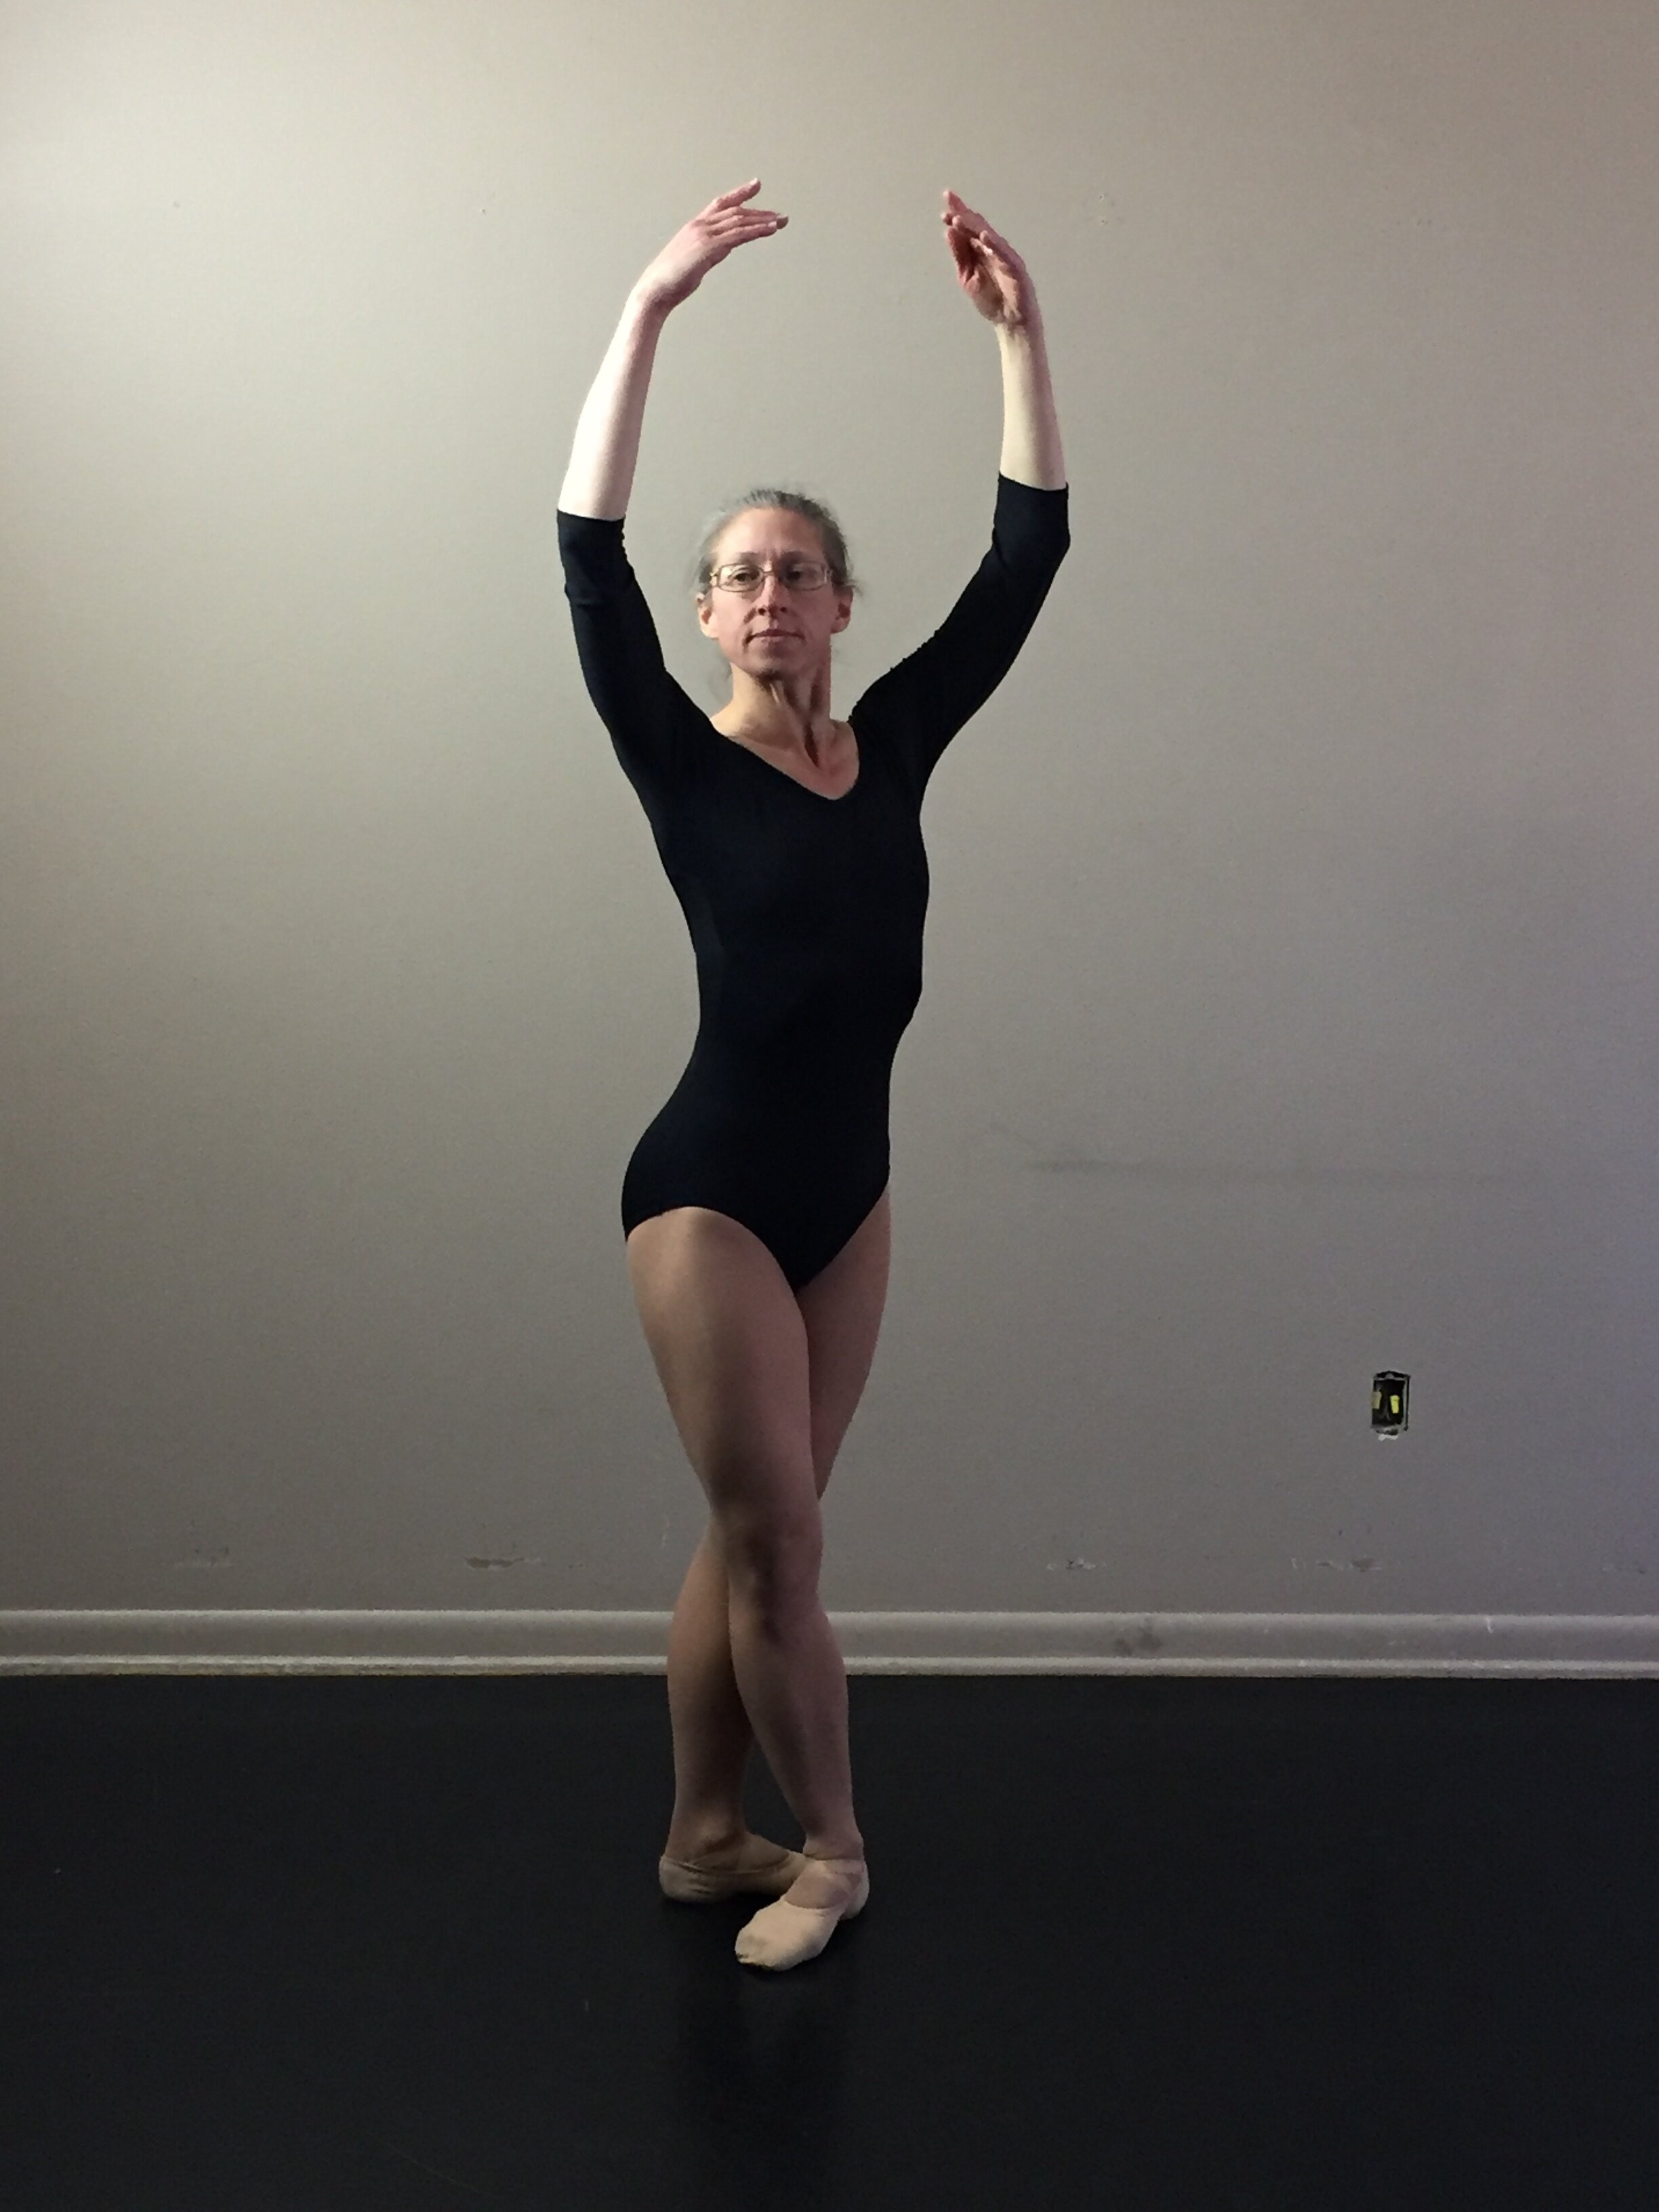
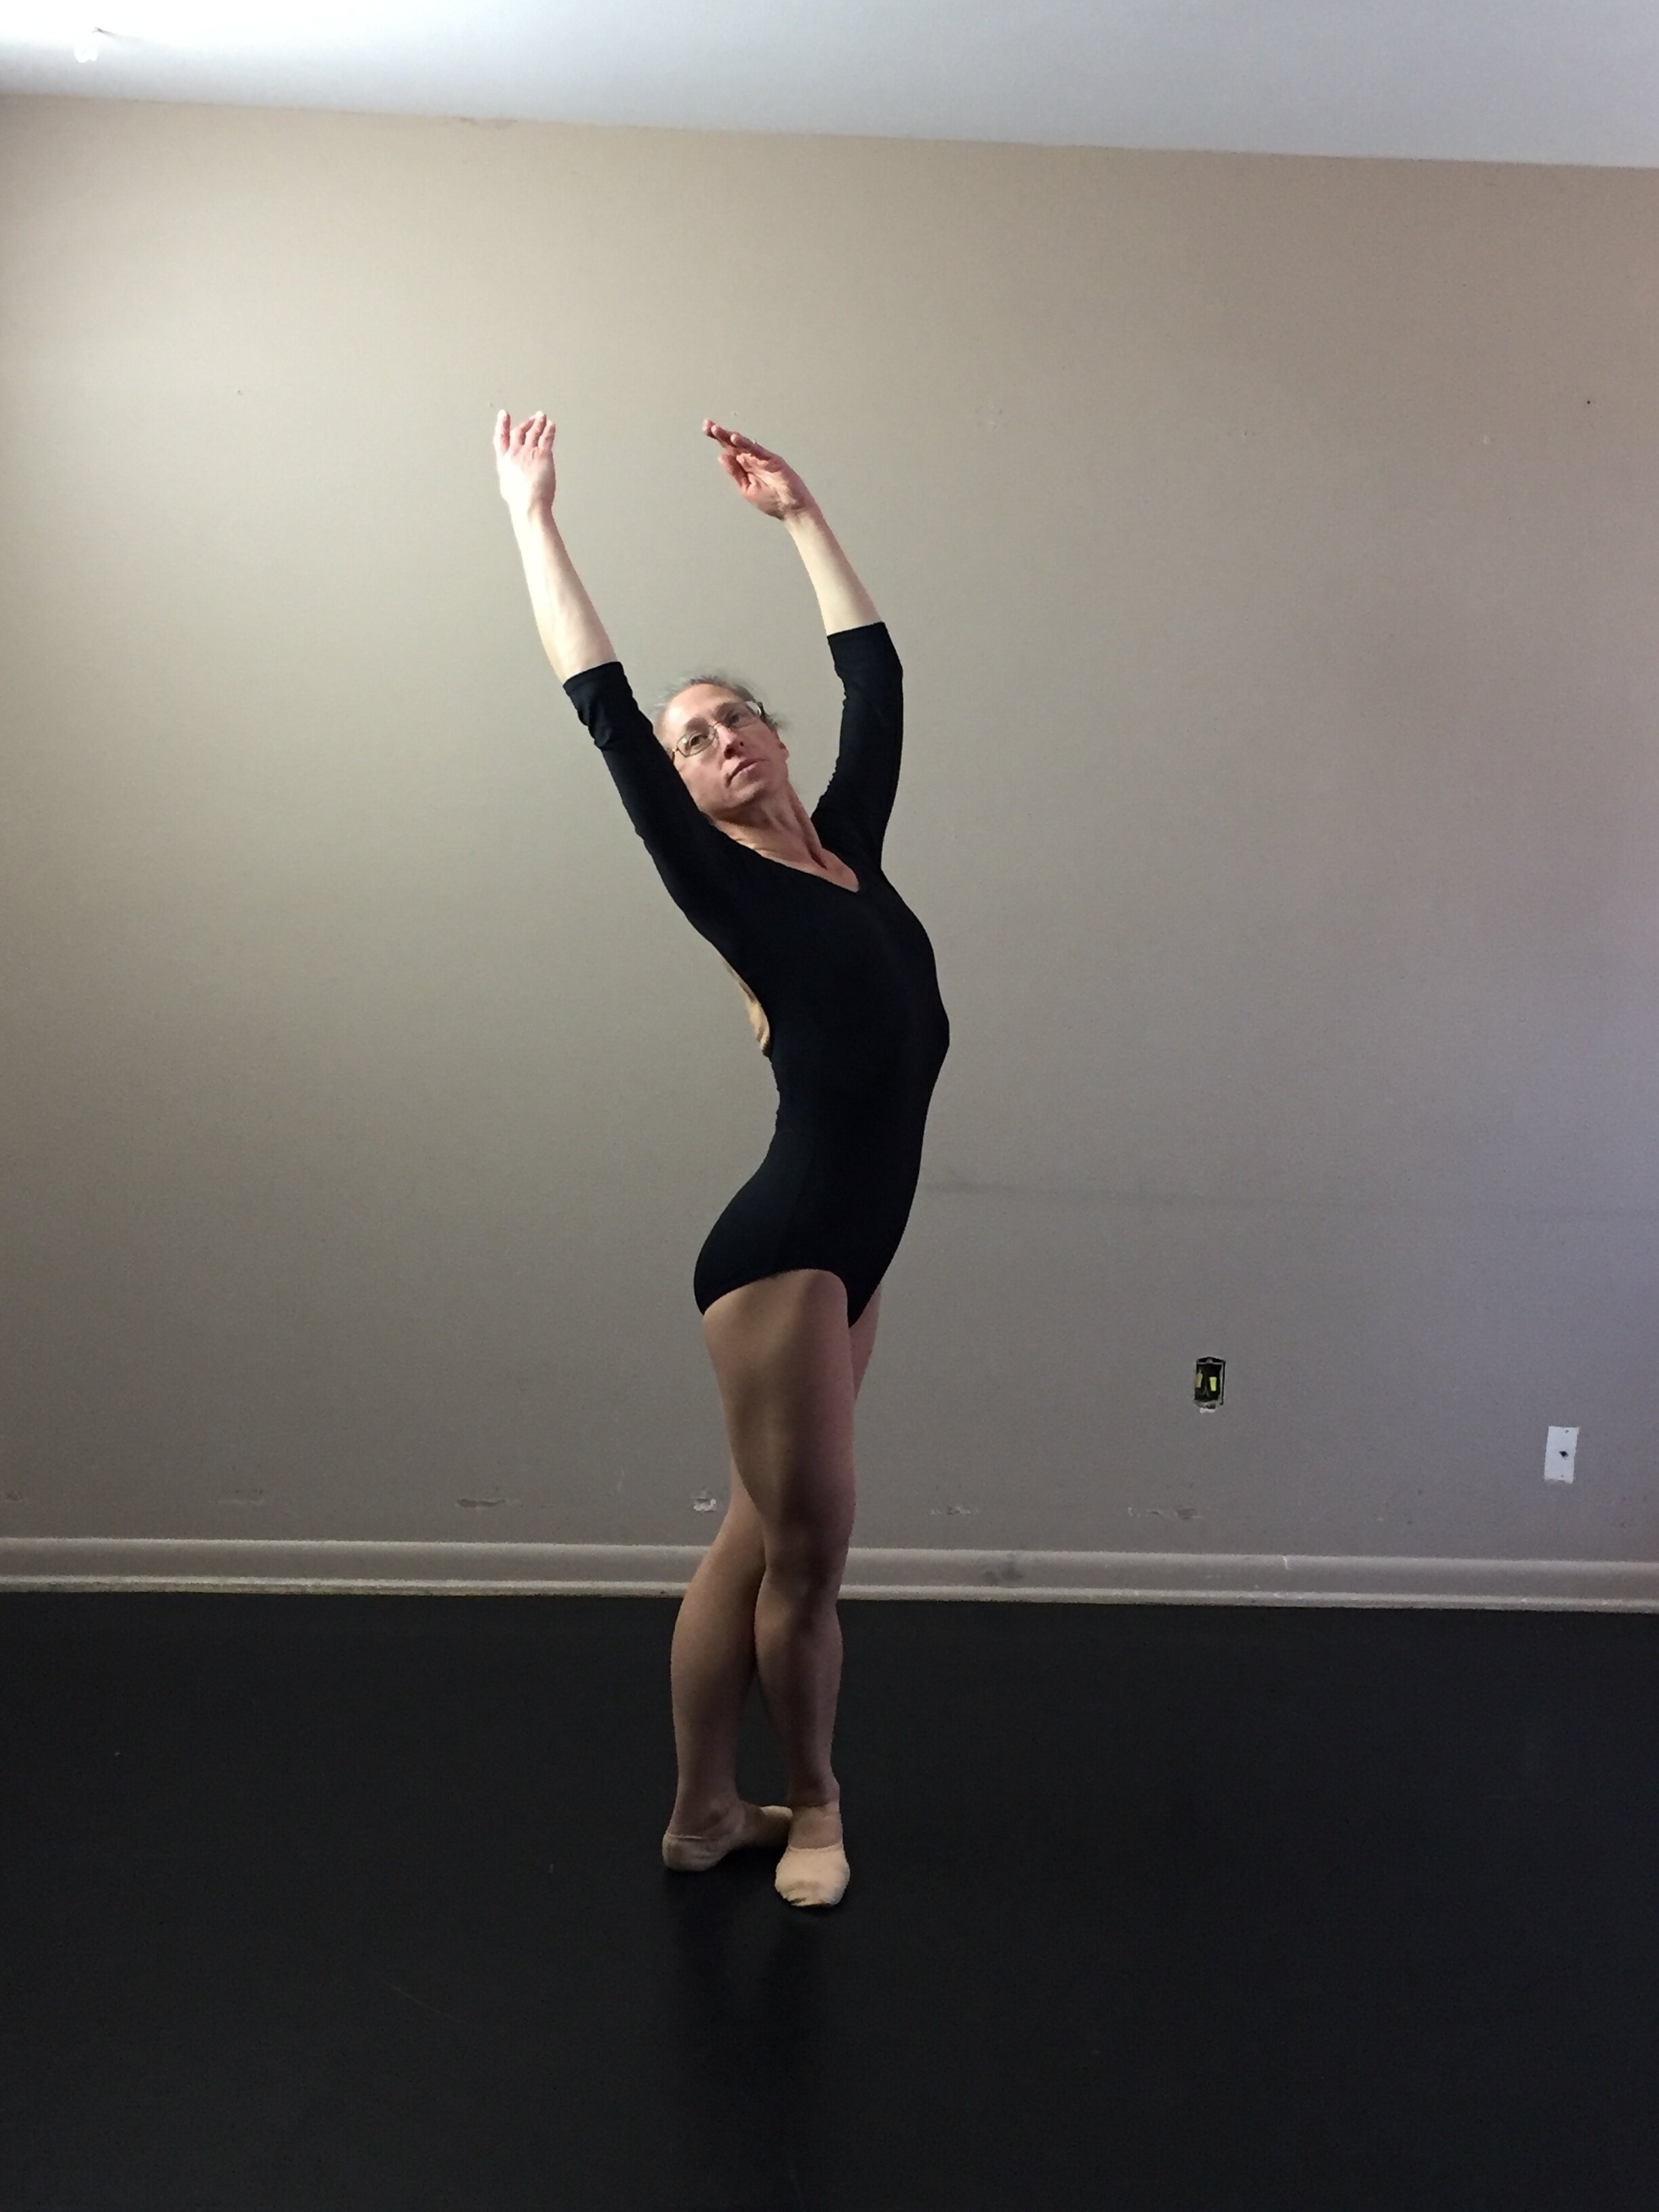
Correct - head and body coming up together

Incorrect - Head leading the body upwards
From here, the dancer begins a cambré back. Another slight breath of the upper body involves a tiny dip forward of the head and hands which then immediately begin the arch back. The focus remains downstage into the forearm and the elbows remain pressed wide open to allow to face to be seen above the arms during the arch of the back. The top of the head and the hands lead this arch while the waistline is strongly activated to remain lifted and long. The arch back continues to the base of the shoulder blades. Depending upon the flexibility of the dancer’s back, this arch backward may continue to go lower into the back, but there must remain a strong engagement of the lower back muscles such that the dancer does not “drop” into the lower back, causing a subsequent displacement of the hips and bending of the knees.

Having reached the culmination of the backward arch, the dancer begins the return to vertical from the base of the curve, radiating upward to the head which is last to return to vertical. As the dancer arrives at vertical, the arms open to 2nd position as the eyes follow the downstage hand.
Some Common Pitfalls to watch out for:
incorrect - Elbow forward obscuring face

Incorrect - Head dropped back
Incorrect - sinking into lower back causing displacement of hips and knees

Incorrect - Tailbone poking out behind

Vaganova Second Port de Bras
In my previous blog we addressed the details of Vaganova First Port de Bras. “Port de bras” means “carriage of the arms.” This blog continues our series on the six established Vaganova port de bras exercises by delving into the Second Port de Bras. As you progress through each of these port de bras blogs you may wish to refer back to Zombie, Doll, Swan or Human – Its all in the Arms to remind yourself of some of the specific arm position details. I also recommend that you practice your port de bras AS you are reading, taking each detail into account and creating a muscle memory as you do so.
Second Port de Bras trains the use of the arms in separate and opposing movements with complex involvement of the head and focus.

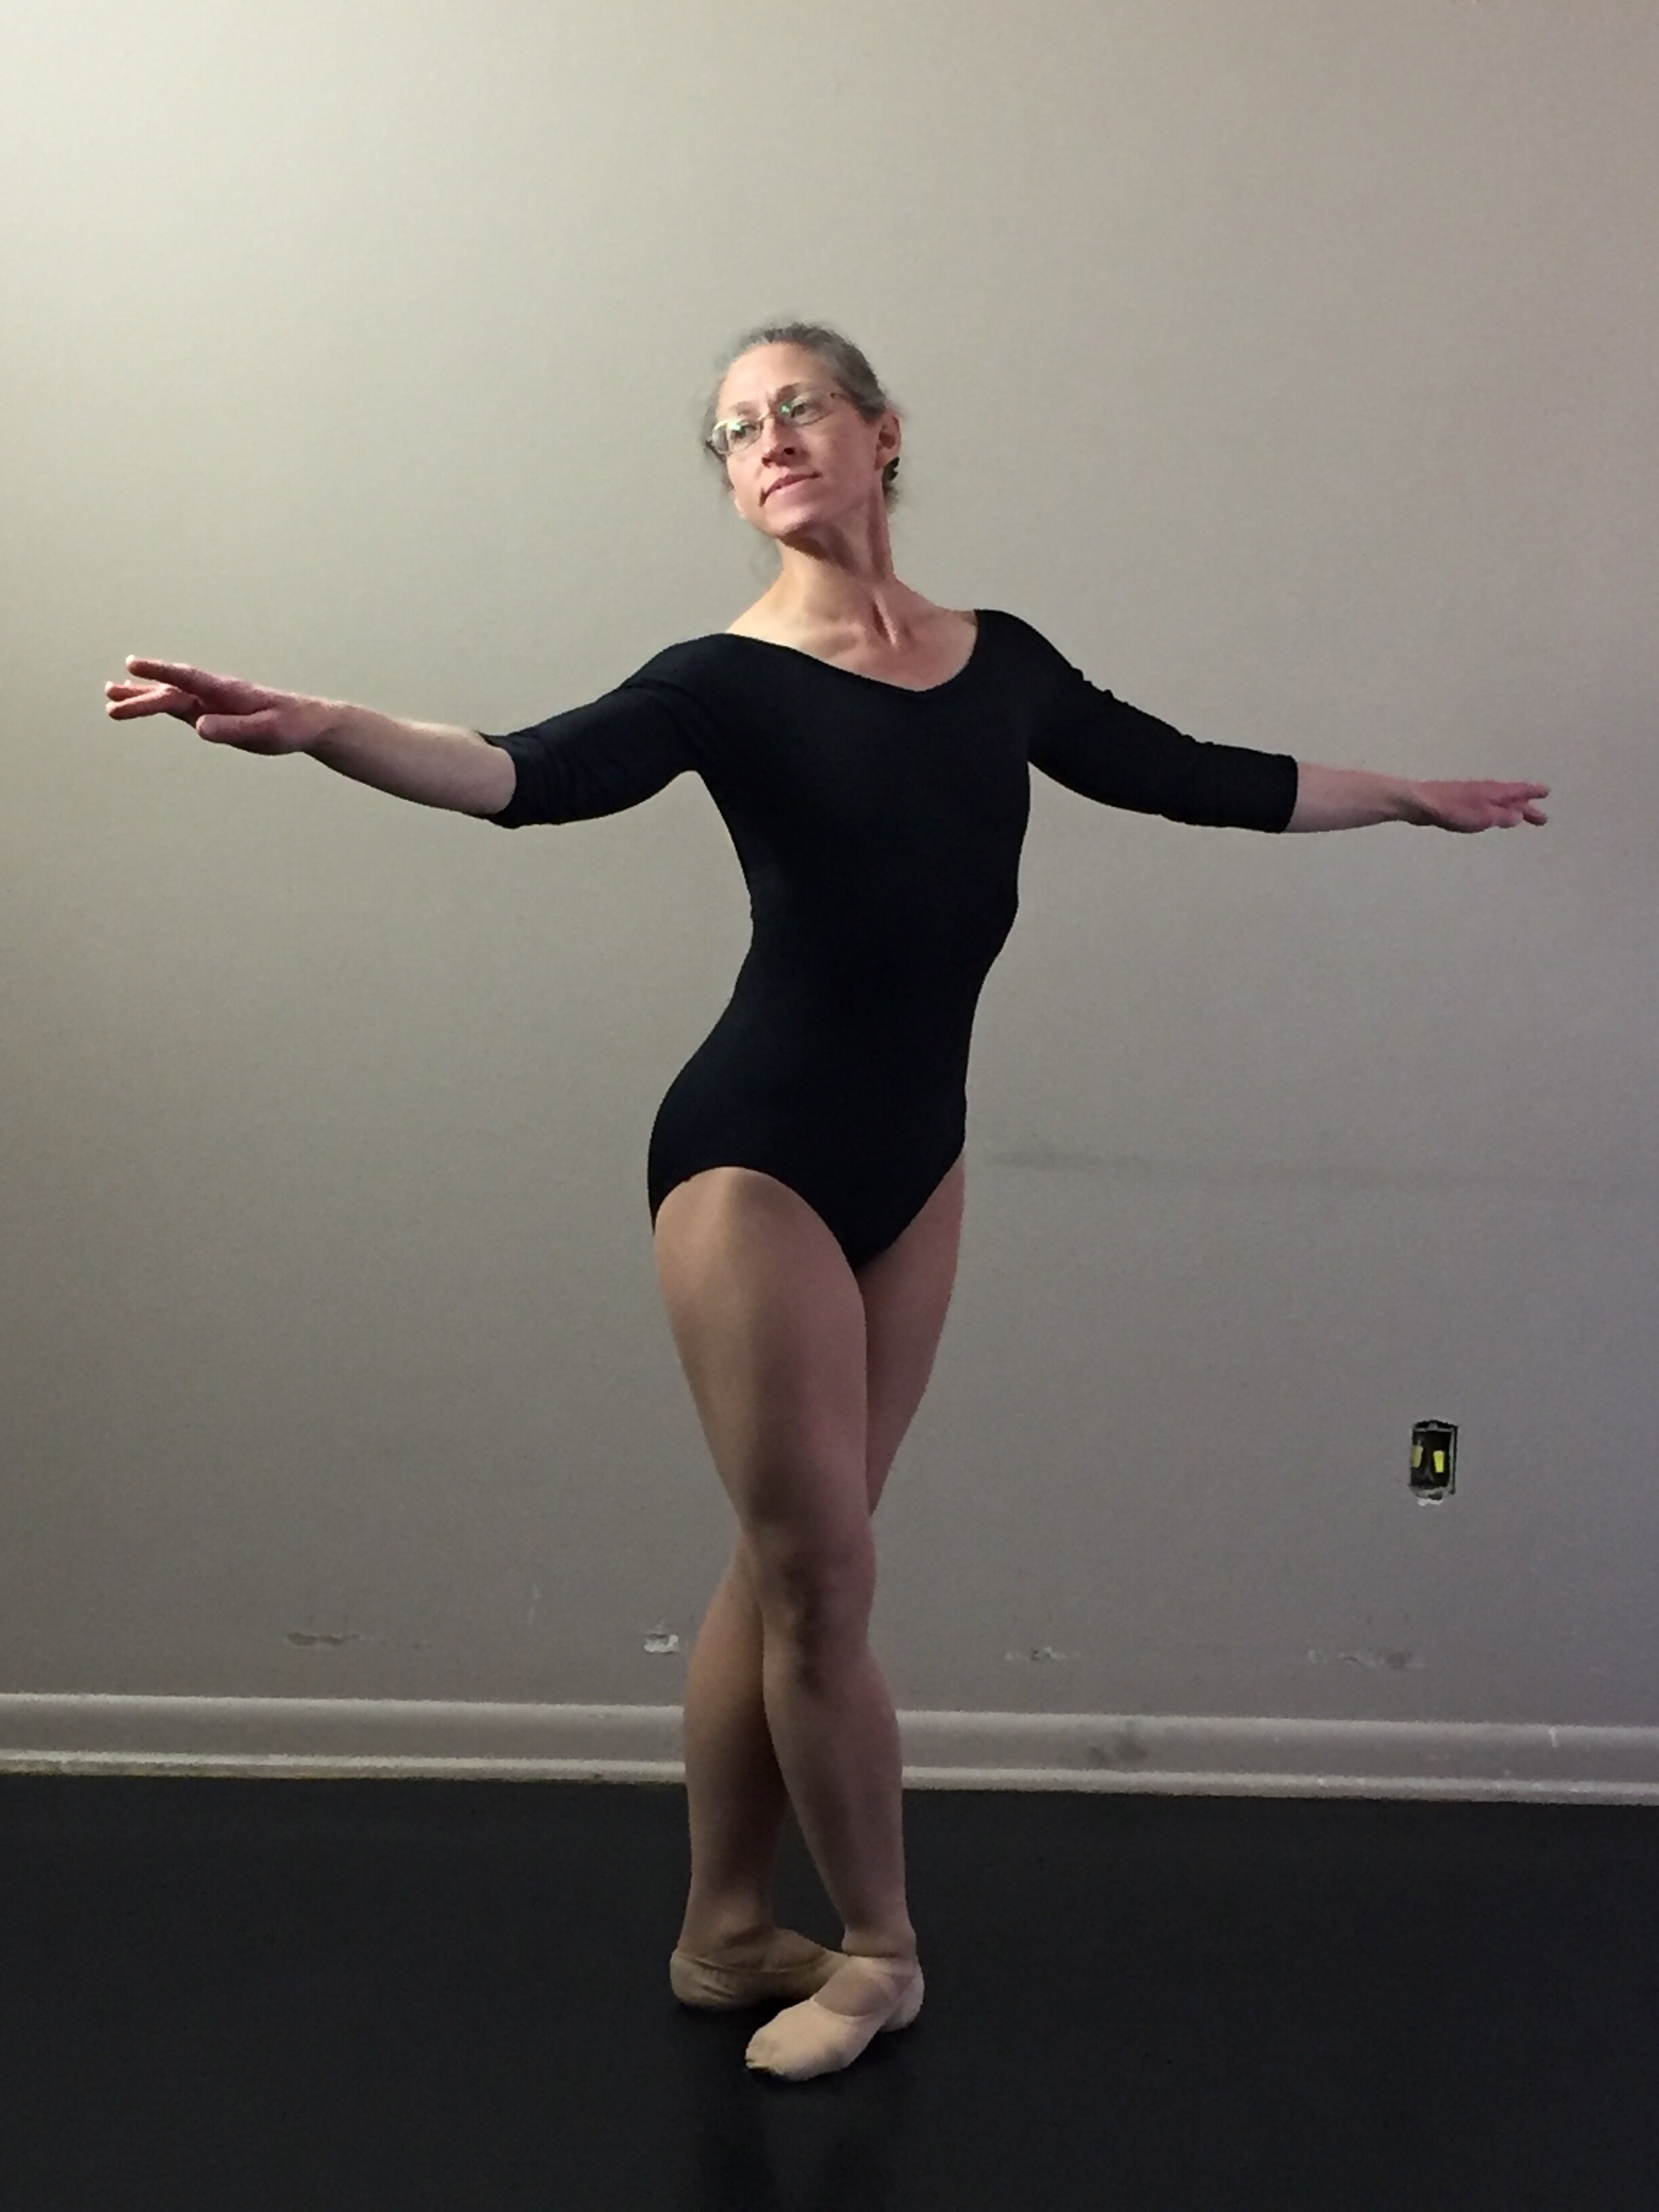
Stand with your body in croise (angled an eighth turn from front). If the arms are in preparatory to begin, they will rise together to a circular First Position across from your diaphragm. The eyes follow the palm of the downstage hand (that one which is closest to the audience or front) as the head inclines slightly over the upstage shoulder (that one which is furthest from the front).
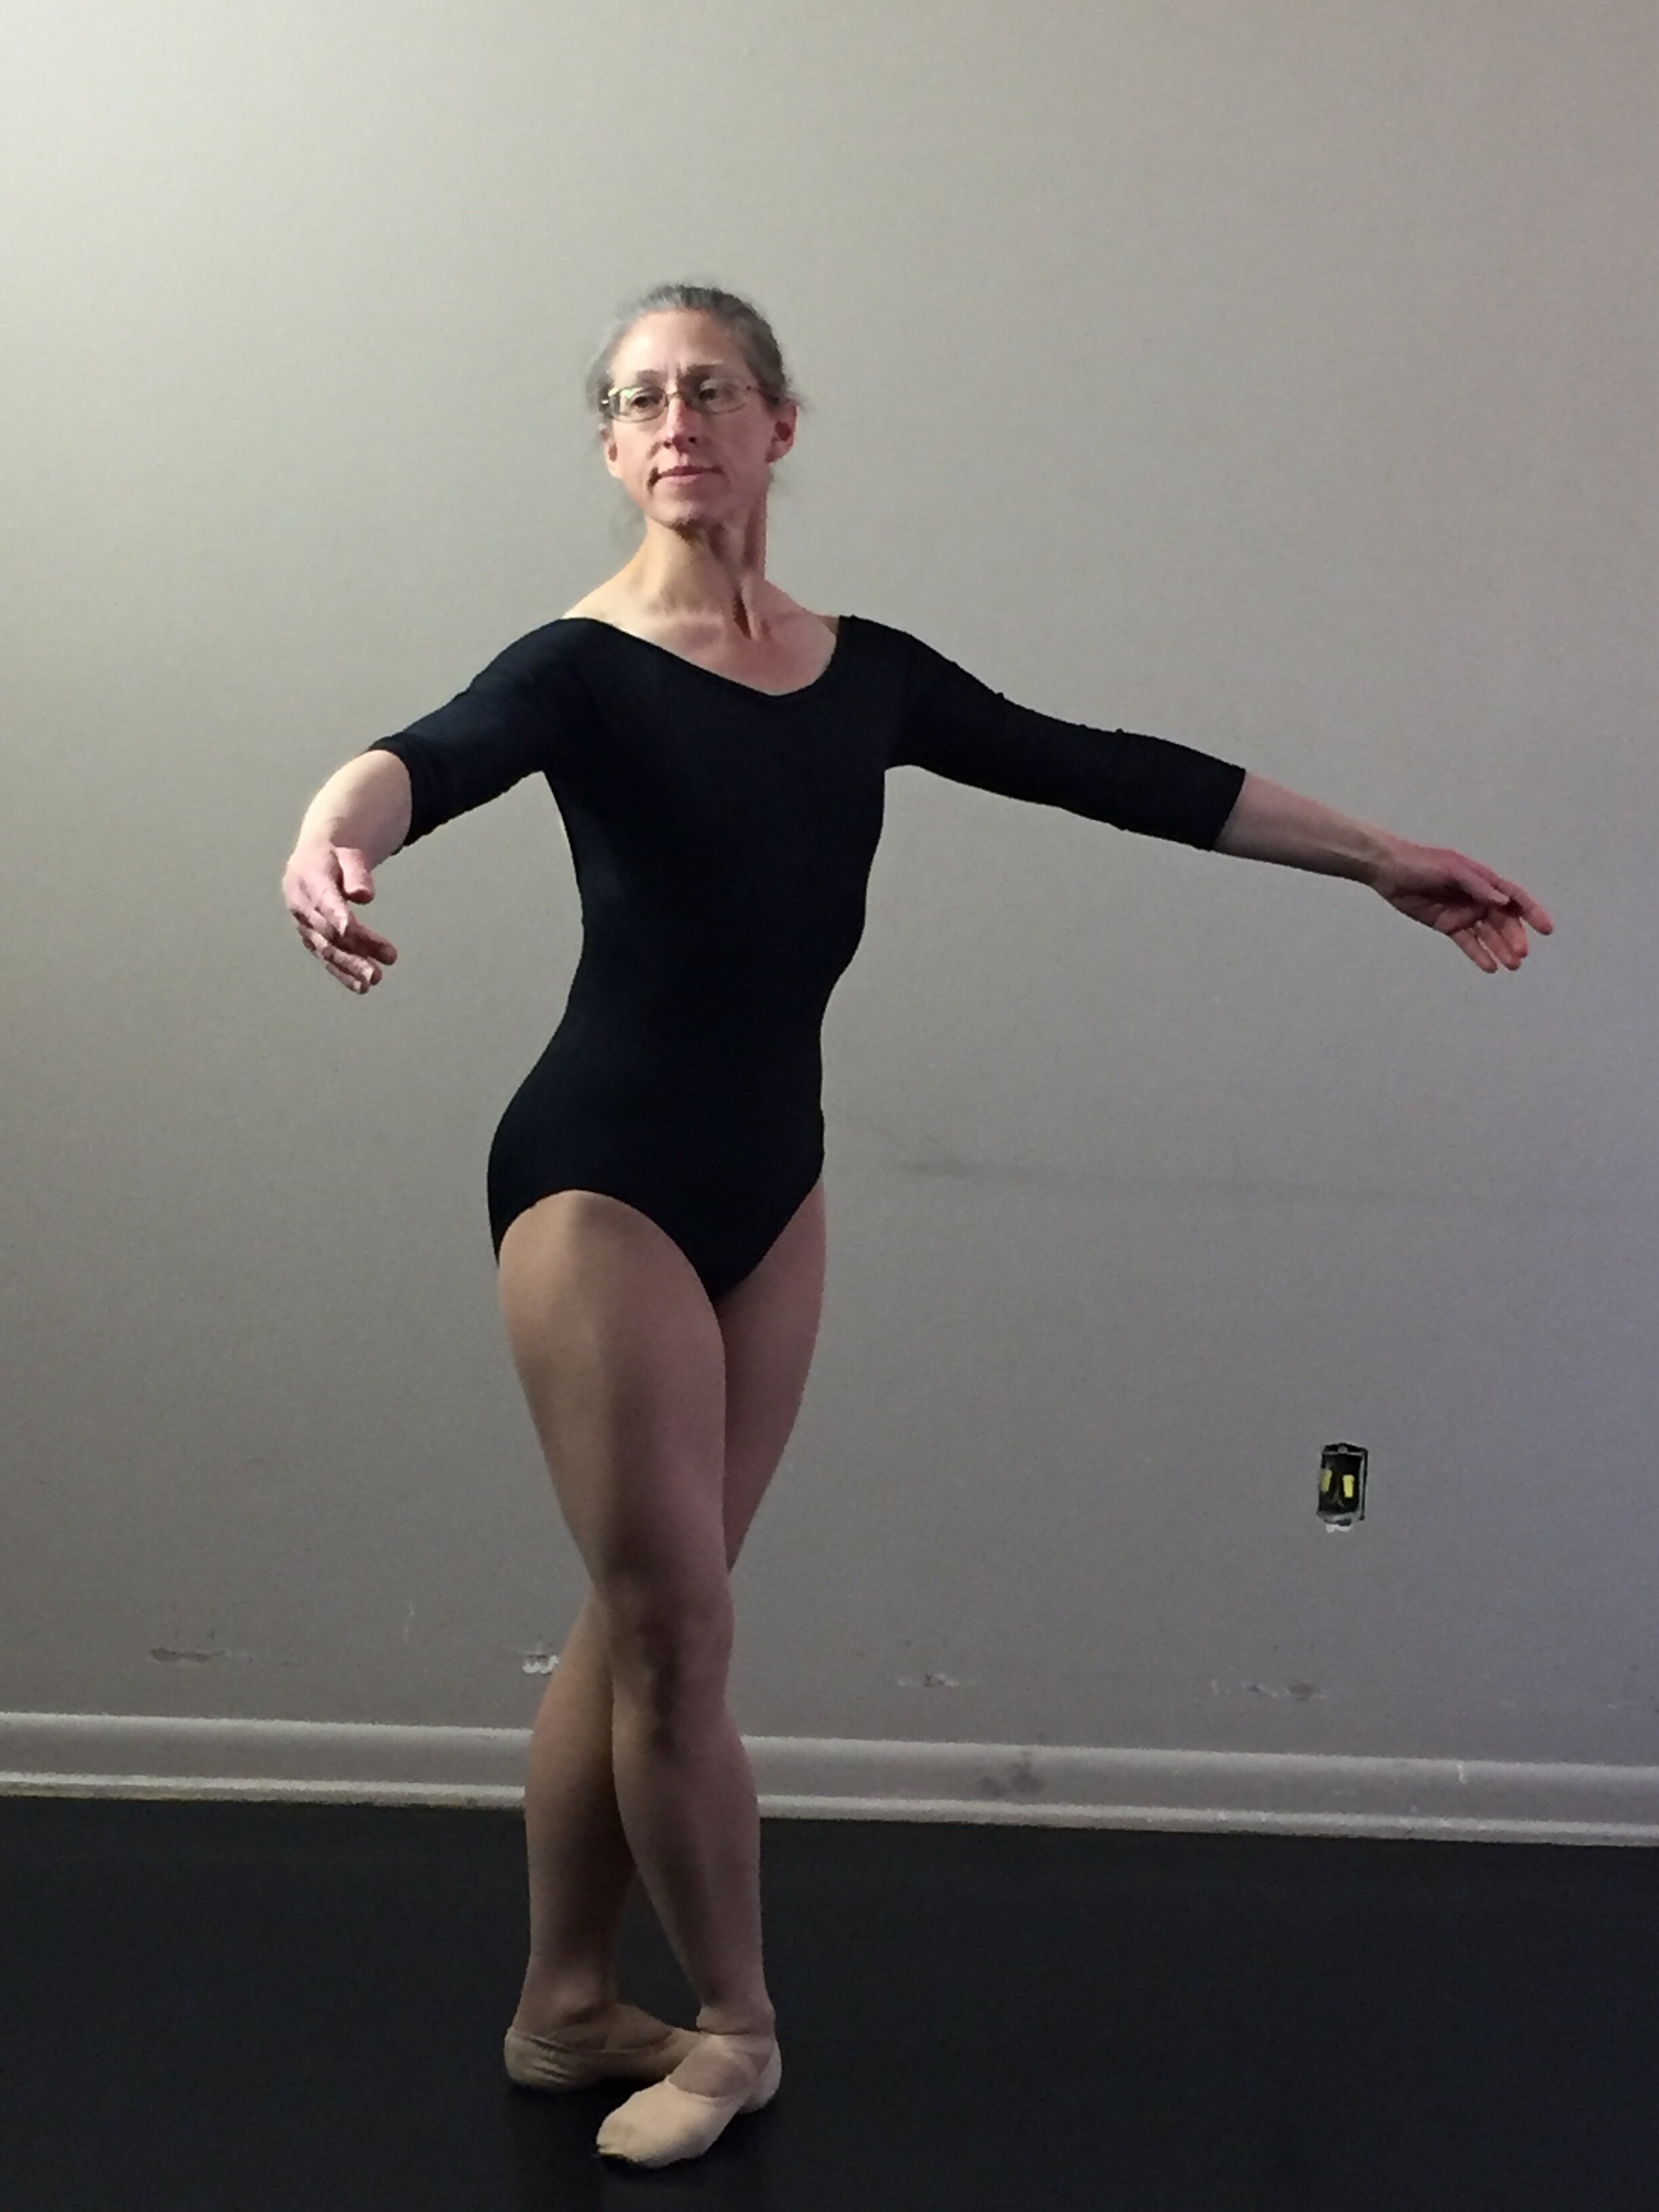
From this point, they part ways. The upstage arm rises overhead to Third Position while the downstage arm opens to Second Position. During this movement the eyes follow the downstage hand towards the front.


Now your upstage arm opens to Second Position and the eyes and head follow this movement. While the upstage arm continues its movement downward into Preparatory Position, the downstage arm moves up from the side to Third Position. This downstage arm should lead its movement with the back of the hand, which turns as it arrives overhead. Simultaneously, the focus and head turn downstage again with a slight incline forward, looking under the downstage arm. From here, the arms move from their opposite positions towards one another, meeting in First Position where the focus is again on the downstage hand with the head slightly inclined over the upstage shoulder.
The Second Port de Bras involves quite a bit more complexity than First Port de Bras, both in the movement of the arms as well as in the use of the head and focus. It should be studied carefully as it provides an excellent basis from which to develop the coordination of arms and head together. The fluid and correct movement of arms and head are crucial training for a dancer whose movements may look unnatural, awkward, lifeless and robotic without these details. The dancer with elegant, expressive, fluid arms and head movements can draw an audience in to the internal emotional world the dancer seeks to convey while a dancer without this quality will generally deny his/her audience this deeper experience of the performance.

Vaganova First Port de Bras
In my previous blog we delved into the nitty gritty details of the various arm positions in classical ballet. In this and the next several blogs, we will closely analyze how the arms should move from one position to another. In Vaganova technique, there are six established port de bras exercises designed to train dancers in the graceful and fluid movement of the arms coordinated with the head and the rest of the body. I will address each one of these exercises and its derivatives in separate blog posts in order to present the material in manageable chunks. As you progress through these port de bras blogs you may wish to refer back to Zombie, Doll, Swan or Human – Its all in the Arms to remind yourself of some of the specific arm position details. I also recommend that you practice your port de bras AS you are reading, taking each detail into account and creating a muscle memory as you do so.

Vaganova First Port de Bras progresses from preparatory through 1st position of the arms up to 3rd and open to 2nd position, returning to preparatory at the completion of the movement. As the arms and hands pass through their positions, they should adhere to the descriptions set forth in the previous blog. But how do they move from one position to another? And how are the head and eye focus involved?
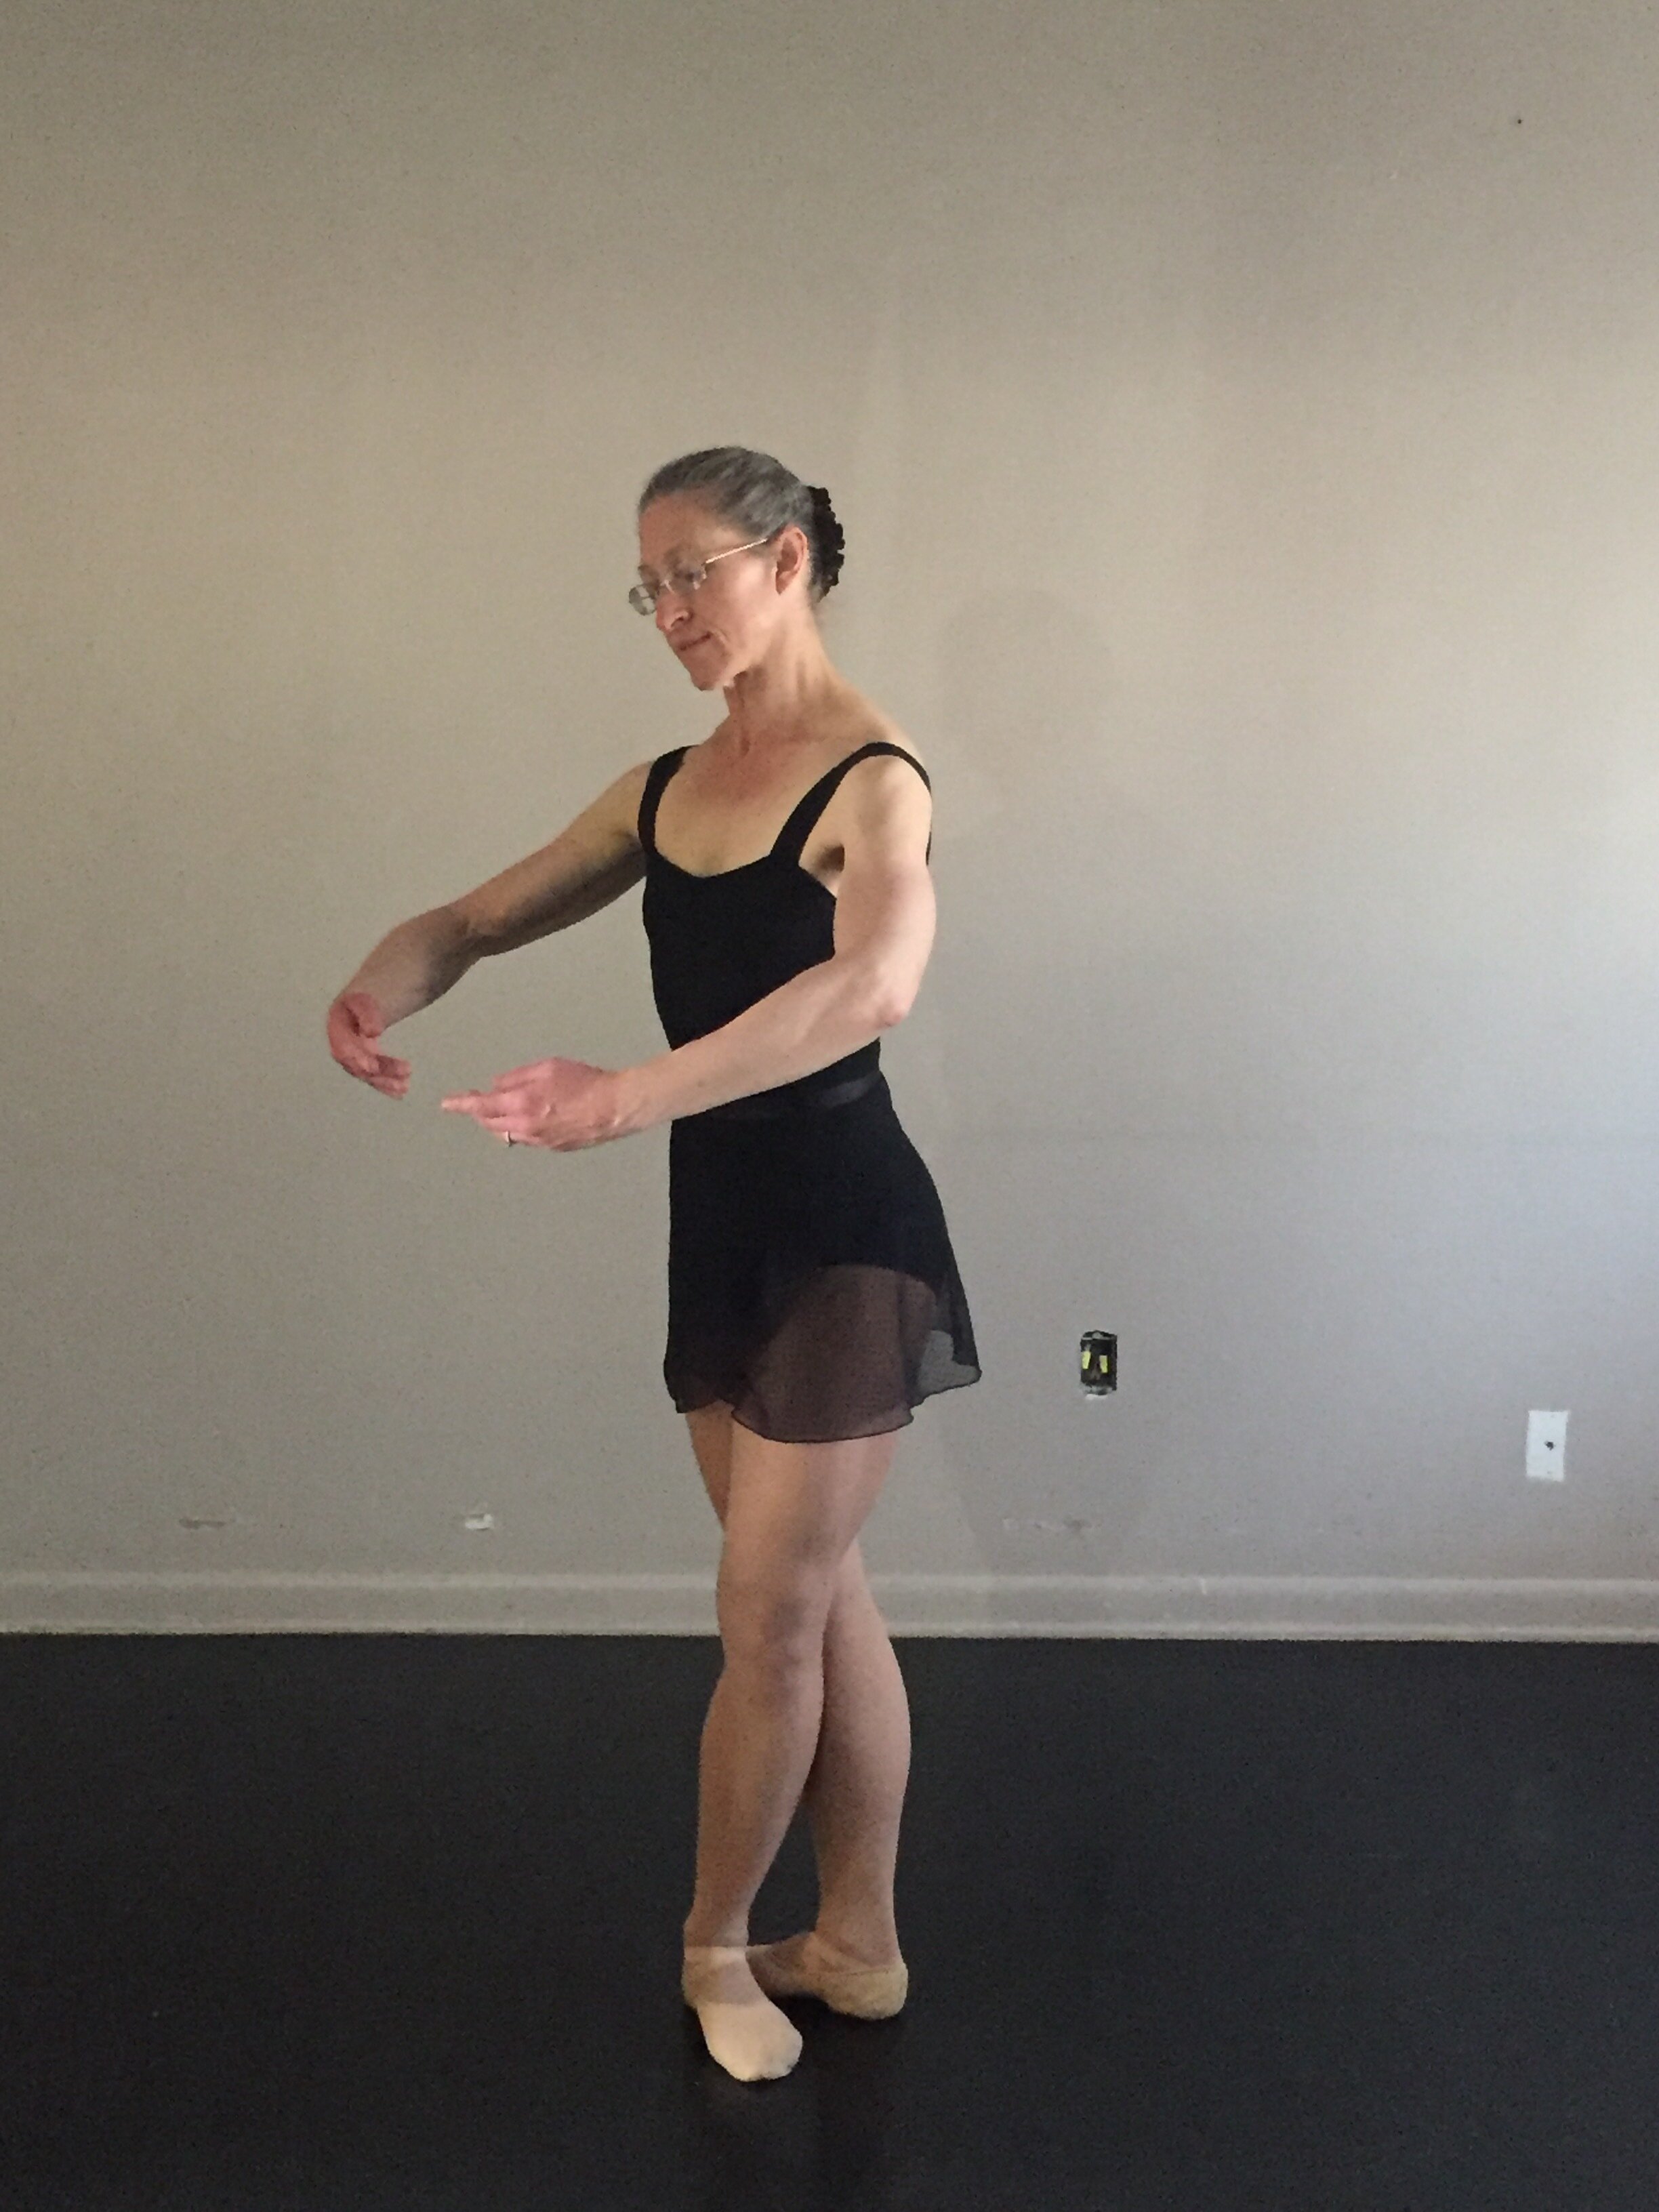
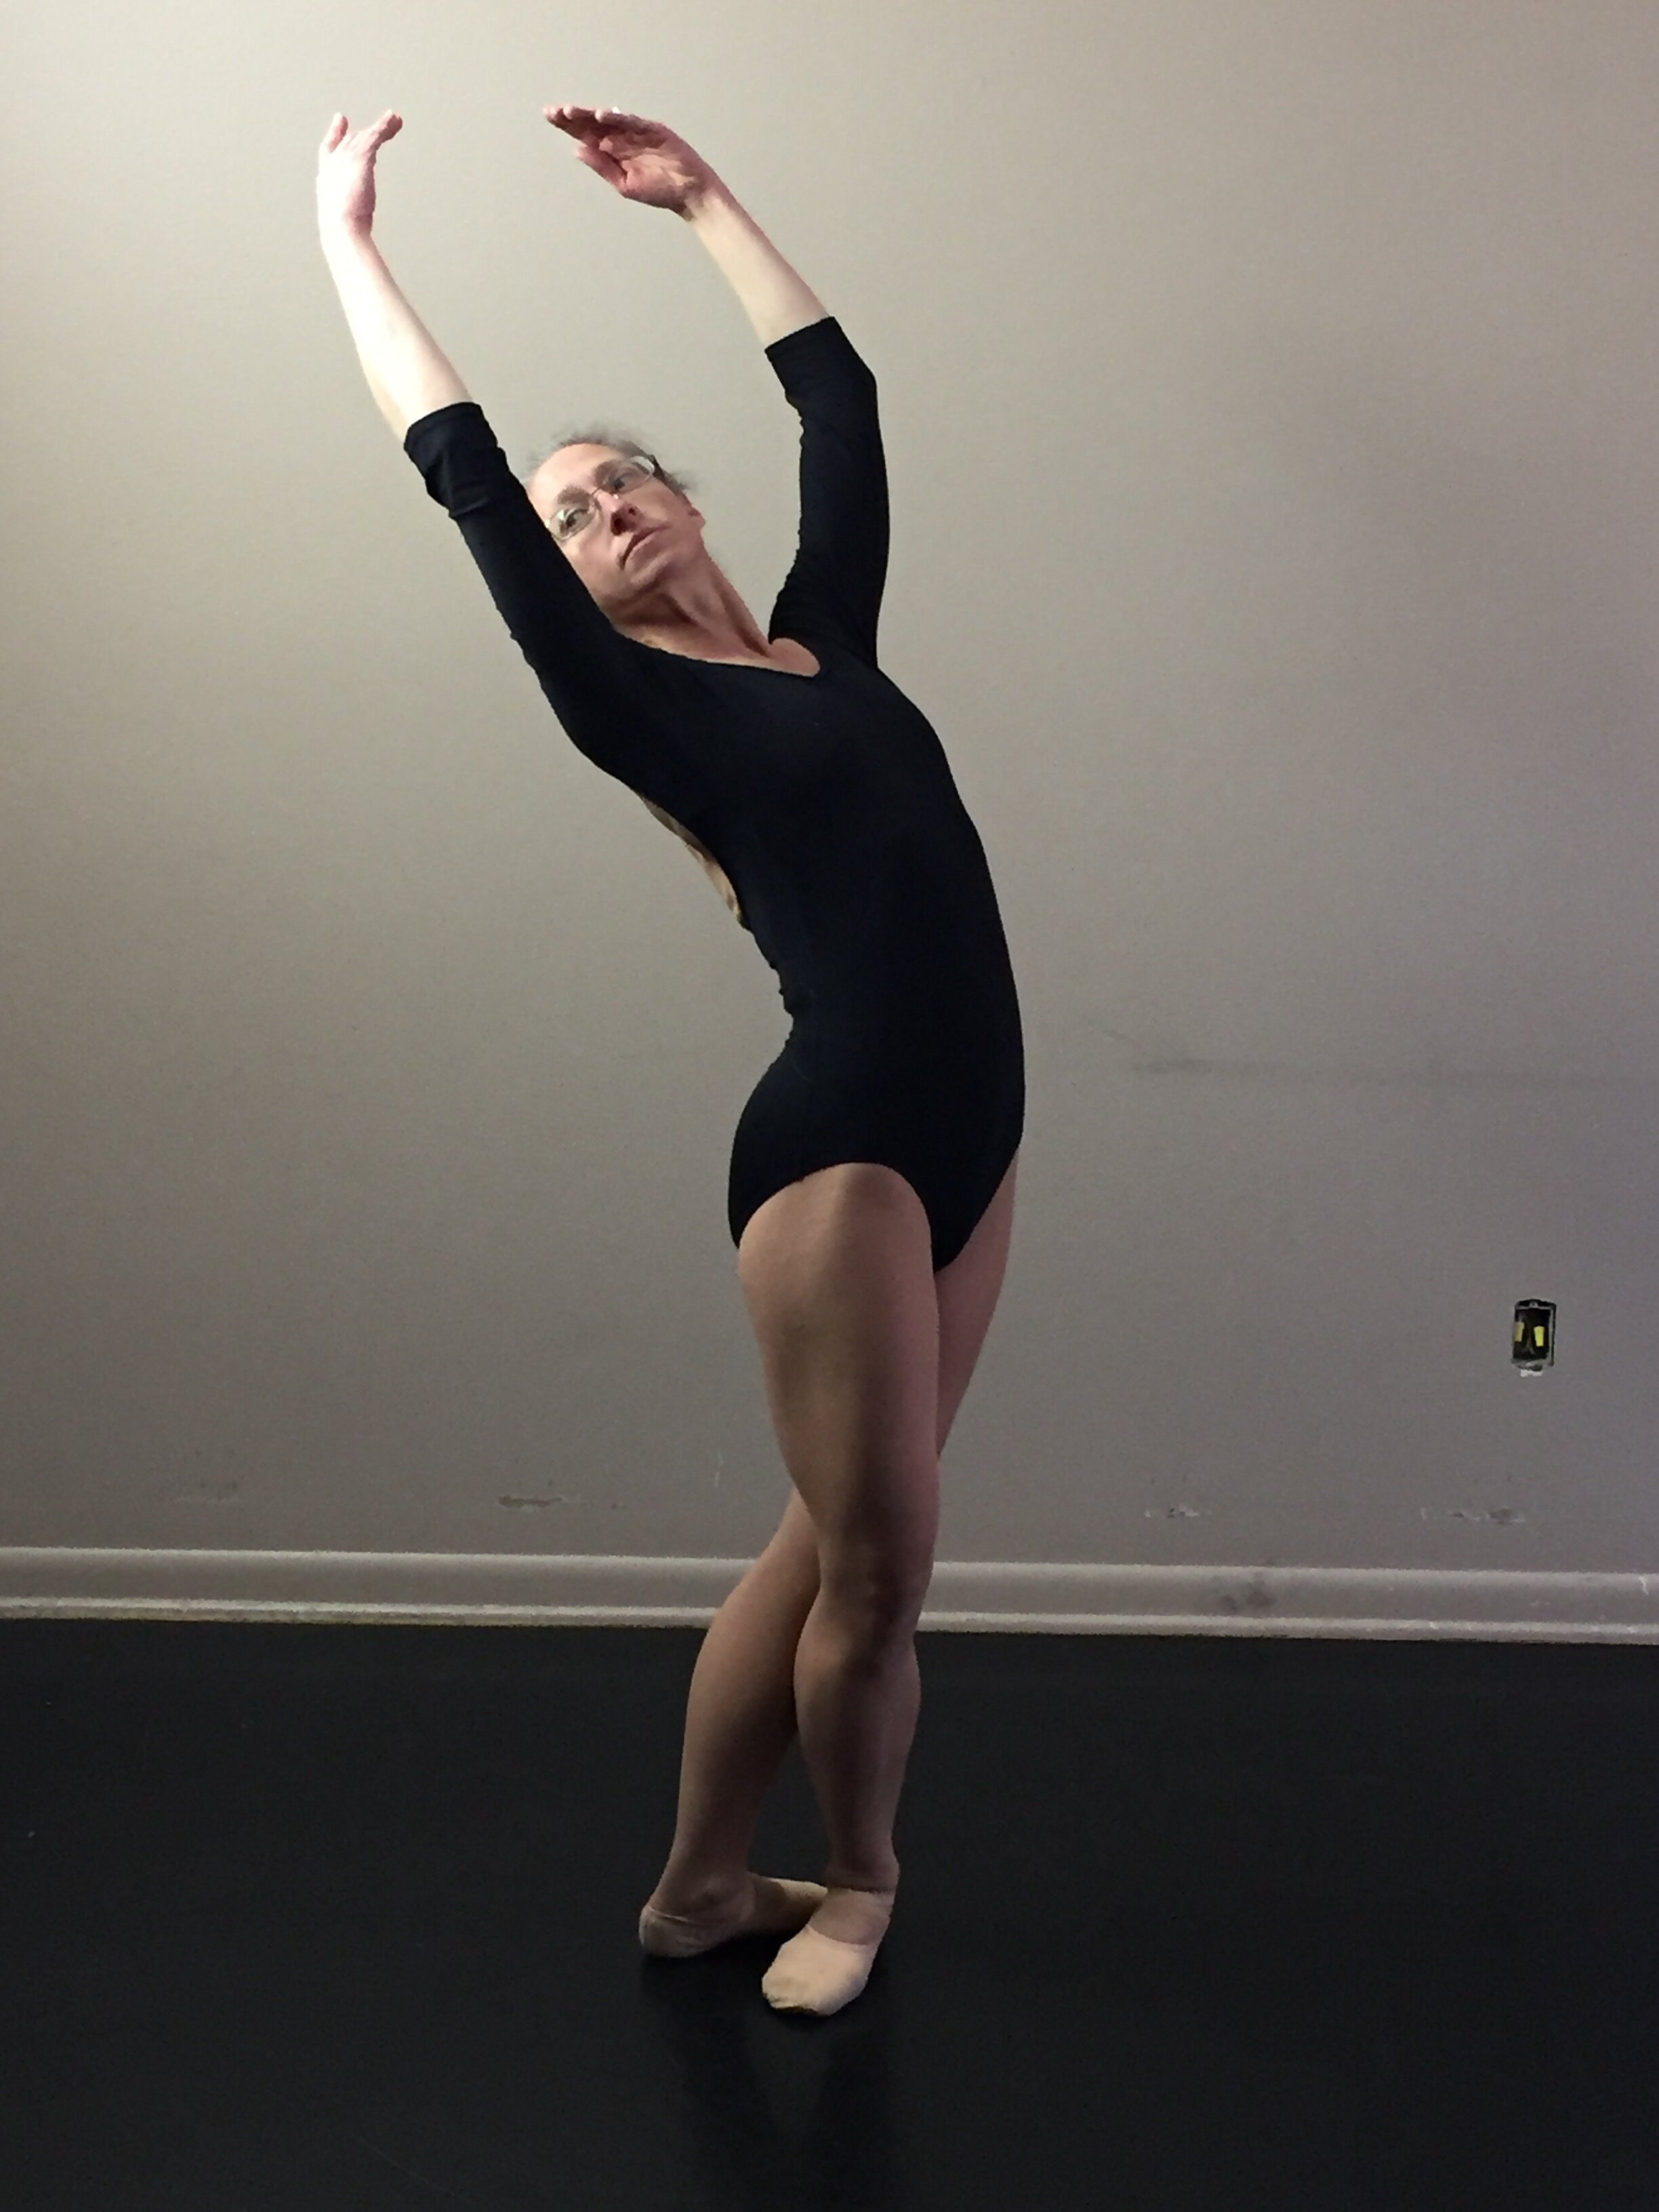
The goal is to achieve movement that appears both natural and easy, while being pure (not extra “flowery”) and fluid. It is important not to disturb the shoulders or torso while moving the arms. Moving from Preparatory position to 1st position, the hands and arms should feel as if they are “gathering up” a large round basket. Neither the hands nor the elbows should be allowed to drag behind, but must be lifted together while the elbows deepen their bend to create the circular shape of 1st position, coming from the more elongated oval shape of Preparatory position. The eyes should be cast into the palm of the downstage hand while the top of the head inclines slightly over the upstage shoulder.


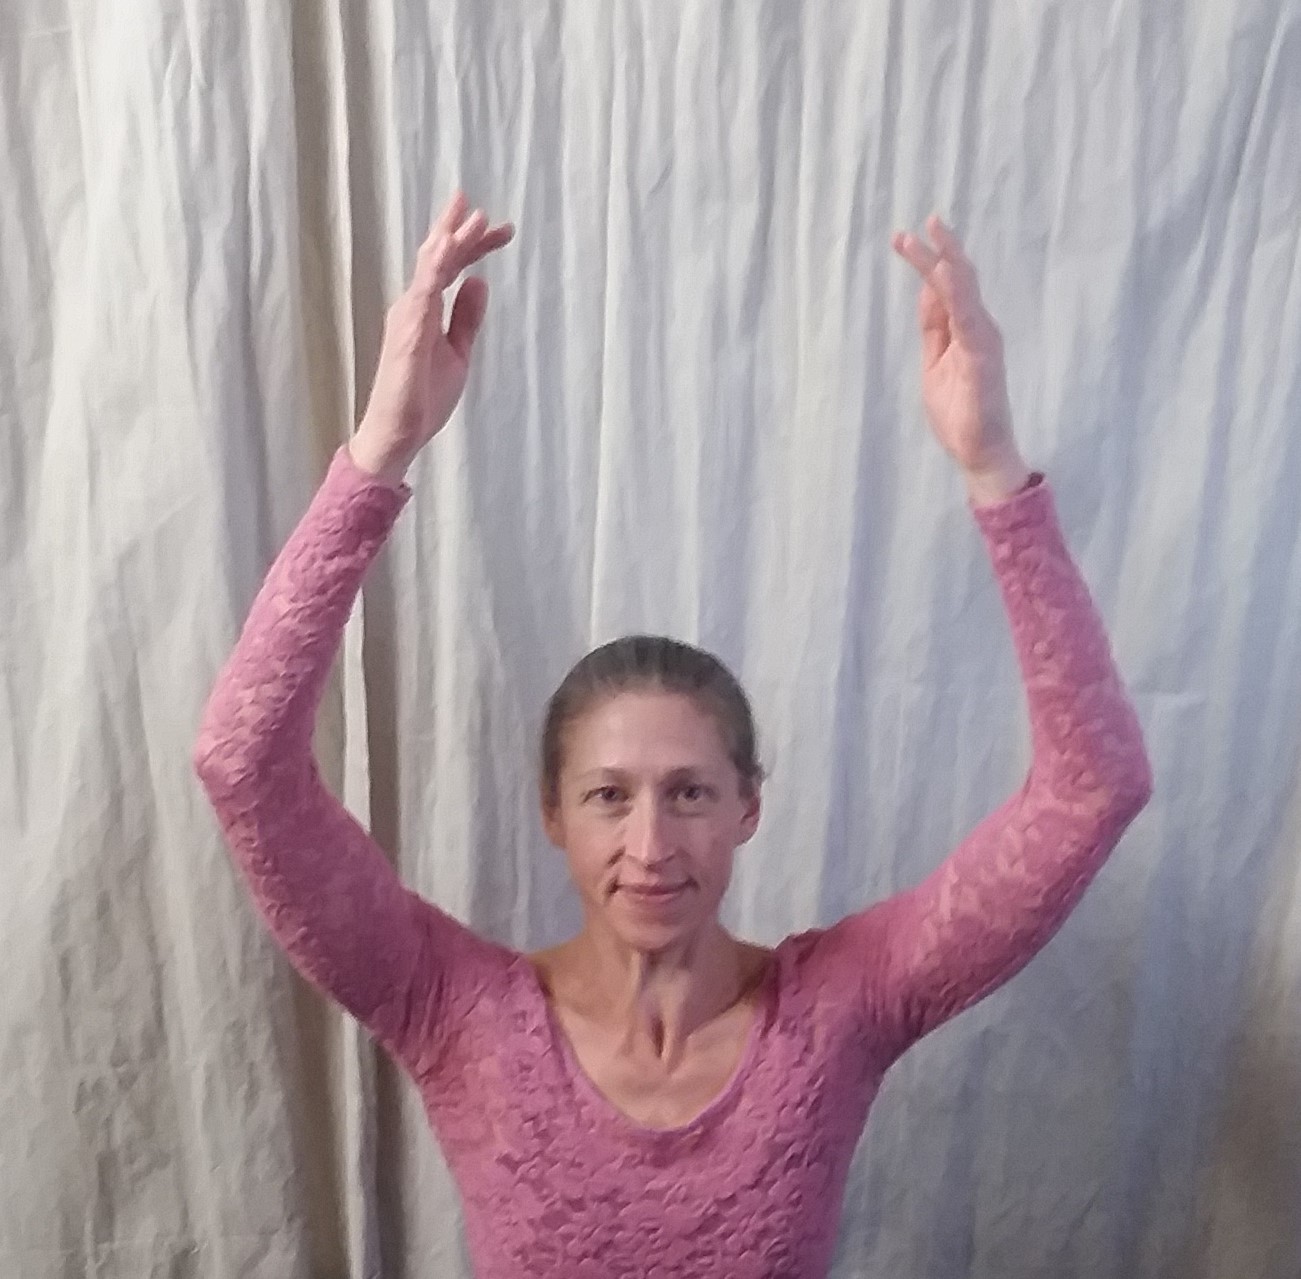
As the arms continue their trajectory up from 1st position to 3rd position, the elbows again elongate to create an oval shape. During this portion of the First Port de Bras, the shoulders must be actively kept in place so that they do not ride up with the arms, causing a closing-off and shortening of the neck. Meanwhile, there must also be energy devoted to keeping the elbows open as they will otherwise tend to close inward slightly, causing a collapsed-oval look and angularity of the elbow joint, both of which should be avoided. The focus of the eyes remains in the palm of the downstage hand while the chin gradually and slightly lifts, the head straightening on the neck. One must be careful not to lift the chin too high here as this causes the dancer’s face to be largely lost to the audience who will then see mostly neck and chin.

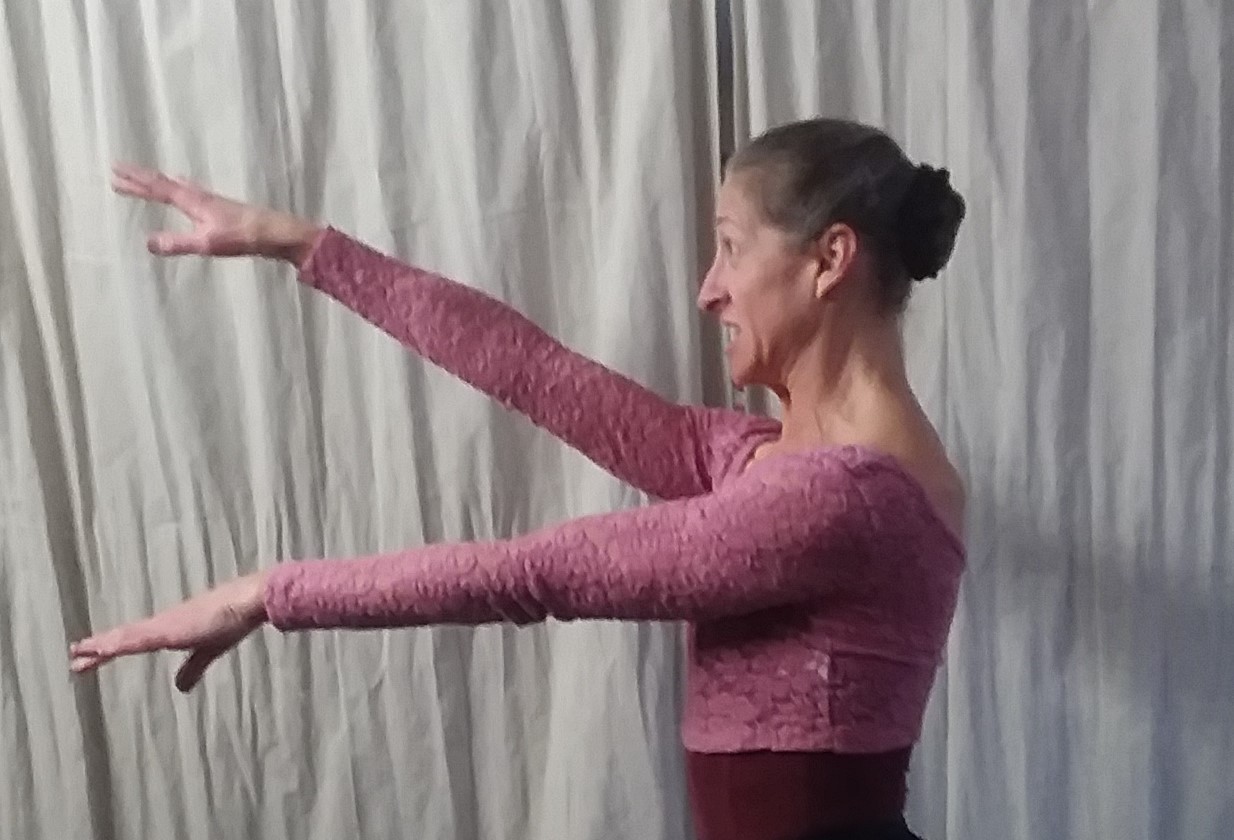
From 3rd position, the arms open to 2nd position with a very slight initiation from the fingers. The hands gradually turn into their correct placement for 2nd position (see previous blog) while the elbows maintain their elongated gentle curve. The focus follows the downstage hand with the chin turning all the way to the downstage shoulder.

To begin the movement from 2nd position returning to Preparatory, the hands initiate a slight “breath” of the arms, allowing the hands to face downward as the outsides of the elbows also turn downward. During this breath, the arms should not lift. The insides of the wrists lead the movement of the arms down to Preparatory while the fingers trail slightly behind without creating an exaggerated break of the line at the wrist. The eyes follow the breath and movement of the downstage hand and the head tilts slightly down as the arms move, lifting up and out over the downstage shoulder as the arms arrive in Preparatory.
Now you have the knowledge to execute a masterful First Port de Bras! Be sure to practice both sides and take care that you are using your head correctly and passing cleanly and elegantly through each of the arm positions as described in my previous blog. Start slowly so that you can be certain you are developing the correct muscle memories by achieving each portion of the port de bras with precision. Remember that practicing things wrong just makes it harder to get them right! So, practice with diligent attention to details!

Awfully Droopy! Vaganova First Port de Bras done WRONG!

Fun, but too Flowery! Clean lines and precision are lost.

Zombie, Doll, Swan or Human - It's all in the arms!
Beware the ballerina zombie apocalypse!
A beautiful fluid port de bras (“carriage of the arms”) that emanates from the back and expresses the soul of the movement is the finishing touch that transforms an accomplished dancer into an exceptional artist. Port de bras can assist or hinder a dancer’s turns and jumps. They can make a dancer look powerful, graceful and elegant if used well, or make the dancer look weak, lazy and amateur if used poorly. They can transform the artist from human to swan or whatever the character may be. From the beginning student to the advanced dancer, attention paid to the arms and hands is essential.
In this article, we will look at the basic arm positions – pitfalls to watch out for, and pointers to keep in mind. We will attend to many fine details down to the shape and arrangement of your fingers and the rotation of the joints of the arms. How the arms are held in any position gives an air of strength, confidence and energy or of weakness, laziness or uncertainty. Learning how to hold your arms properly in each position also encourages the proper use of muscles in the back and abdomen. Correct usage of the arms will enhance your jumps and turns, your partnering, and everything else in between and beyond!
Hands and Fingers
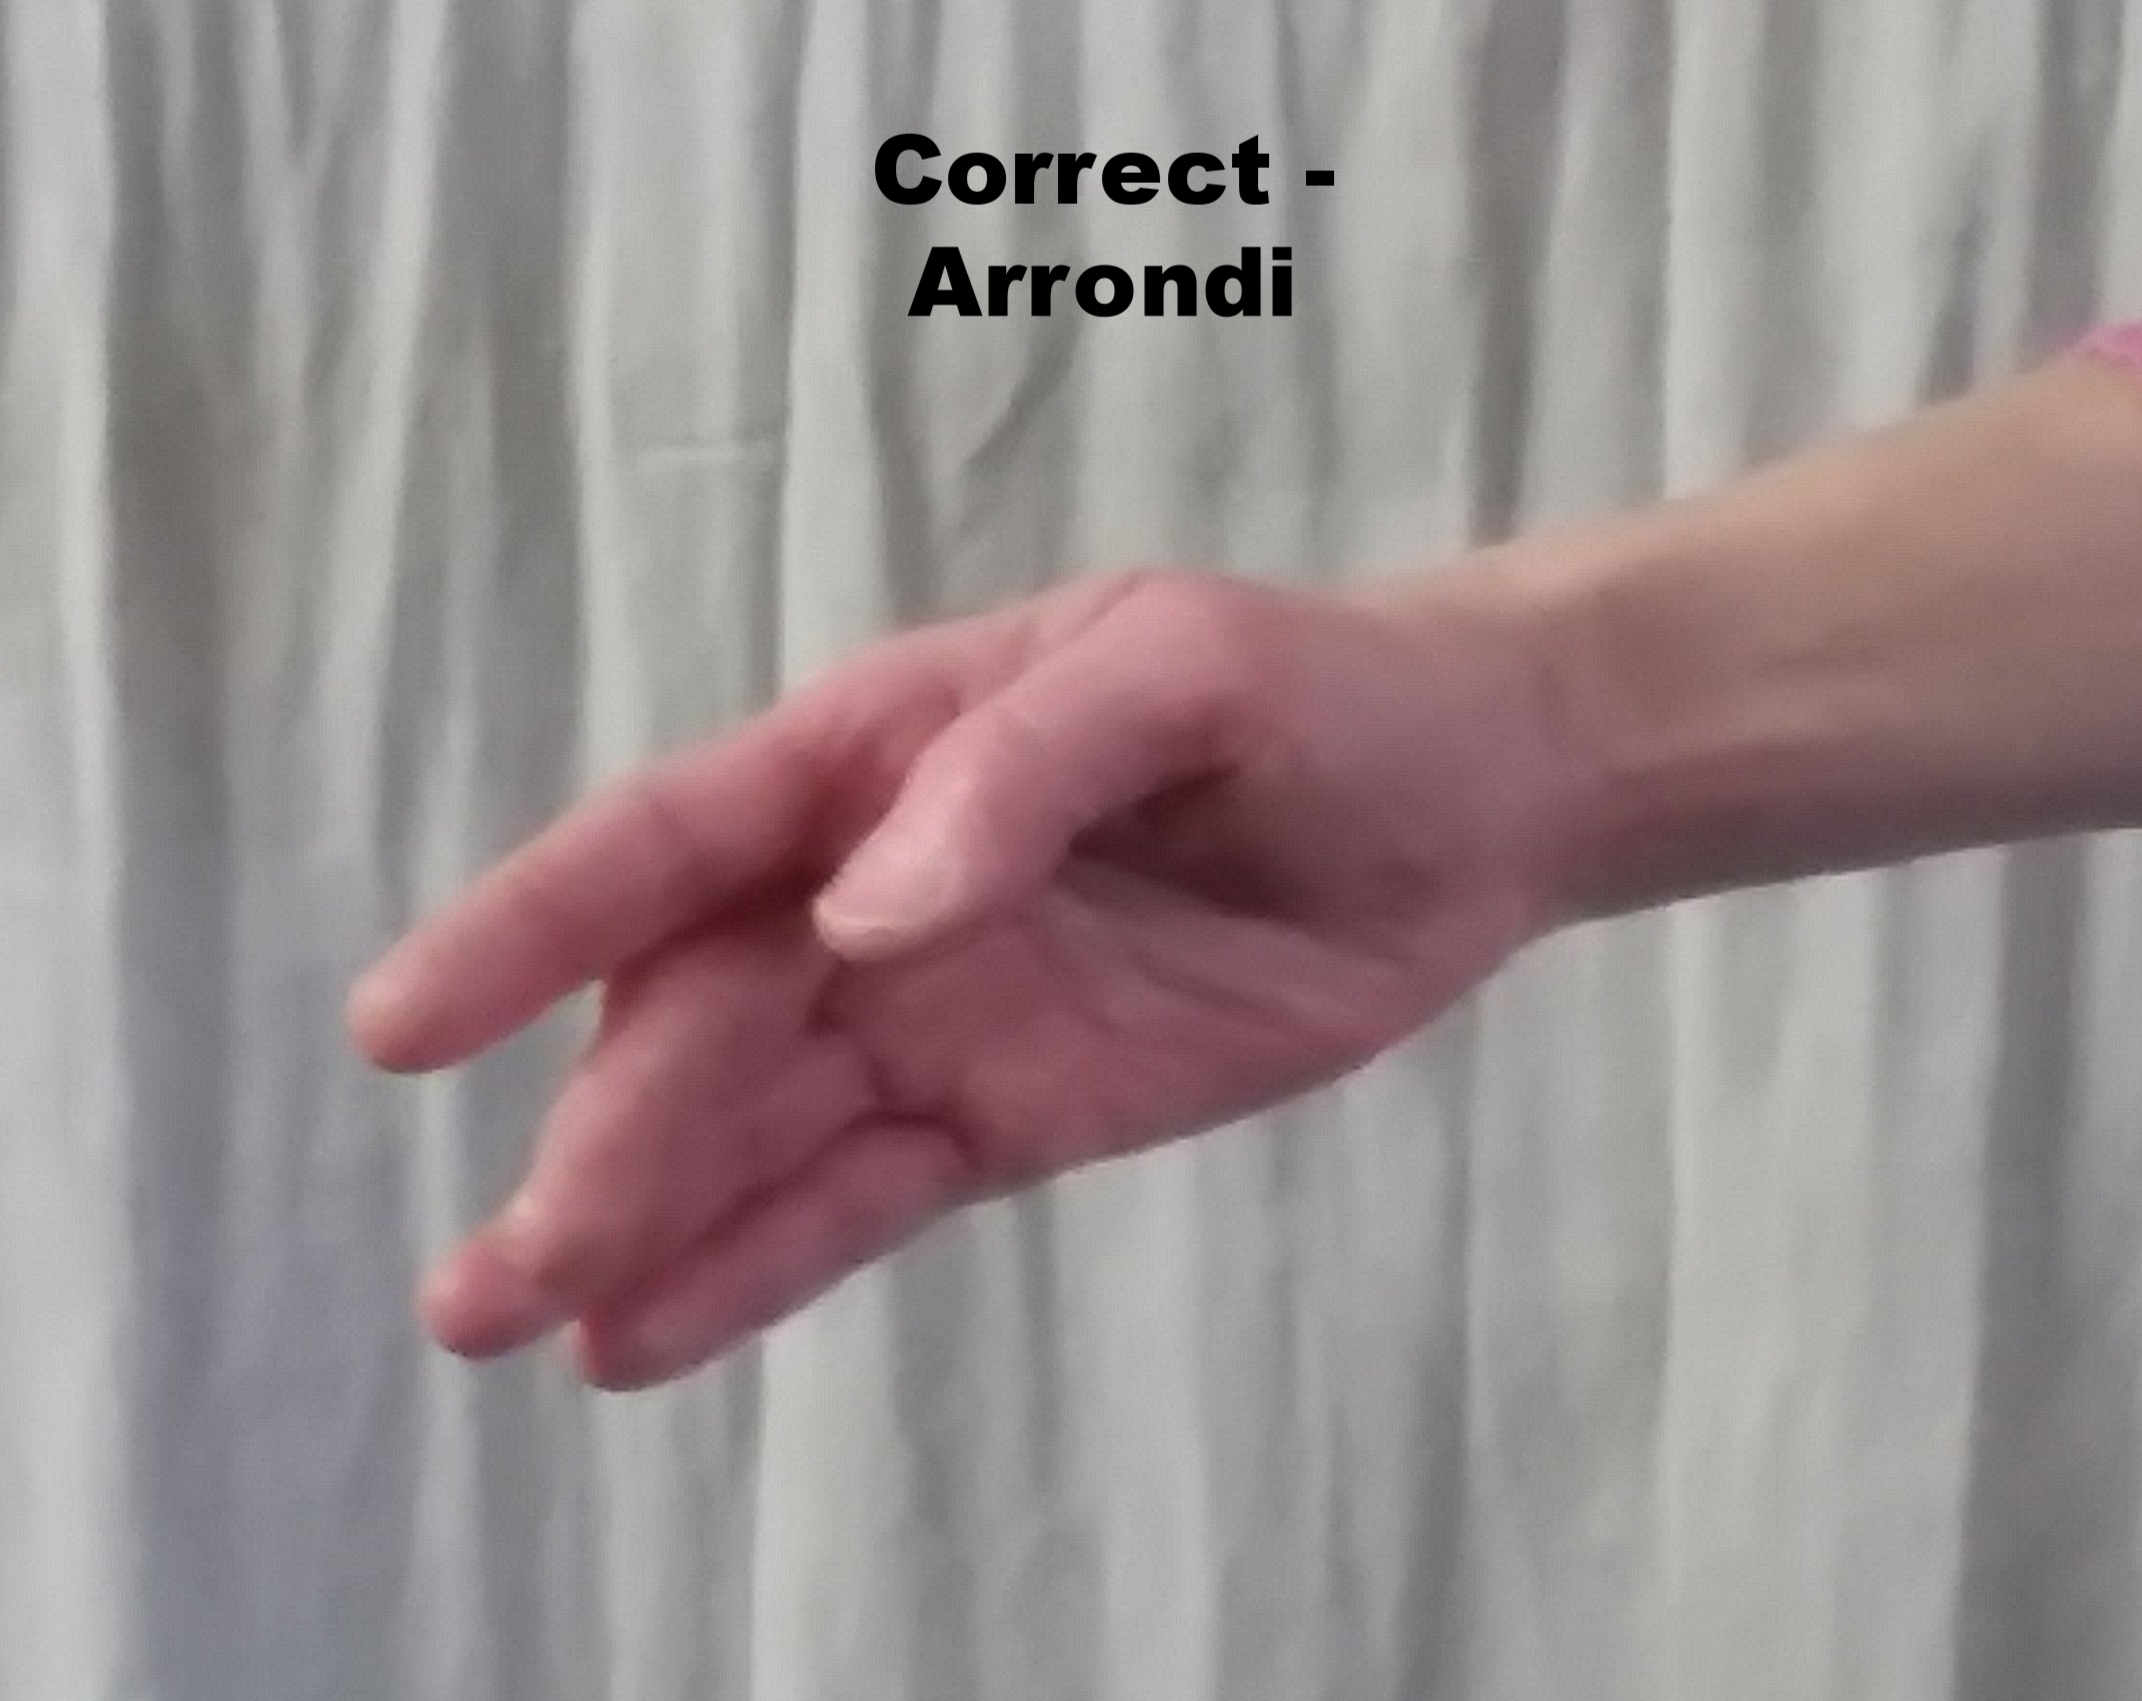
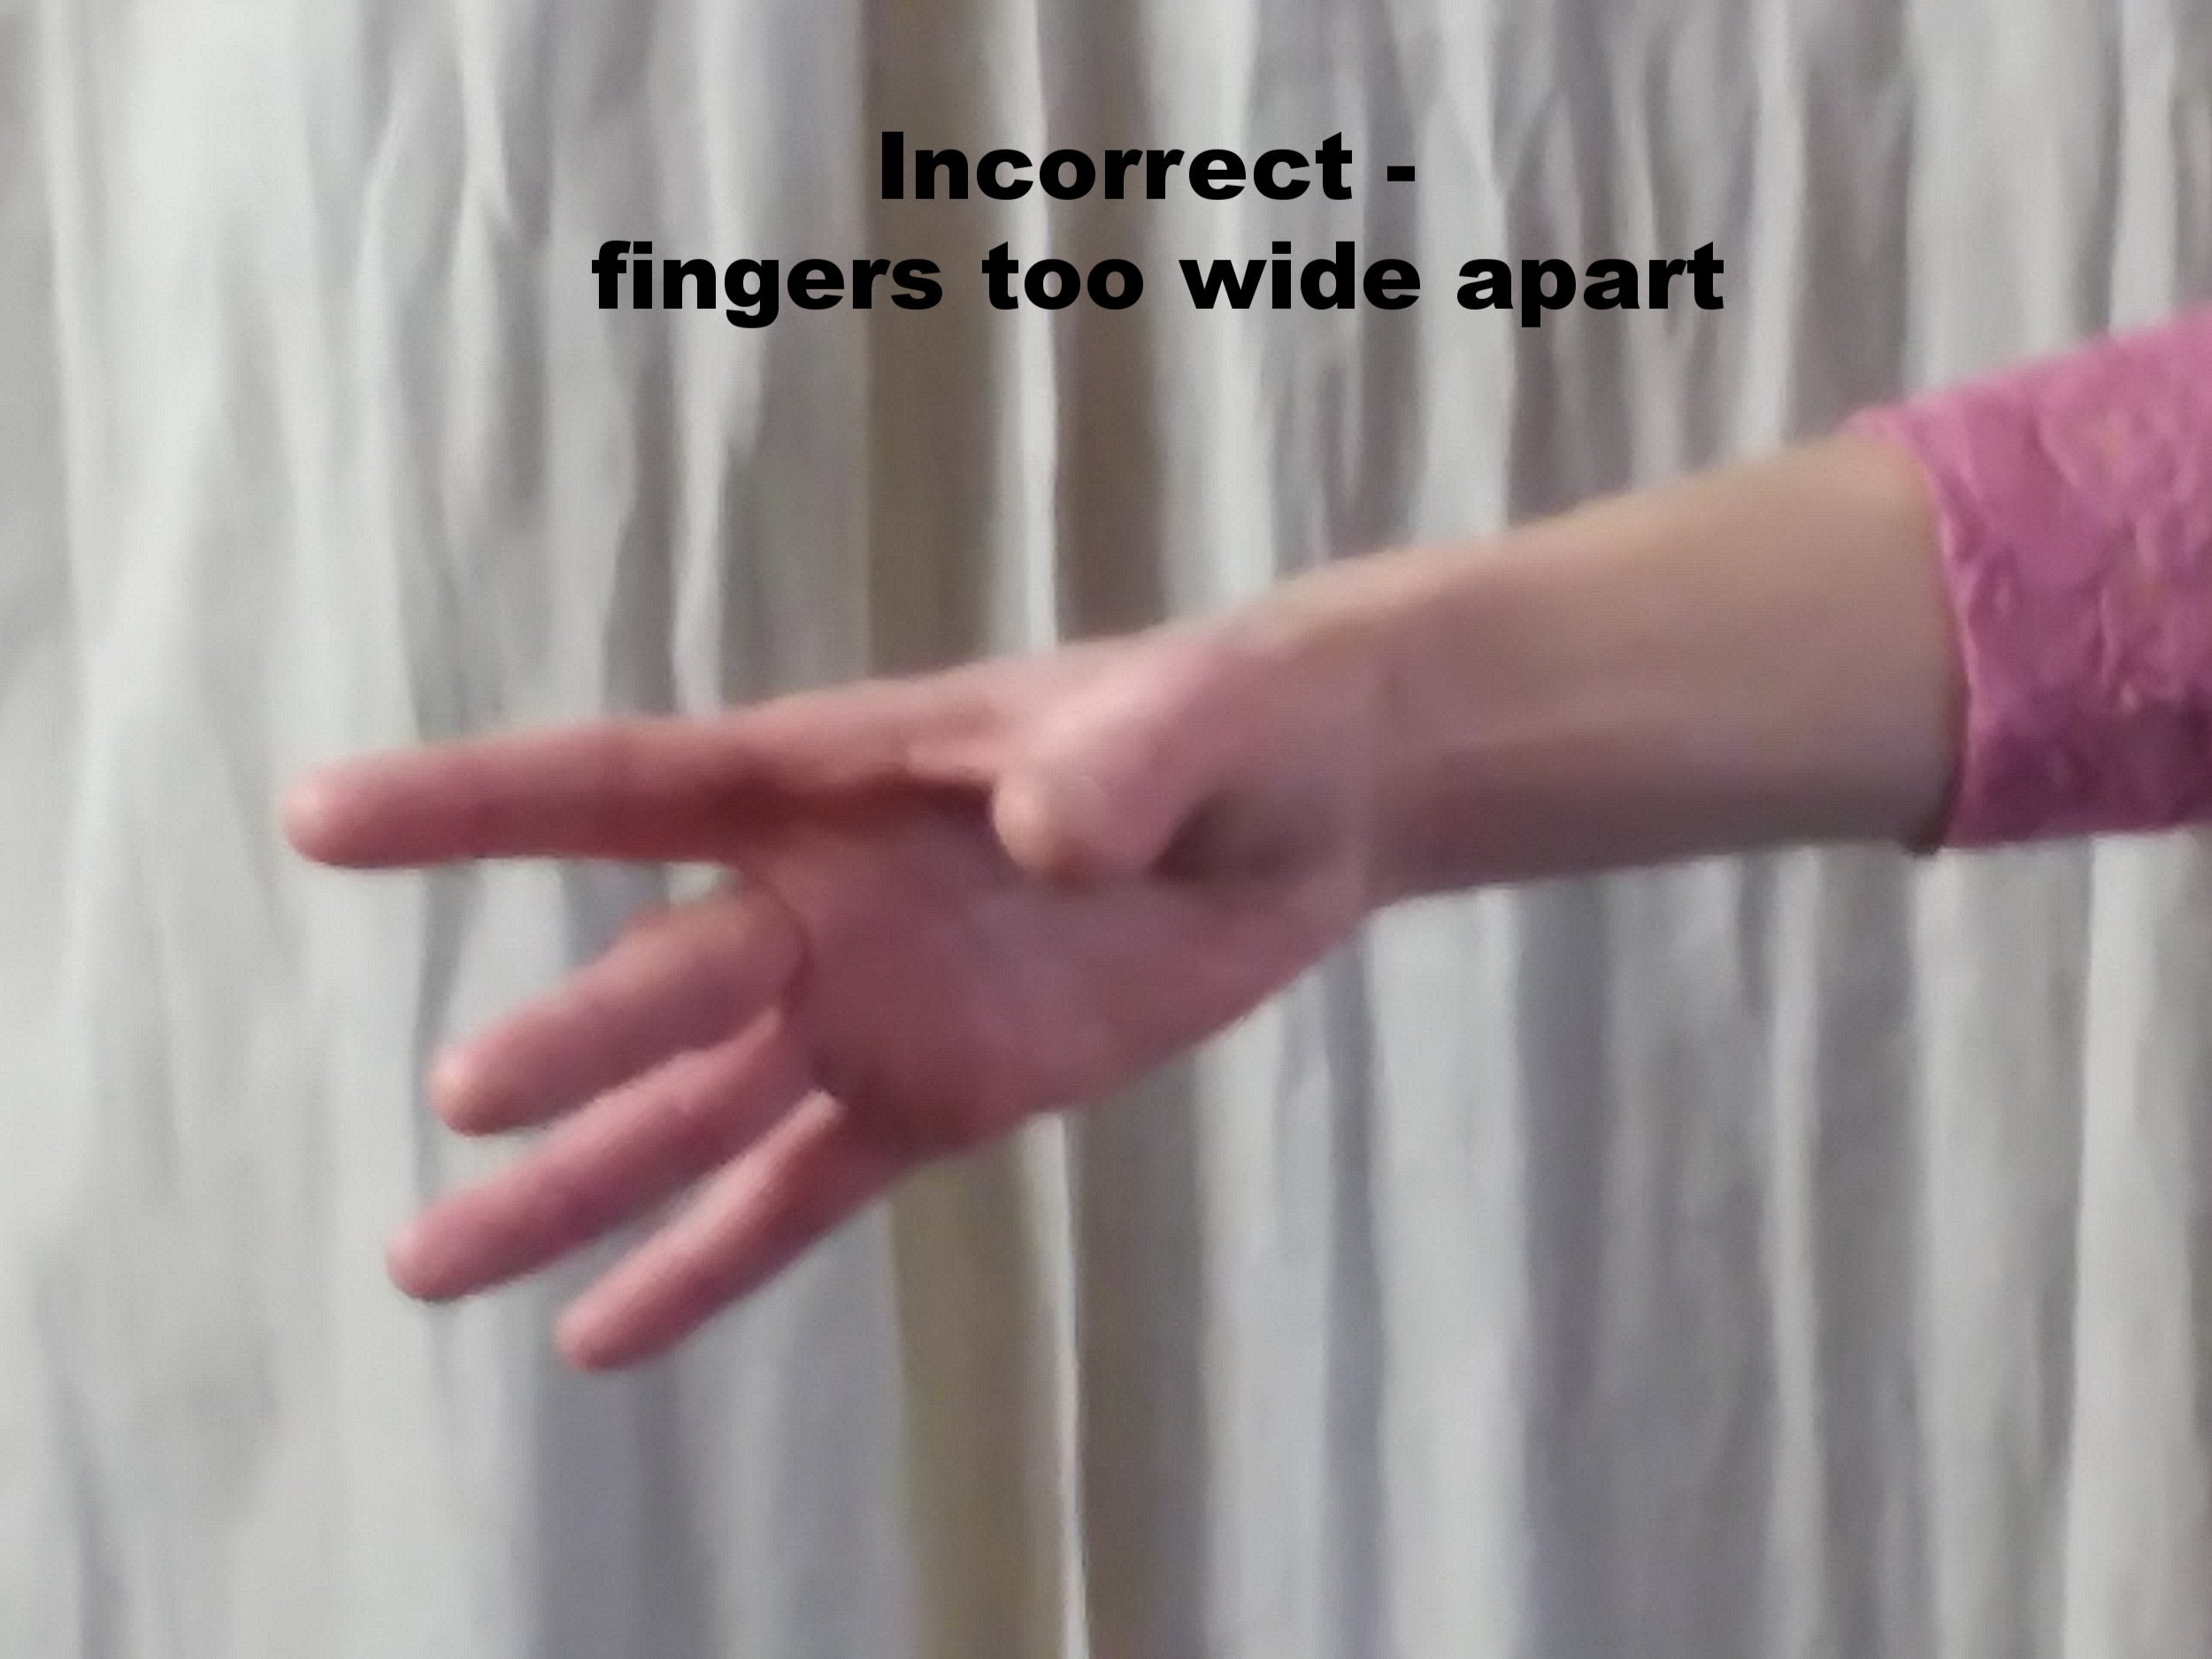
The basic ballet hand position is really just a formalization and extension of what is a rather natural relaxed position of the hand. The fingers should be very gently, subtly curved – never absolutely straight, unless you are dancing a robot dance or something of the like! The pointing finger is extended furthest open while the thumb is softly flattened in towards the pointing and middle fingers (not touching these fingers). Try to avoid the “hamburger” hold with the thumb! Most of the time, the middle, ring and pinky fingers should fan slightly outward with the middle finger furthest inward. The carpal joints closest to the palm of the hand should be very close together, maybe even touching, such that the fingers do NOT separate widely as in a spasmed “jazz” hand. This same set of carpal joints should be just gently curved out from the palm of the hand, such that they complement the curves of the rest of the arm, not sharply bent in causing an angular look.

Basic Arm Positions
Preparatory (also commonly known as “low 5th” in Cecchetti training, or as “bras bas”)
The arms form an oval shape with the pinky fingers just in front of the thighs. There is a space about the width of one hand between the two hands – this distance varies slightly depending upon the style a particular studio uses, but never are the hands touching one another in this position. Palms of the hands are turned diagonally upward, not towards the thighs. The elbows are rotated forward giving space between the waistline and the arms and opening out the oval shape. Shoulders are rotated back.
First Position
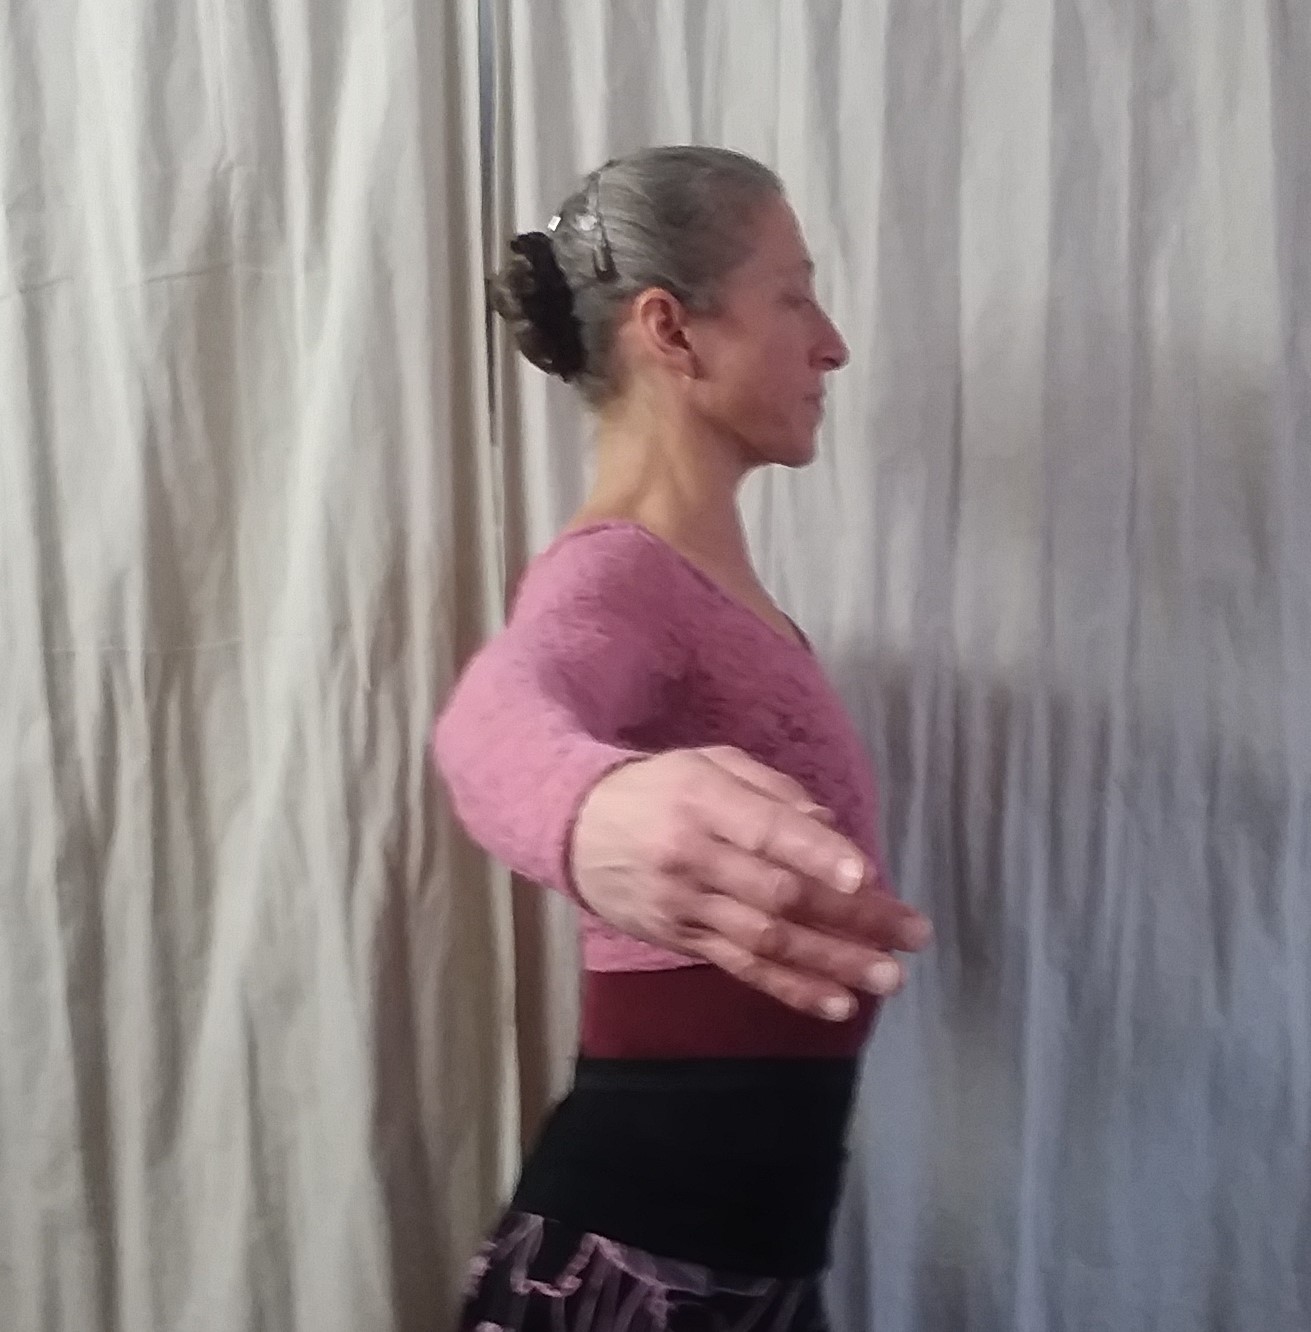
The arms create a circular shape in first position with the hands across from the diaphragm. Elbows are lifted and open – higher than the wrists. Shoulders are again rotated down and back. Clavicles and scapula should feel as if they are held wide, not pinched. The palms of the hands are turned inward and slightly upward such that if you look down at your hands you should be looking into the palms. Some ballet styles teach first position as an oval shape, but this tends to close off the chest and causes an awkwardness in turns. A circular shape gives opportunity for expressiveness in the upper body while also creating a much more streamlined position for turns.

Second Position
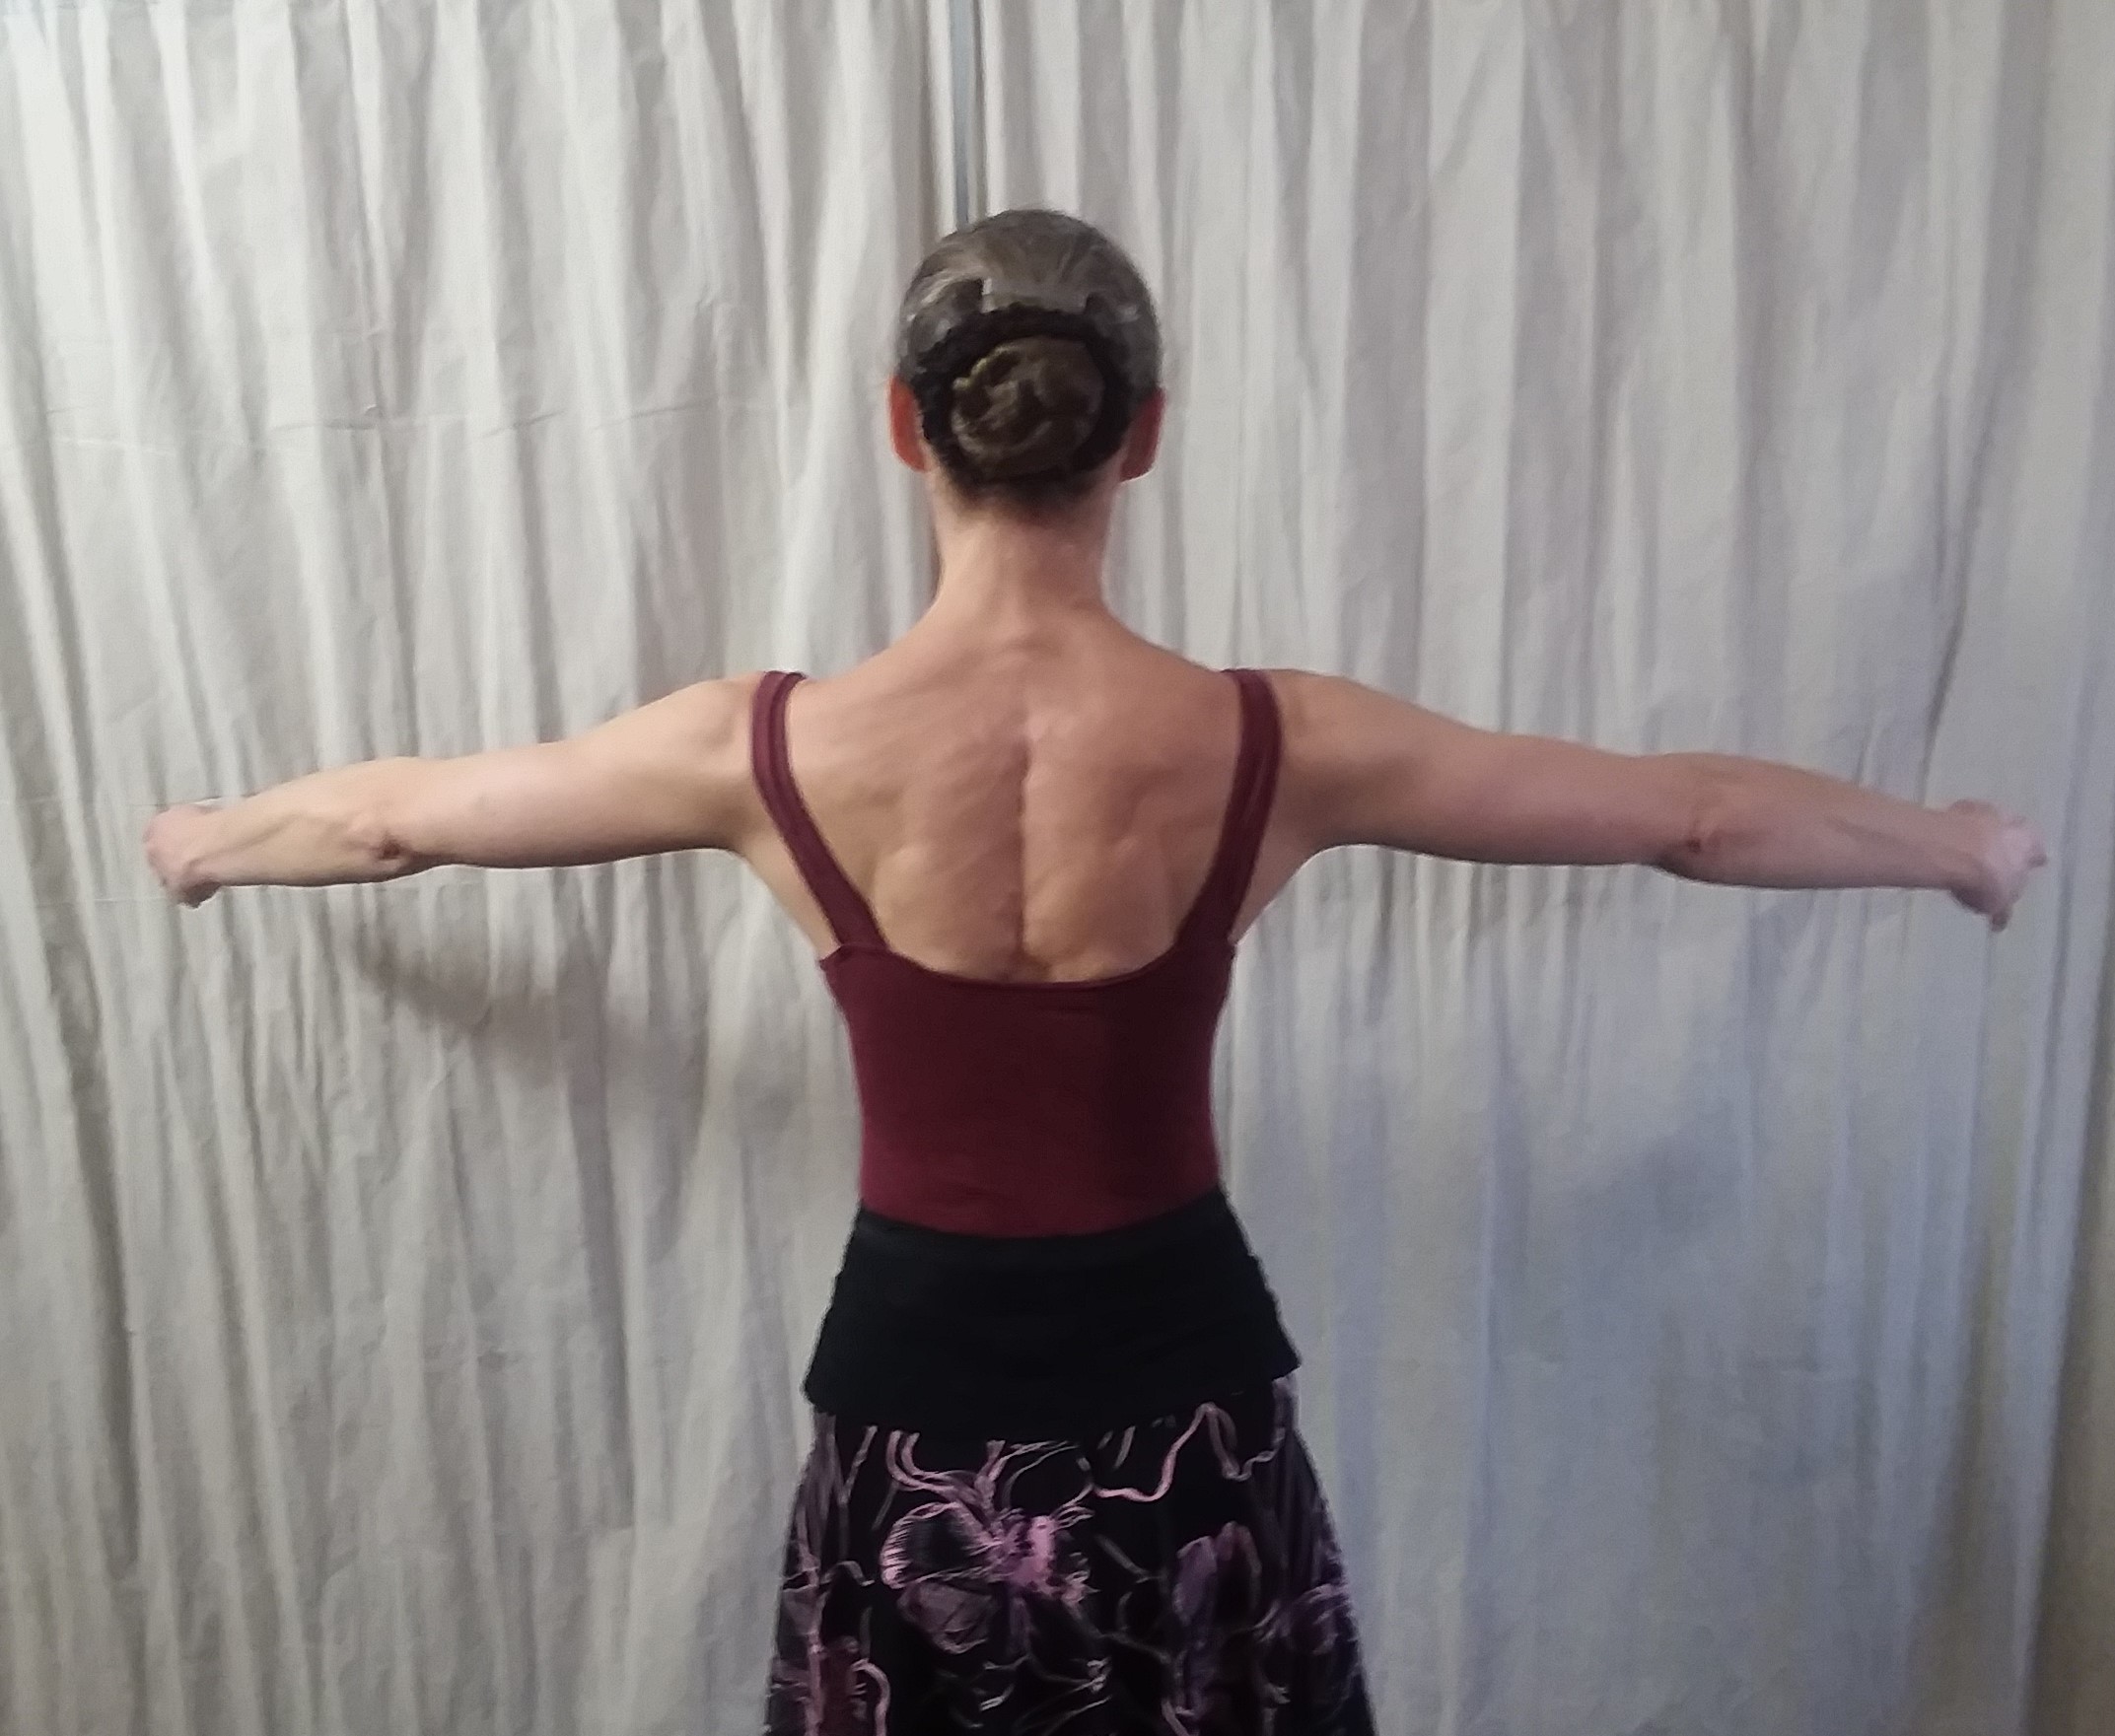
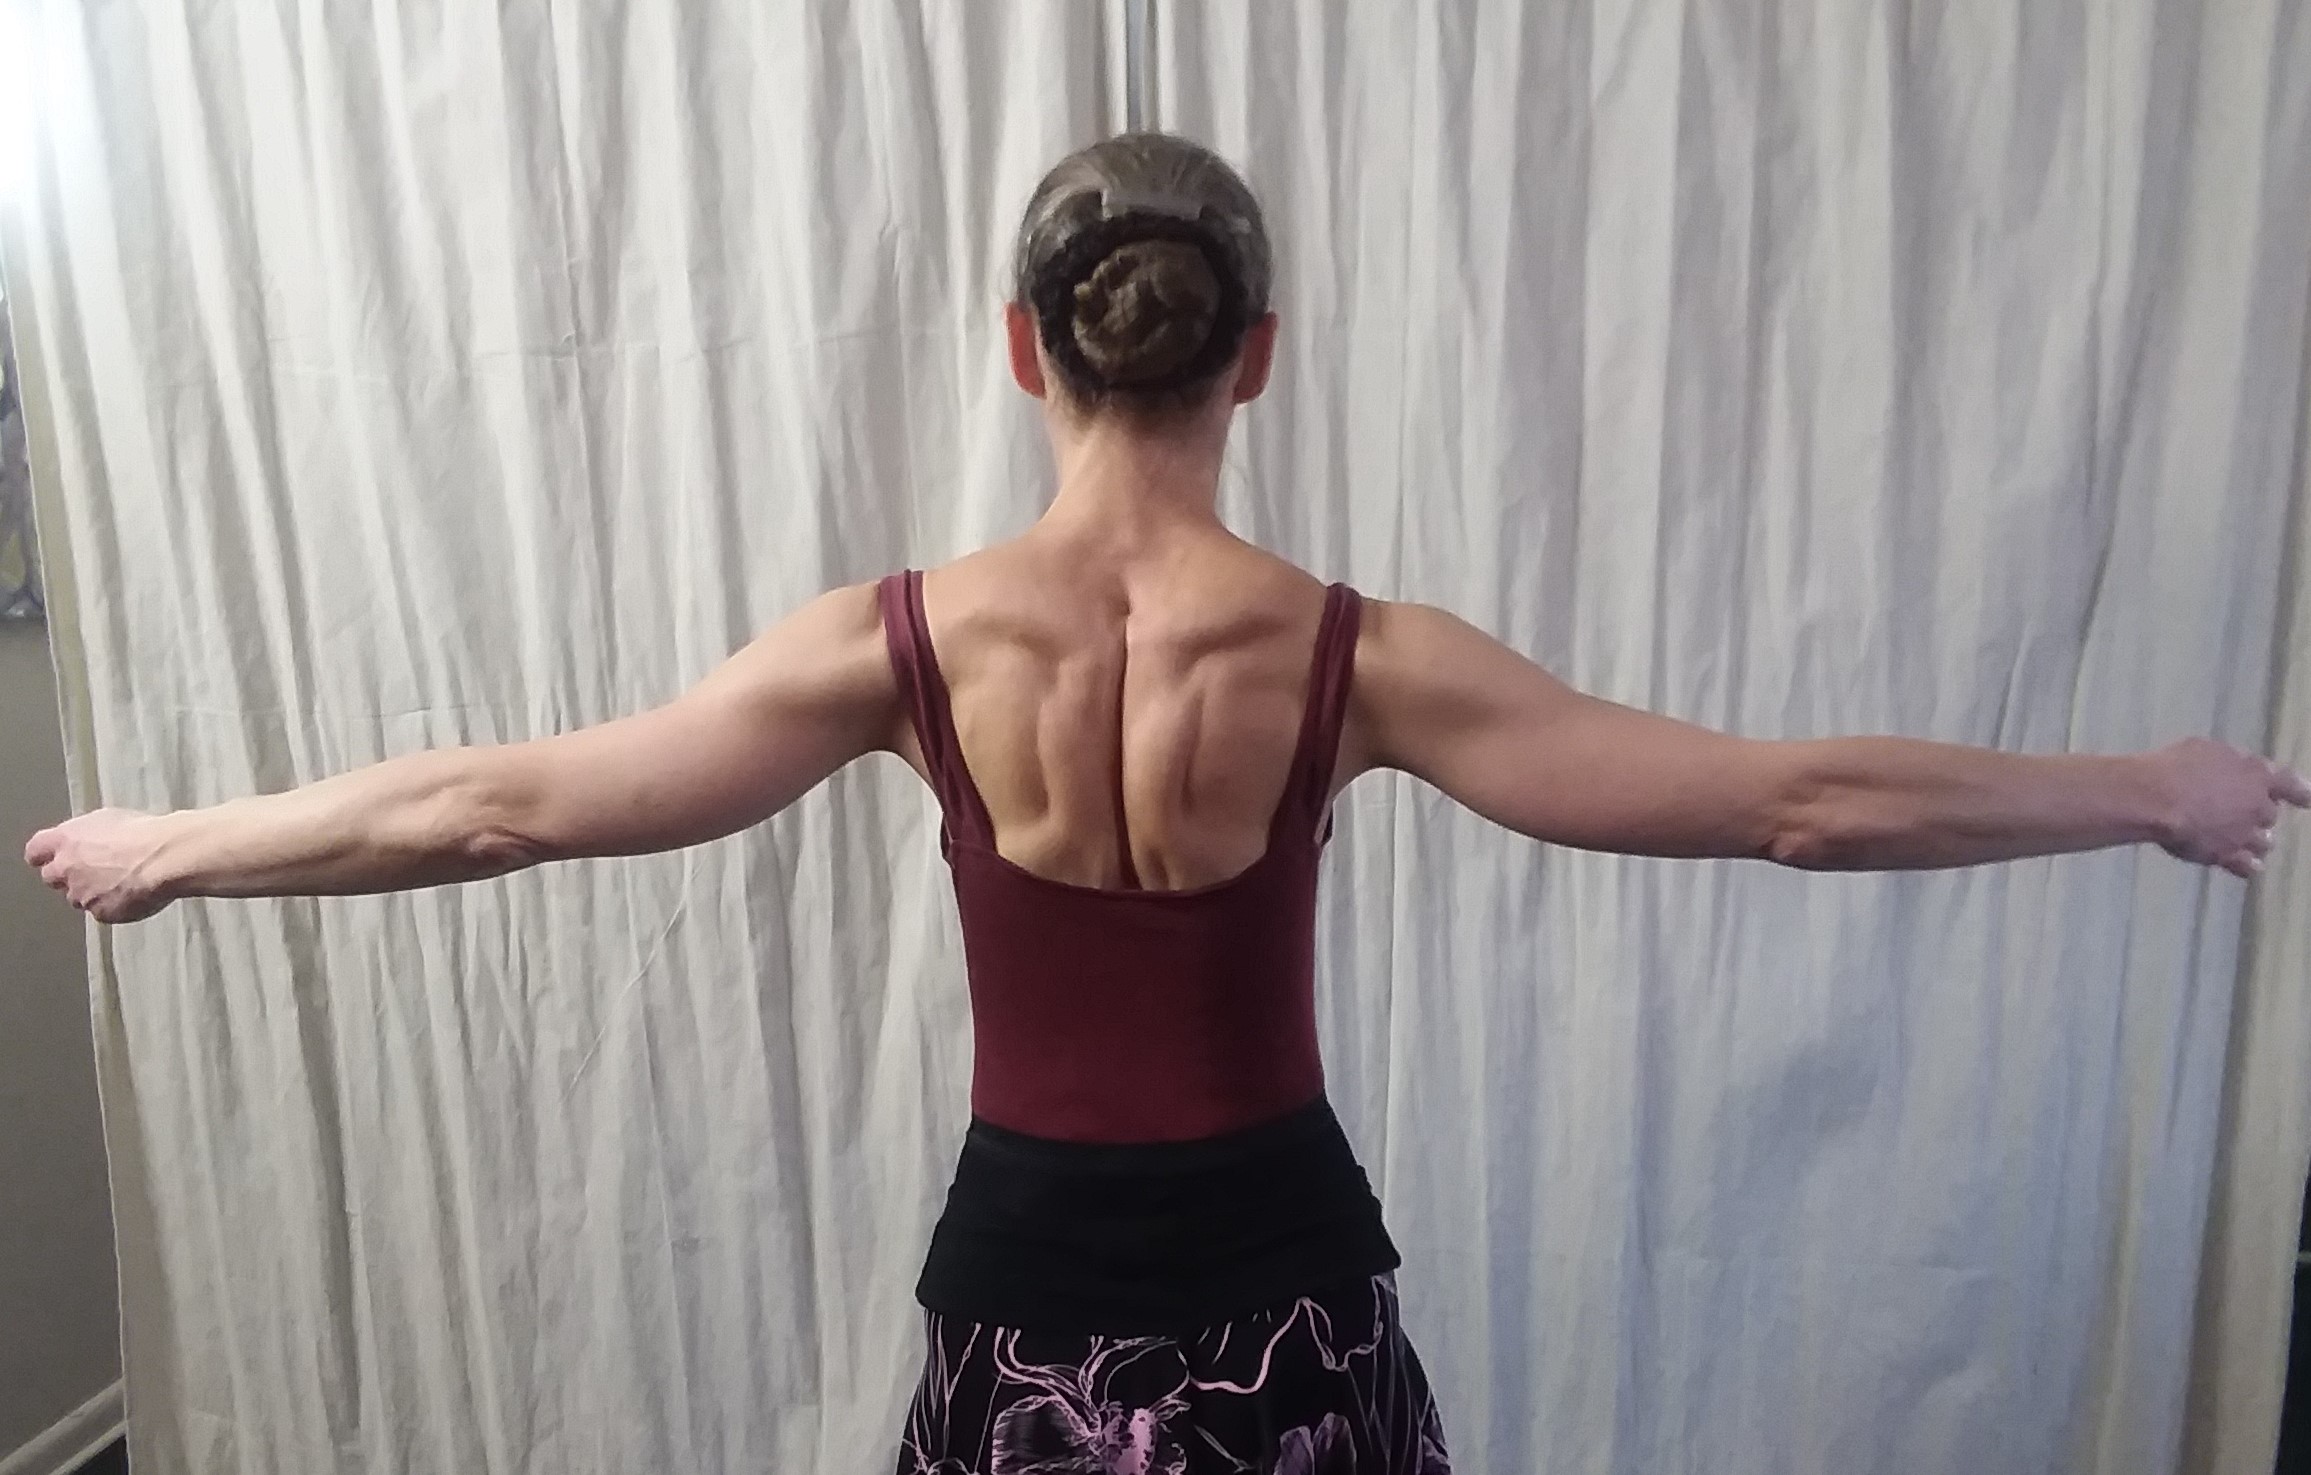
In second position, the arms are held wide from the center of the back in long arcs sloping gently down from the shoulders to the fingertips. Both clavicles and scapula should be spread wide, not pinched. The upper arms rotate backward, keeping the shoulders down, while the lower arms rotate forward, lifting the elbows, and the hands rotate backward allowing the palms to face more-or-less forward. The arms should be just slightly forward of the back such that they are wide, but not thrusting the chest forward, pinching the scapula, nor dropping weakly from the shoulder blades.
Third Position (also commonly known as “high 5th” in Cecchetti training)
The arms are again in an oval shape in third position, as they are in preparatory – this time overhead. It is essentially preparatory position brought upward. The shoulders must be actively drawn down in this position as they will naturally want to creep up which shortens the neck and crowds the head. Elbows must be rotated open in this position so they do not break the arc as seen from the side view. The arms are just slightly forward – if your head is straight and you turn just your eyes upward, you should be able to see the pinky finger of each hand. Palms of the hands are turned towards the forehead. Wrists are long and matching the arc created by the curve of the elbows. The dancer must be careful that the wrists do not “re-curve” in a direction opposite of the elbow curve. All the curves of the joints must be continuous, creating a flowing arc uninterrupted by angular elbows or wrists or fingers.
Allongé and Arabesque Positions
Allongé
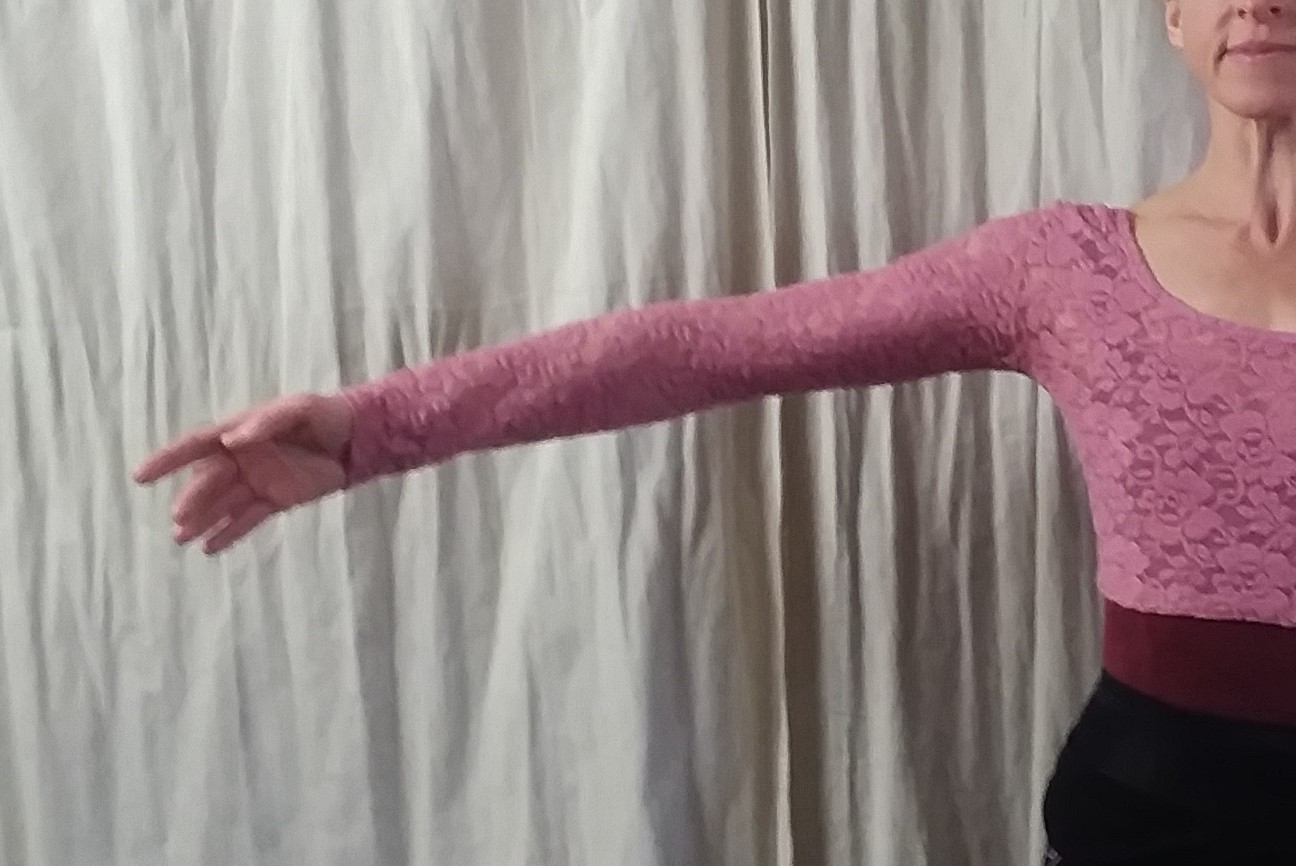
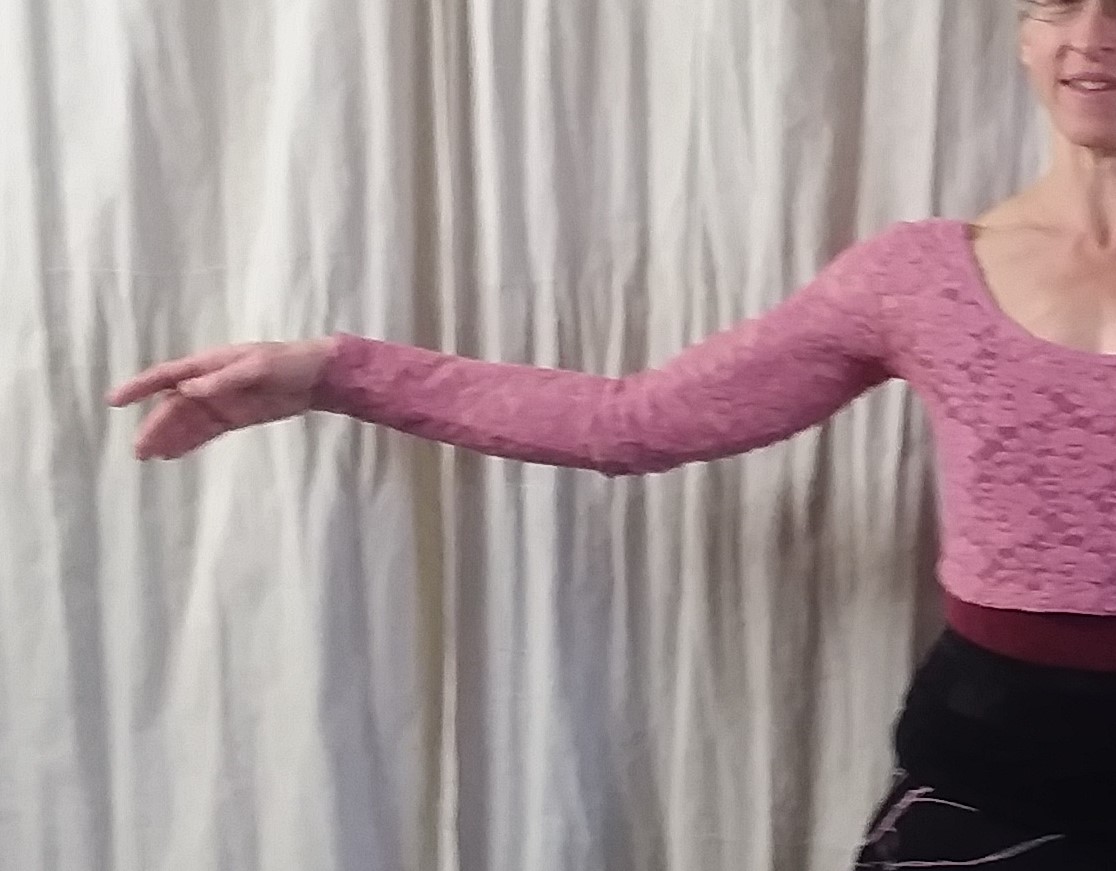
Each of the basic arm positions can be stretched to an allongé position in which the palms of the hands generally face downward and the fingers elongate, as do the elbows. Although elongating, neither the fingers nor the elbows should be entirely straight as this would appear stiff and inexpressive. In preparatory allongé, the lower arms open and turn outward while the elbows turn but do not lift. The elbows and palms in 1st position allongé turn to face downward and the arms and fingers elongate out in front of the shoulders. The arms should not have a collapsed look, but should appear to send the energy out through the fingertips. Meanwhile, the shoulders must remain down and open. In 2nd position allongé, the elbows and palms of the hands again turn downward while fingers stretch out energetically but not stiffly. This position is part of the transitions in moving the arms from 2nd position to preparatory as well as from 2nd position to Vaganova 3rd position (5th position en haut in Cecchetti terms). 3rd position allongé is much like that in preparatory except that it takes place overhead instead of down by the thighs. As in preparatory allongé, the elbows turn, but do not otherwise move. The palms turn outward and the lower arm opens forming almost a “V” shape, although again it is important that while stretching the elbows and fingers, there should not be a stiff look to the arms and they should not be completely straight.


1st and Vaganova 3rd Arabesque Arms
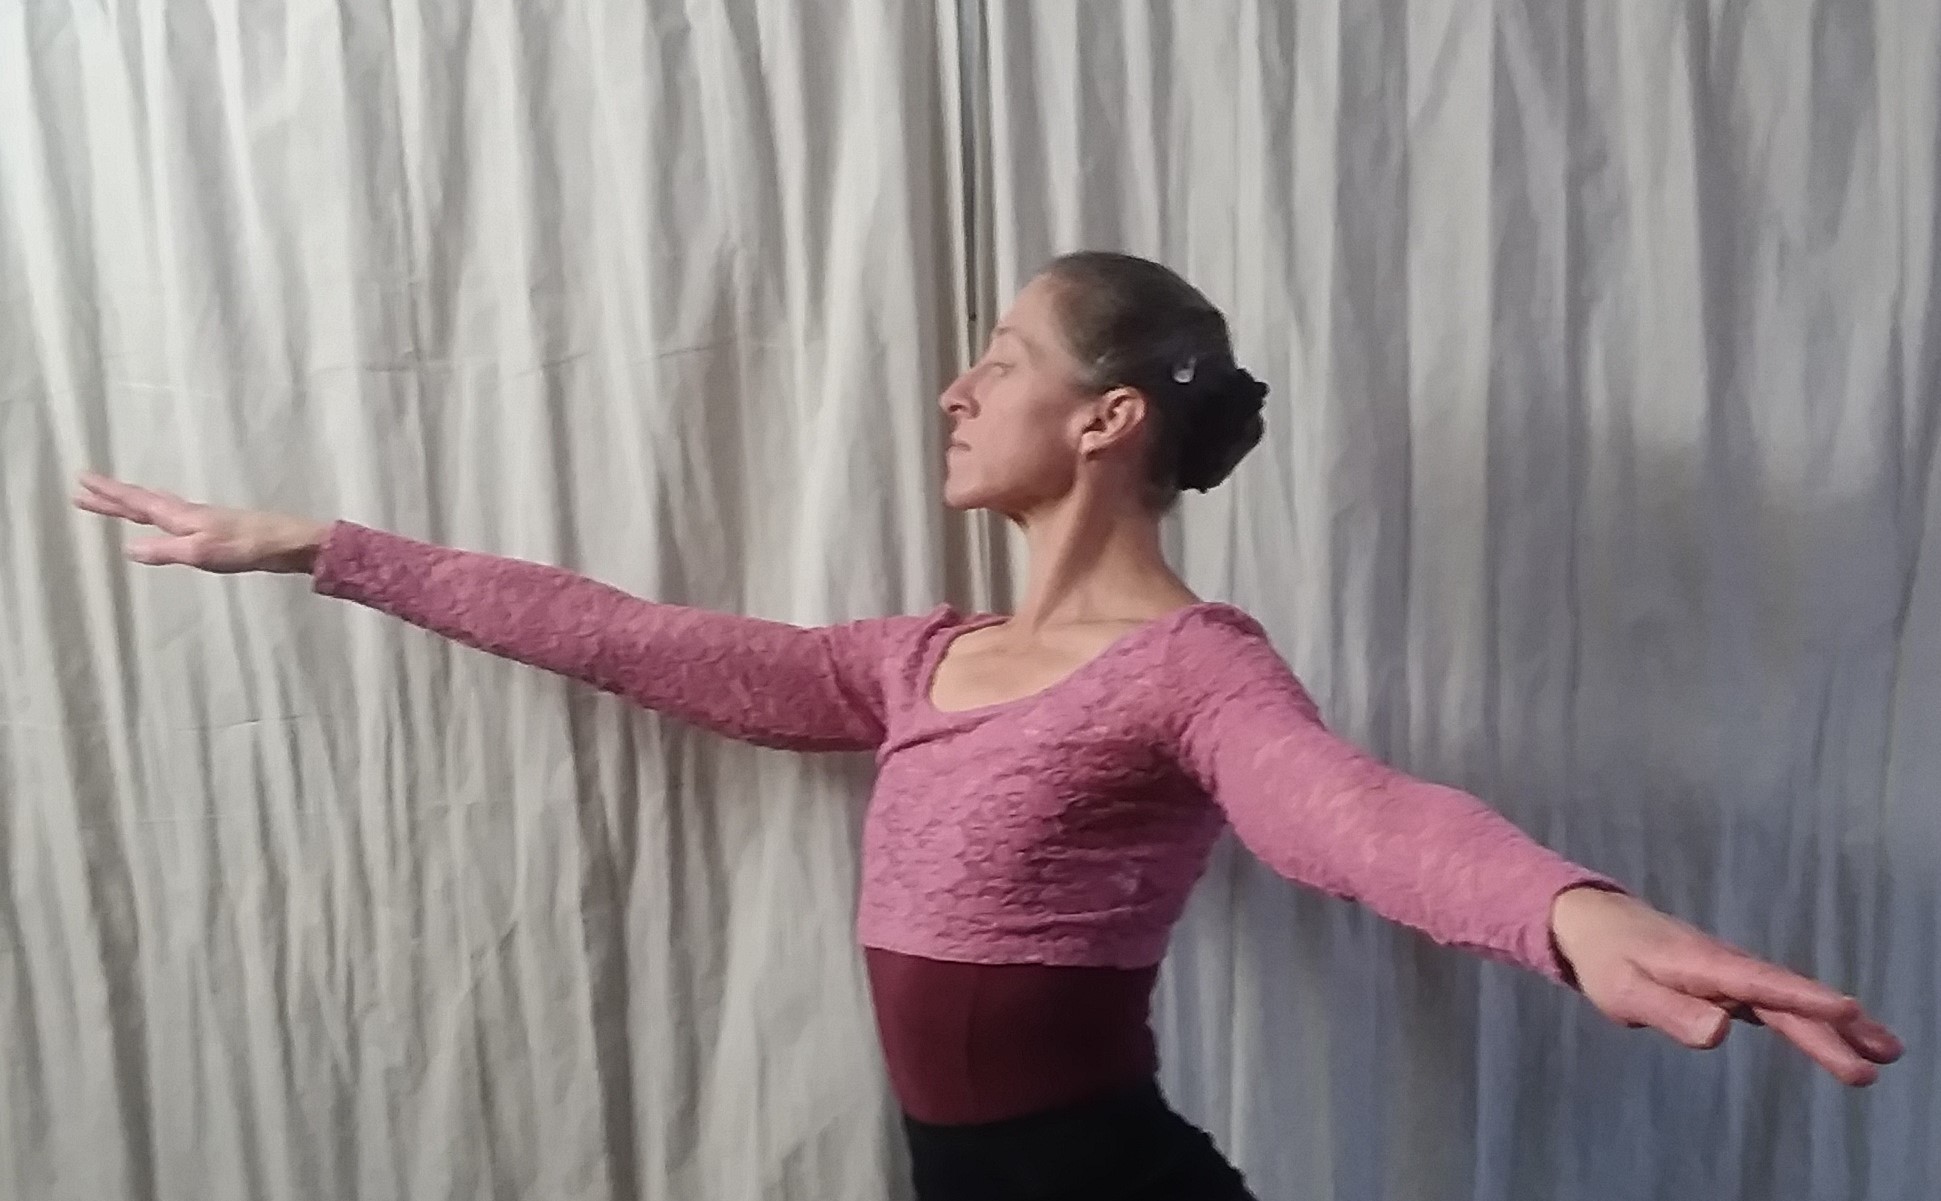
In these positions, the upstage arm is in 1st allongé while the downstage arm is in 2nd allongé. The shoulders open just slightly towards the audience, such that the chest has an open look, but there is not a splaying open of the chest, causing a drop of the upstage side of the body especially in 1st arabesque. The front arm should be about shoulder height in an academic 1st and 3rd arabesque, although commonly in choreography a higher front arm will be desired. The sternum should be actively lifted in these positions causing a slight lift in the chin to look high out over the middle finger of the front hand, increasing the appearance of the continuation of the line of energy pulsing out through the fingers of that front hand.
2nd Arabesque Arms
In 2nd arabesque, the downstage arm is in 1st allongé while the upstage arm is in 2nd allongé. The levels of the arms should be the same as in 1st arabesque. The head turns just slightly towards the audience and gently inclines with the gaze again going out over the middle finger of the front hand.
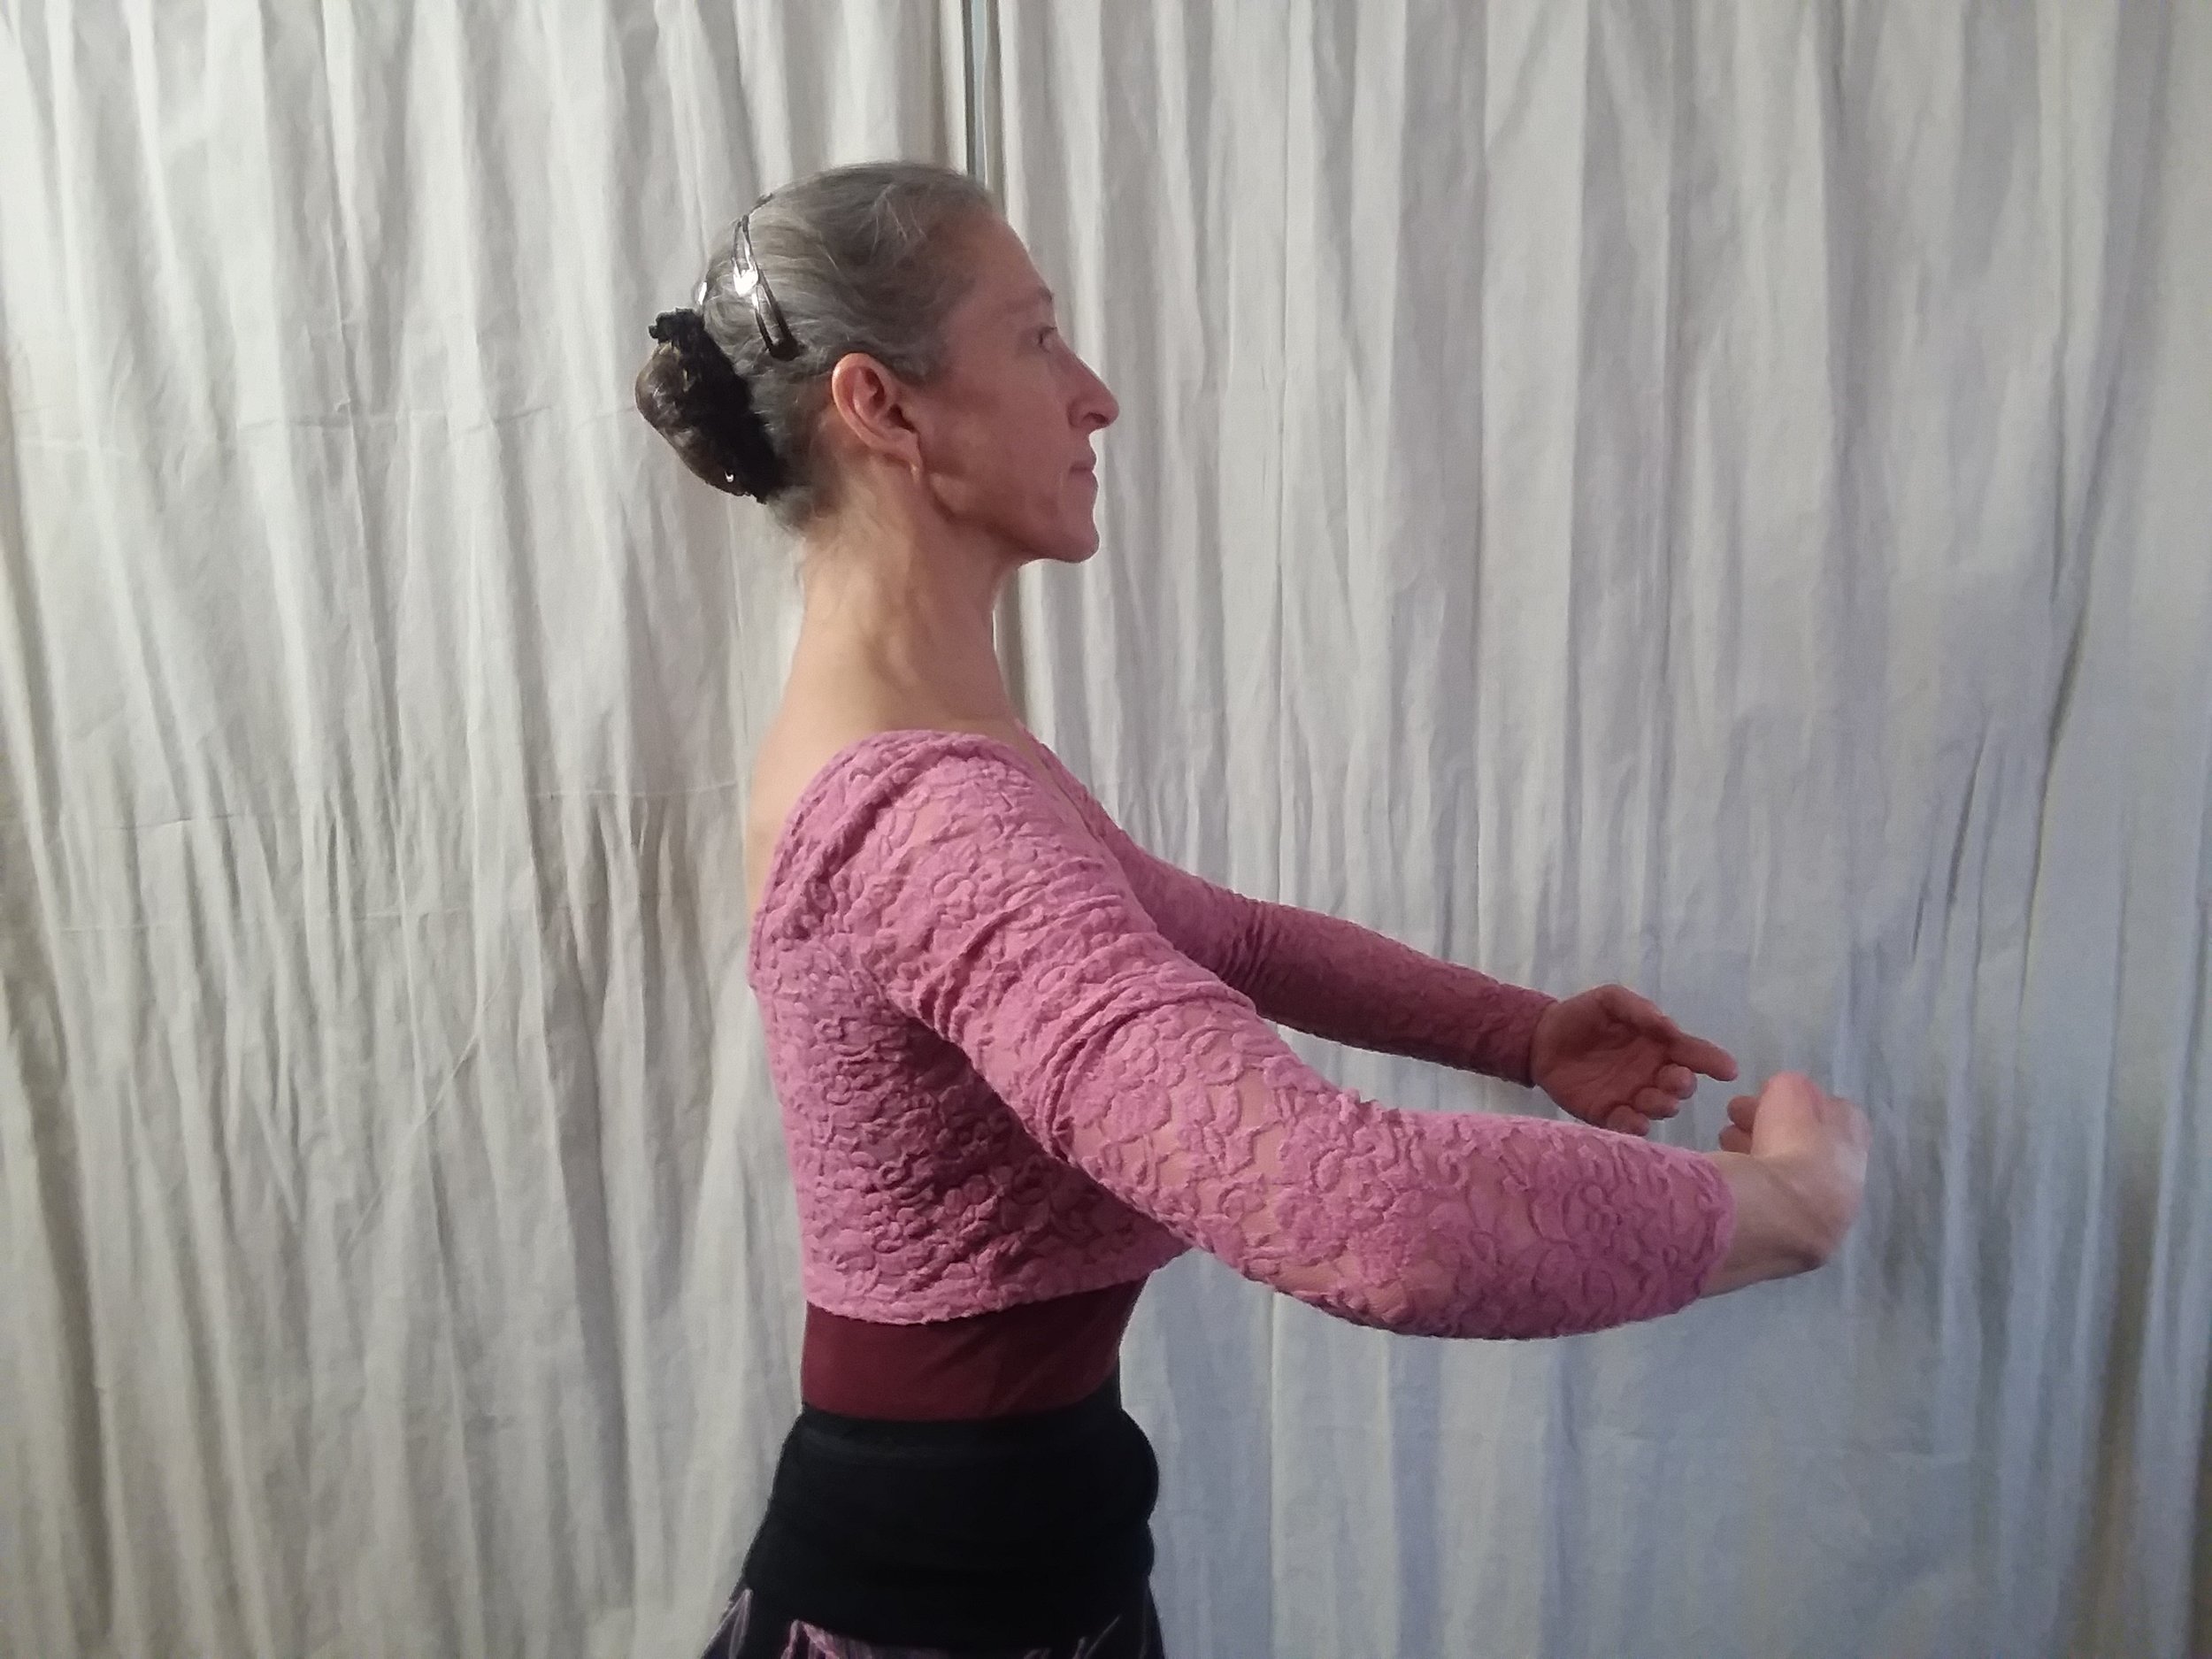
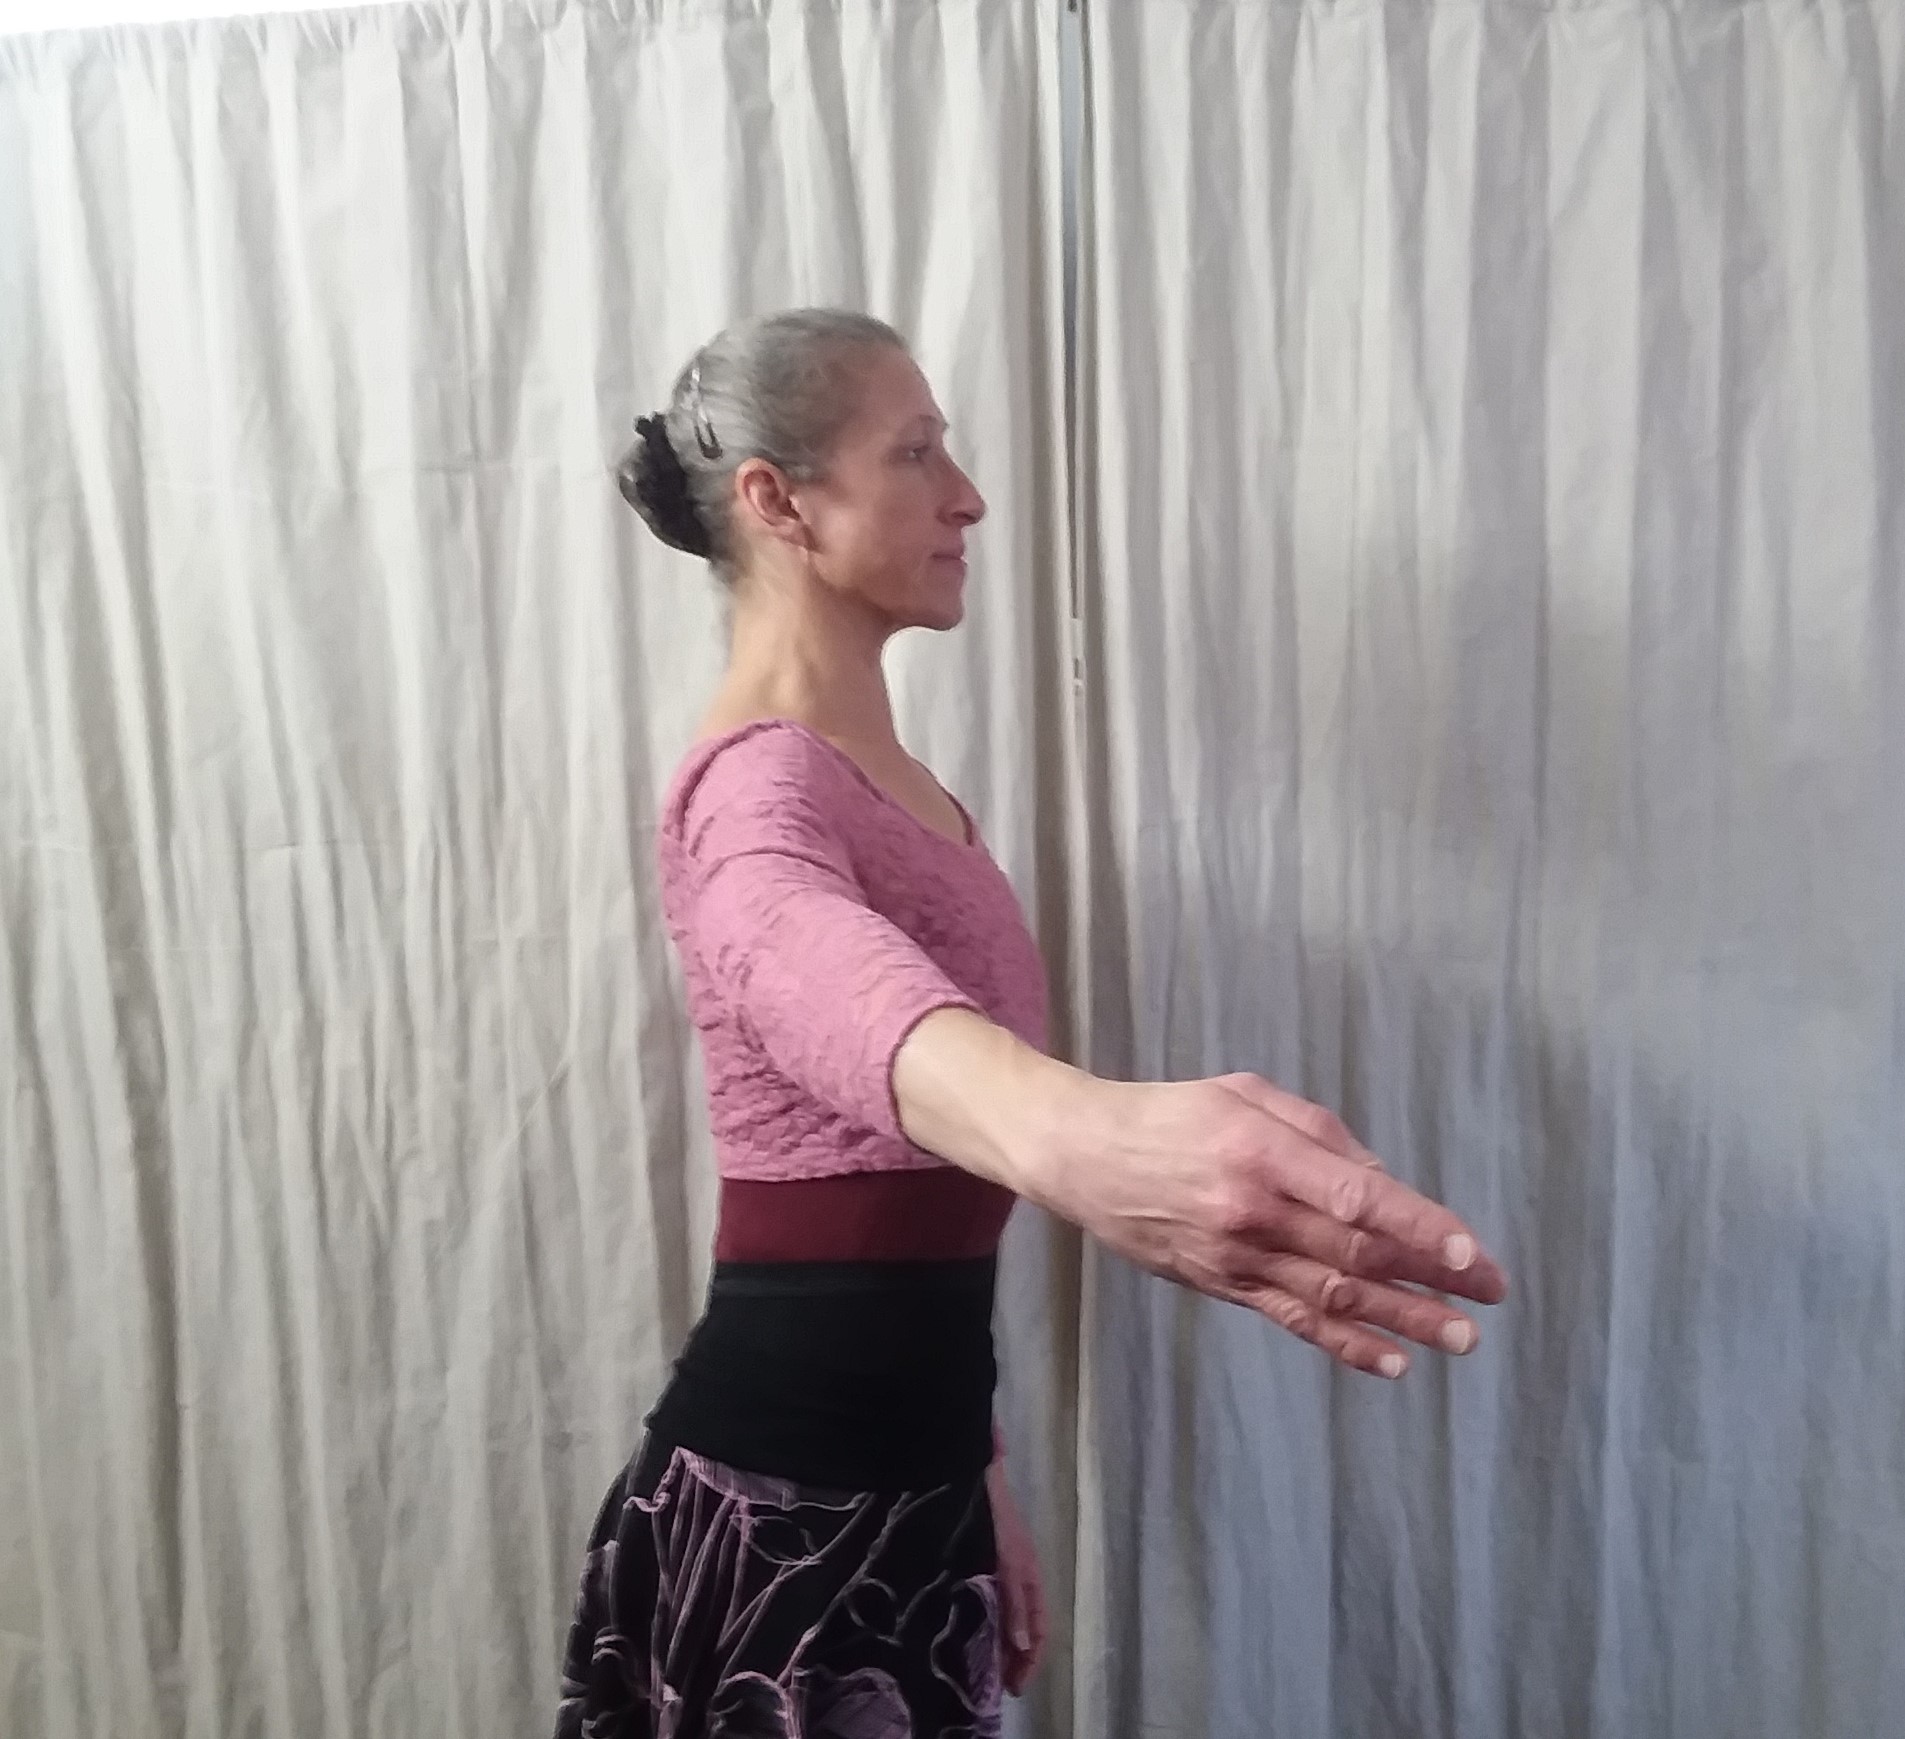
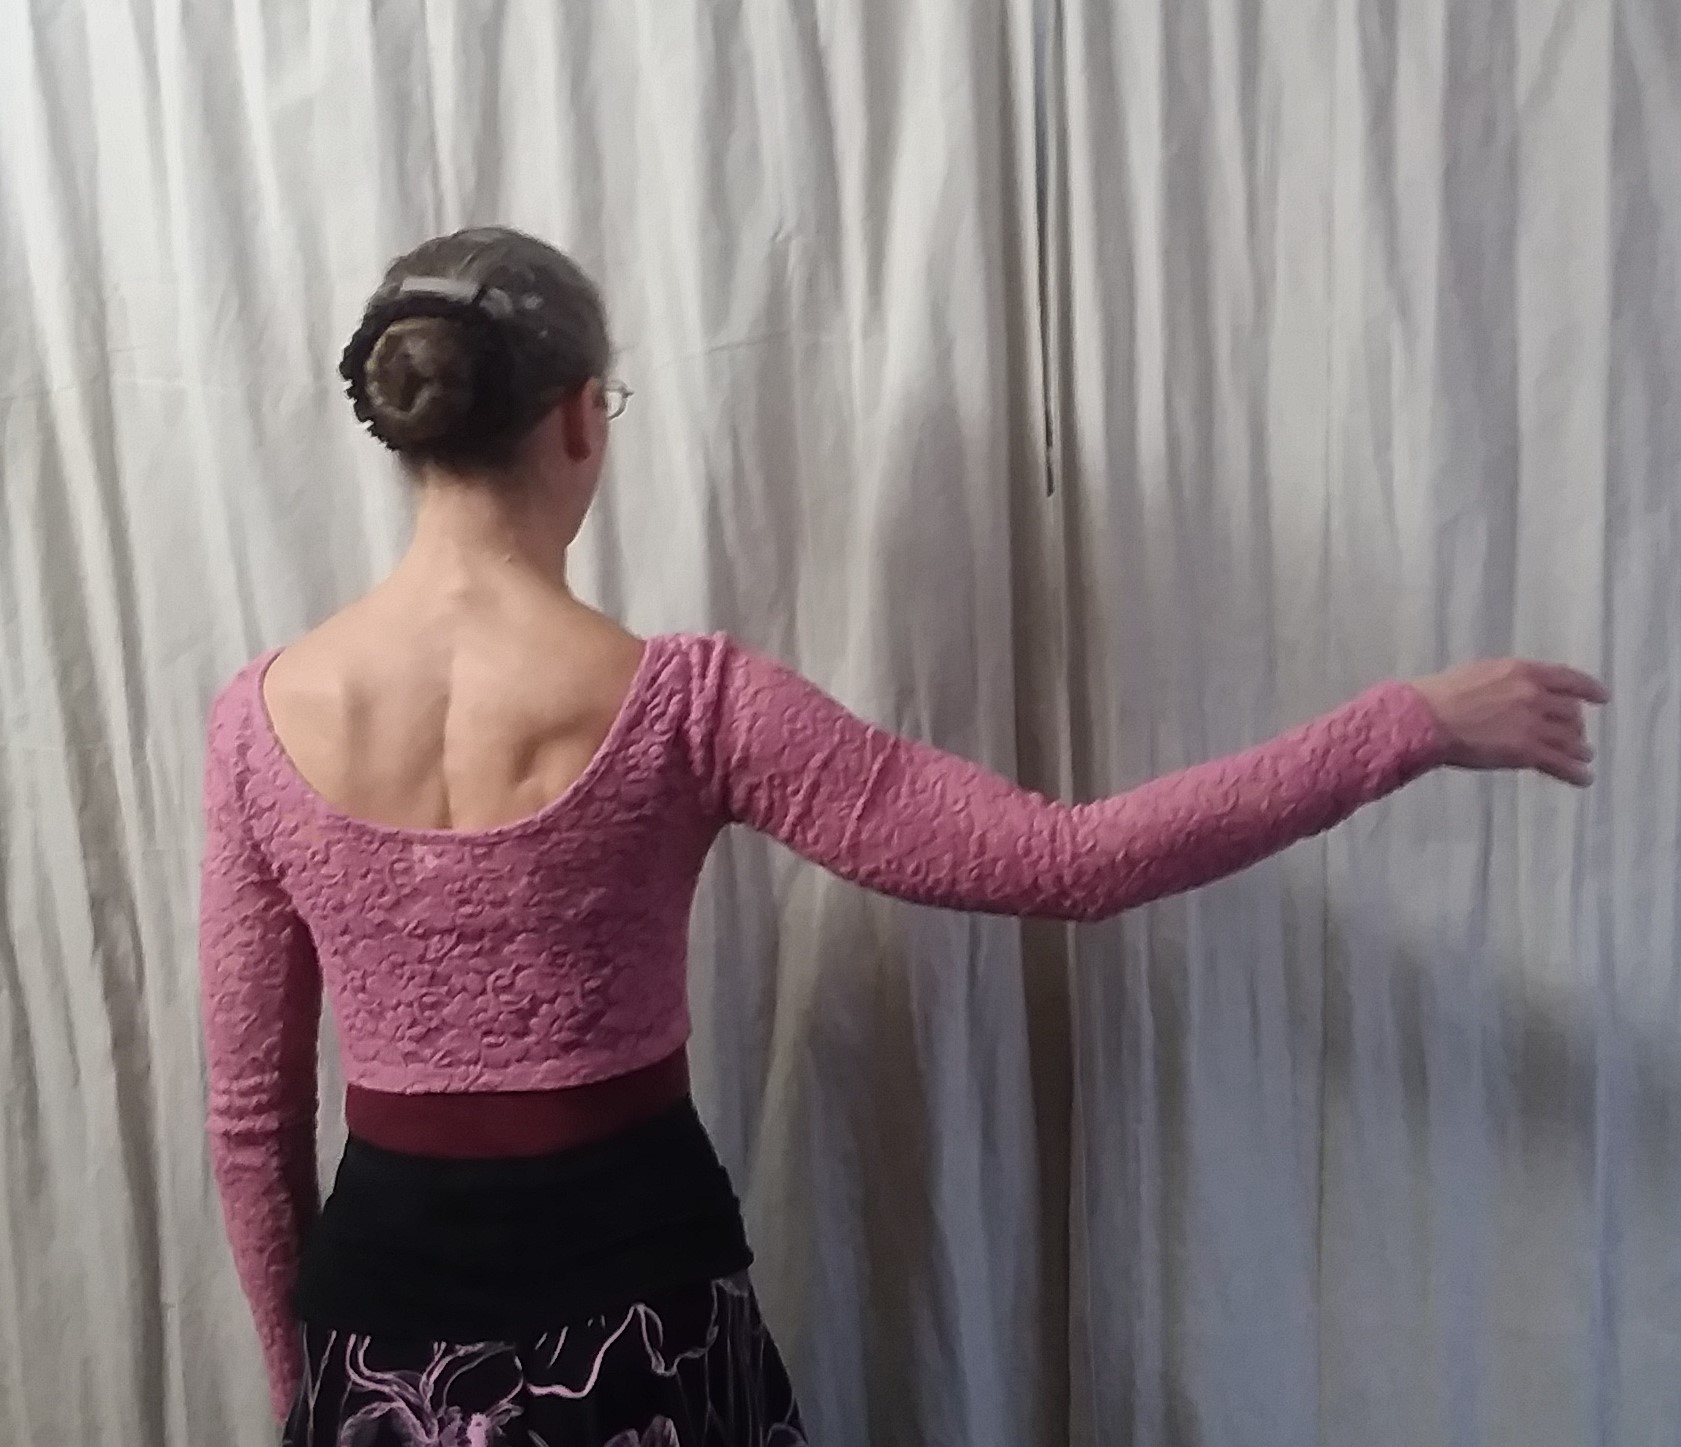
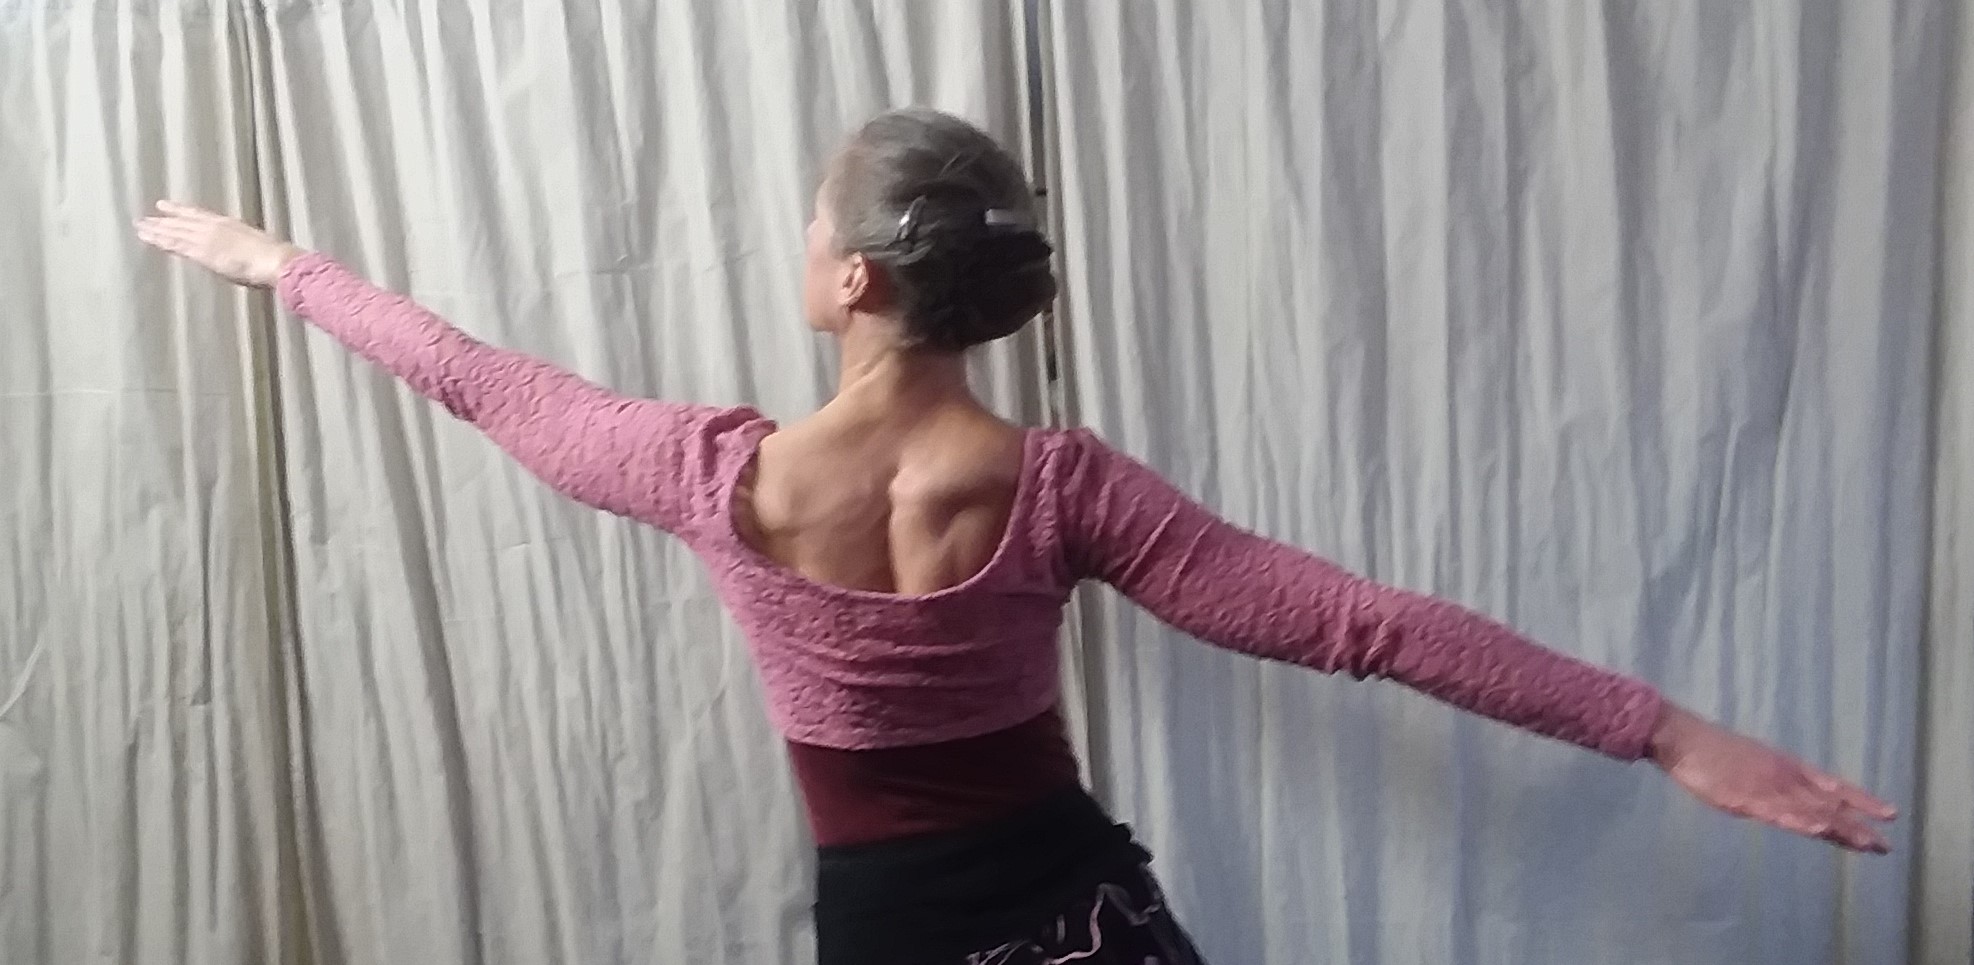
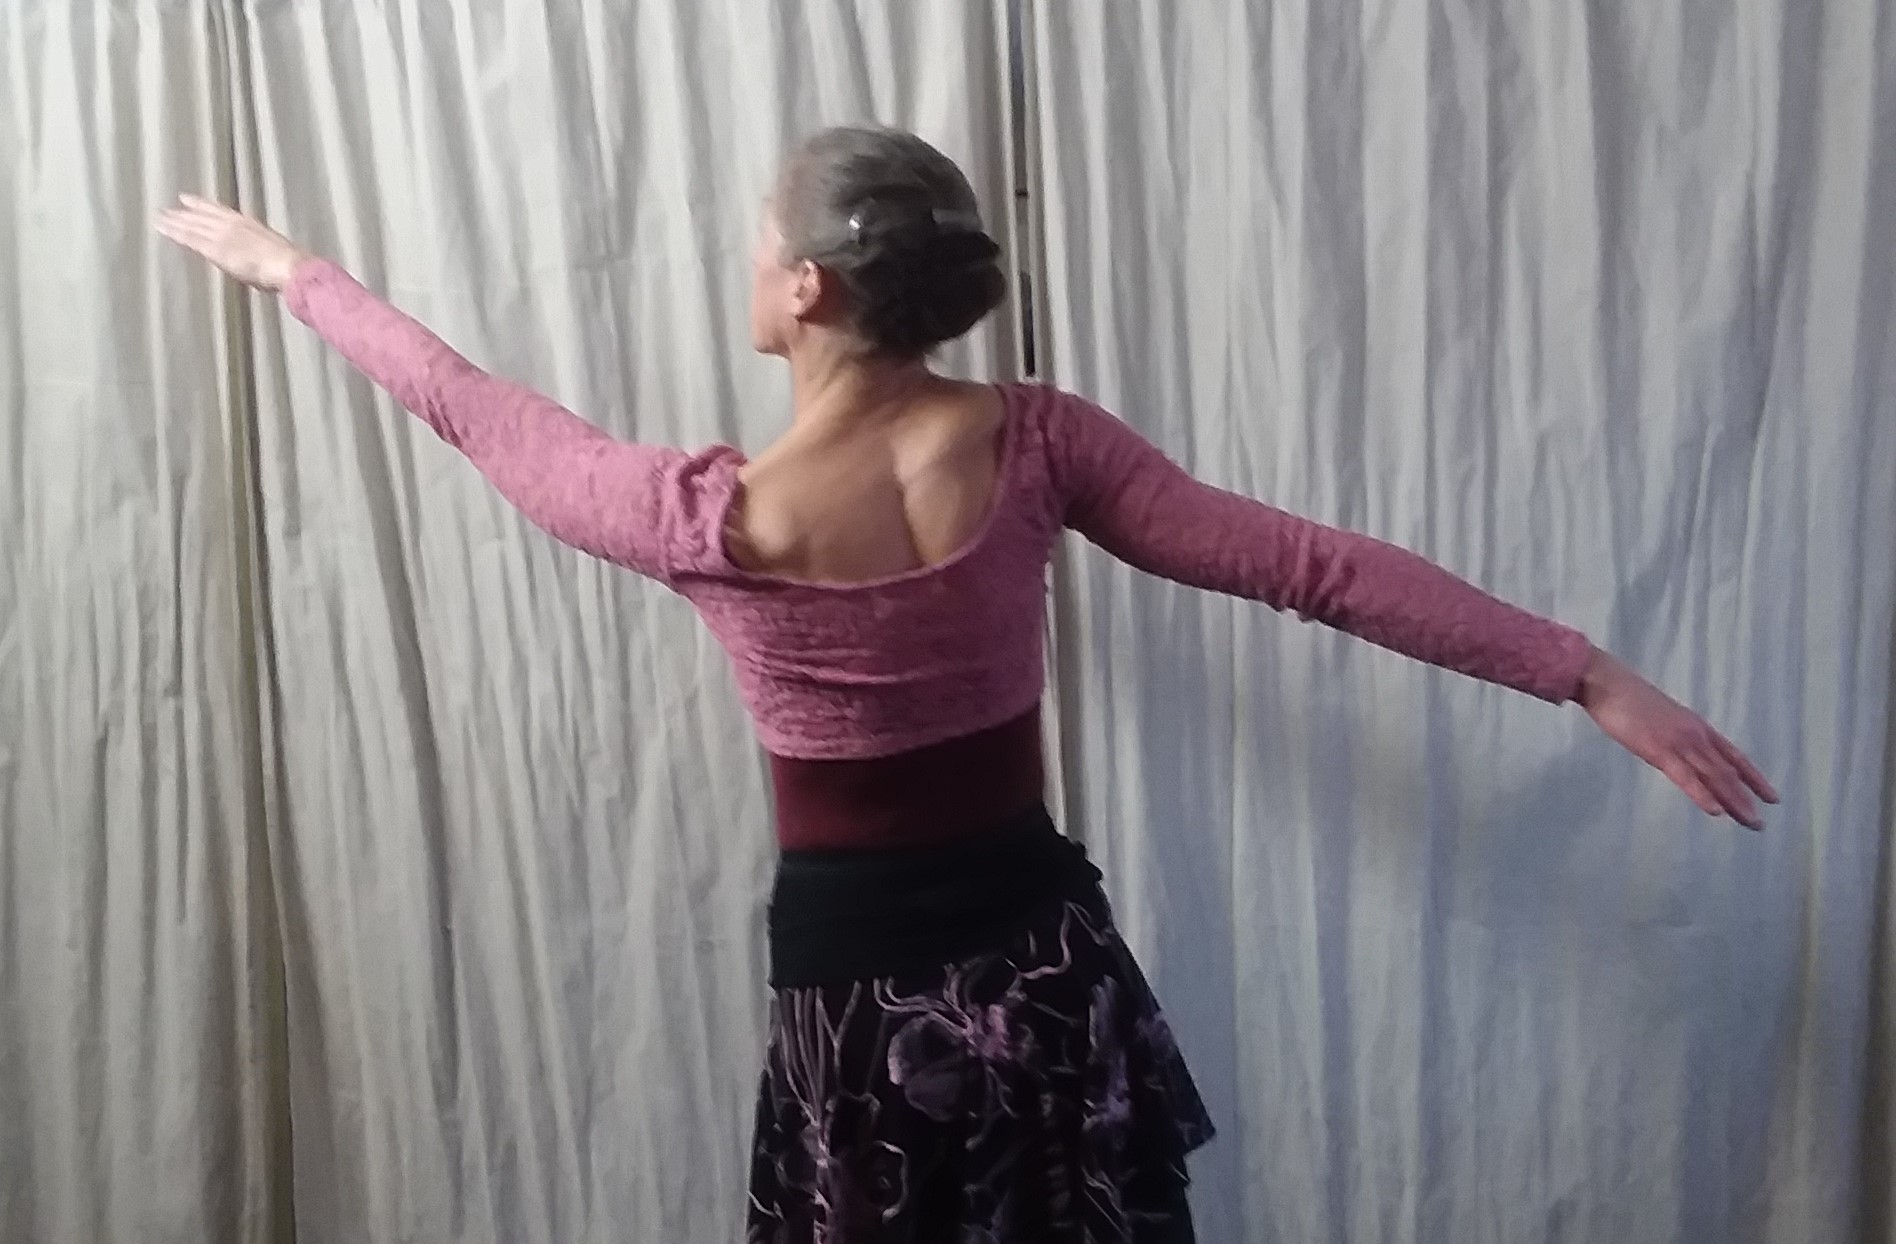
Vaganova 4th Arabesque Arms
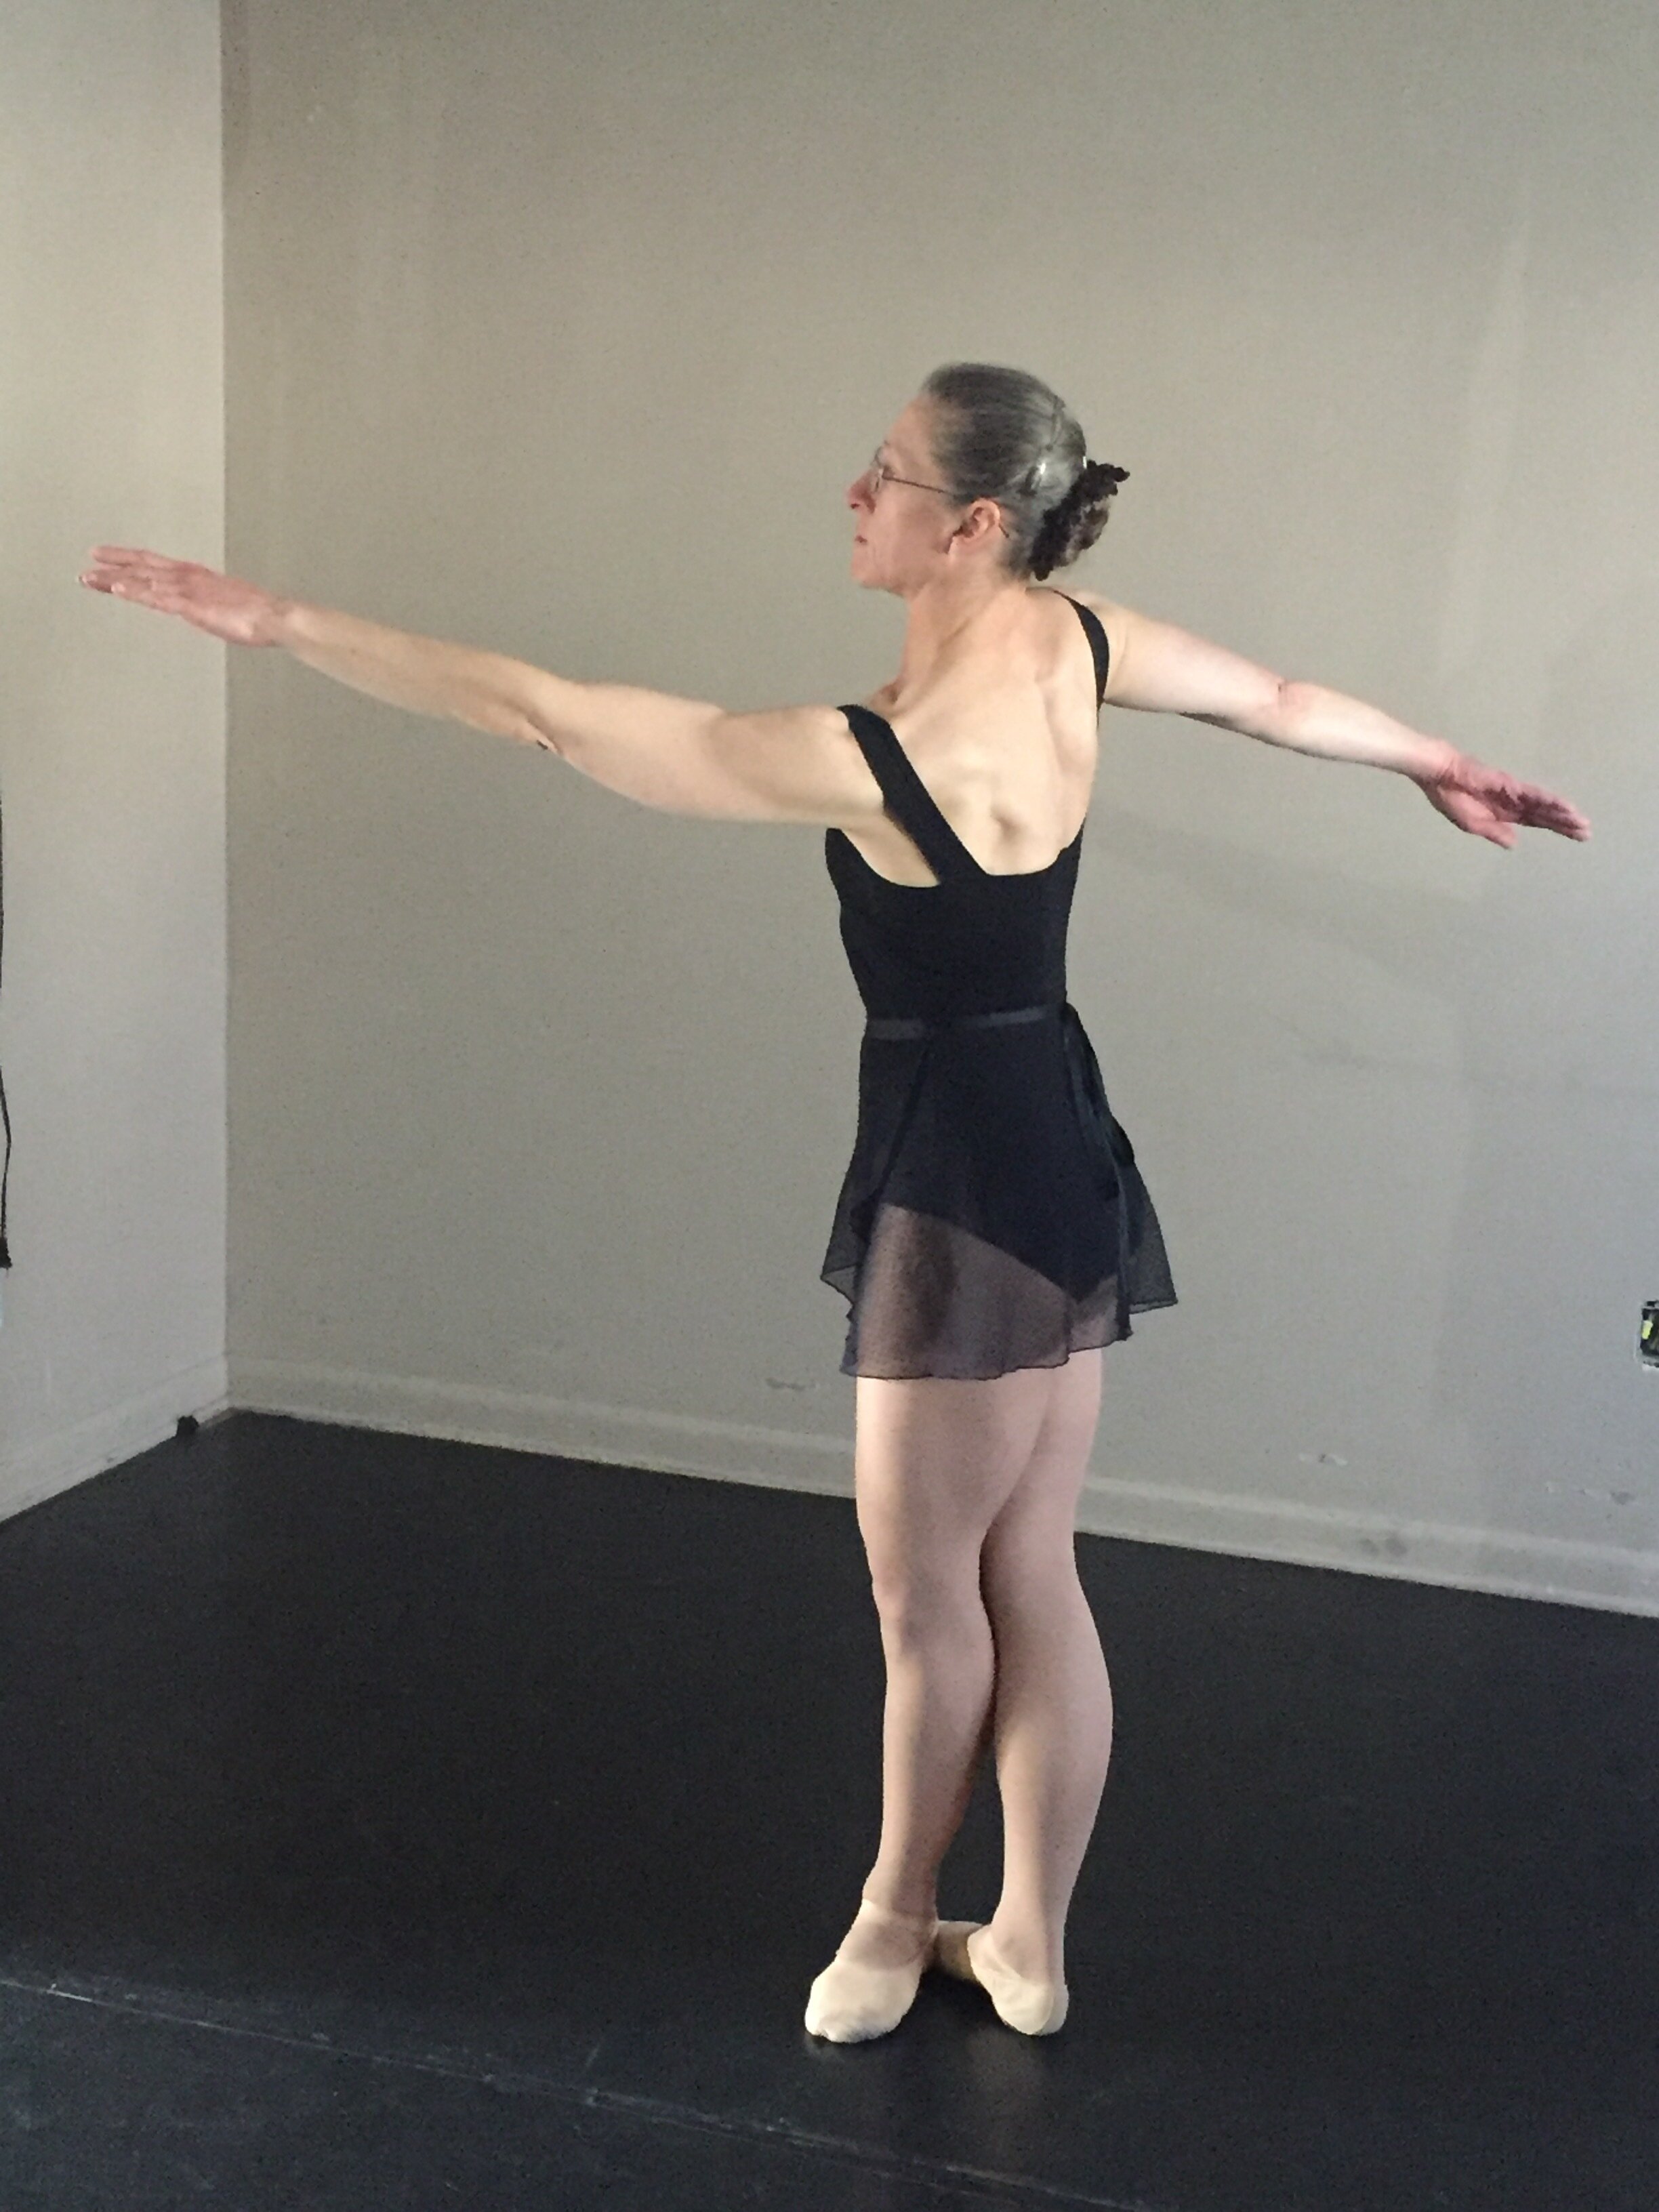
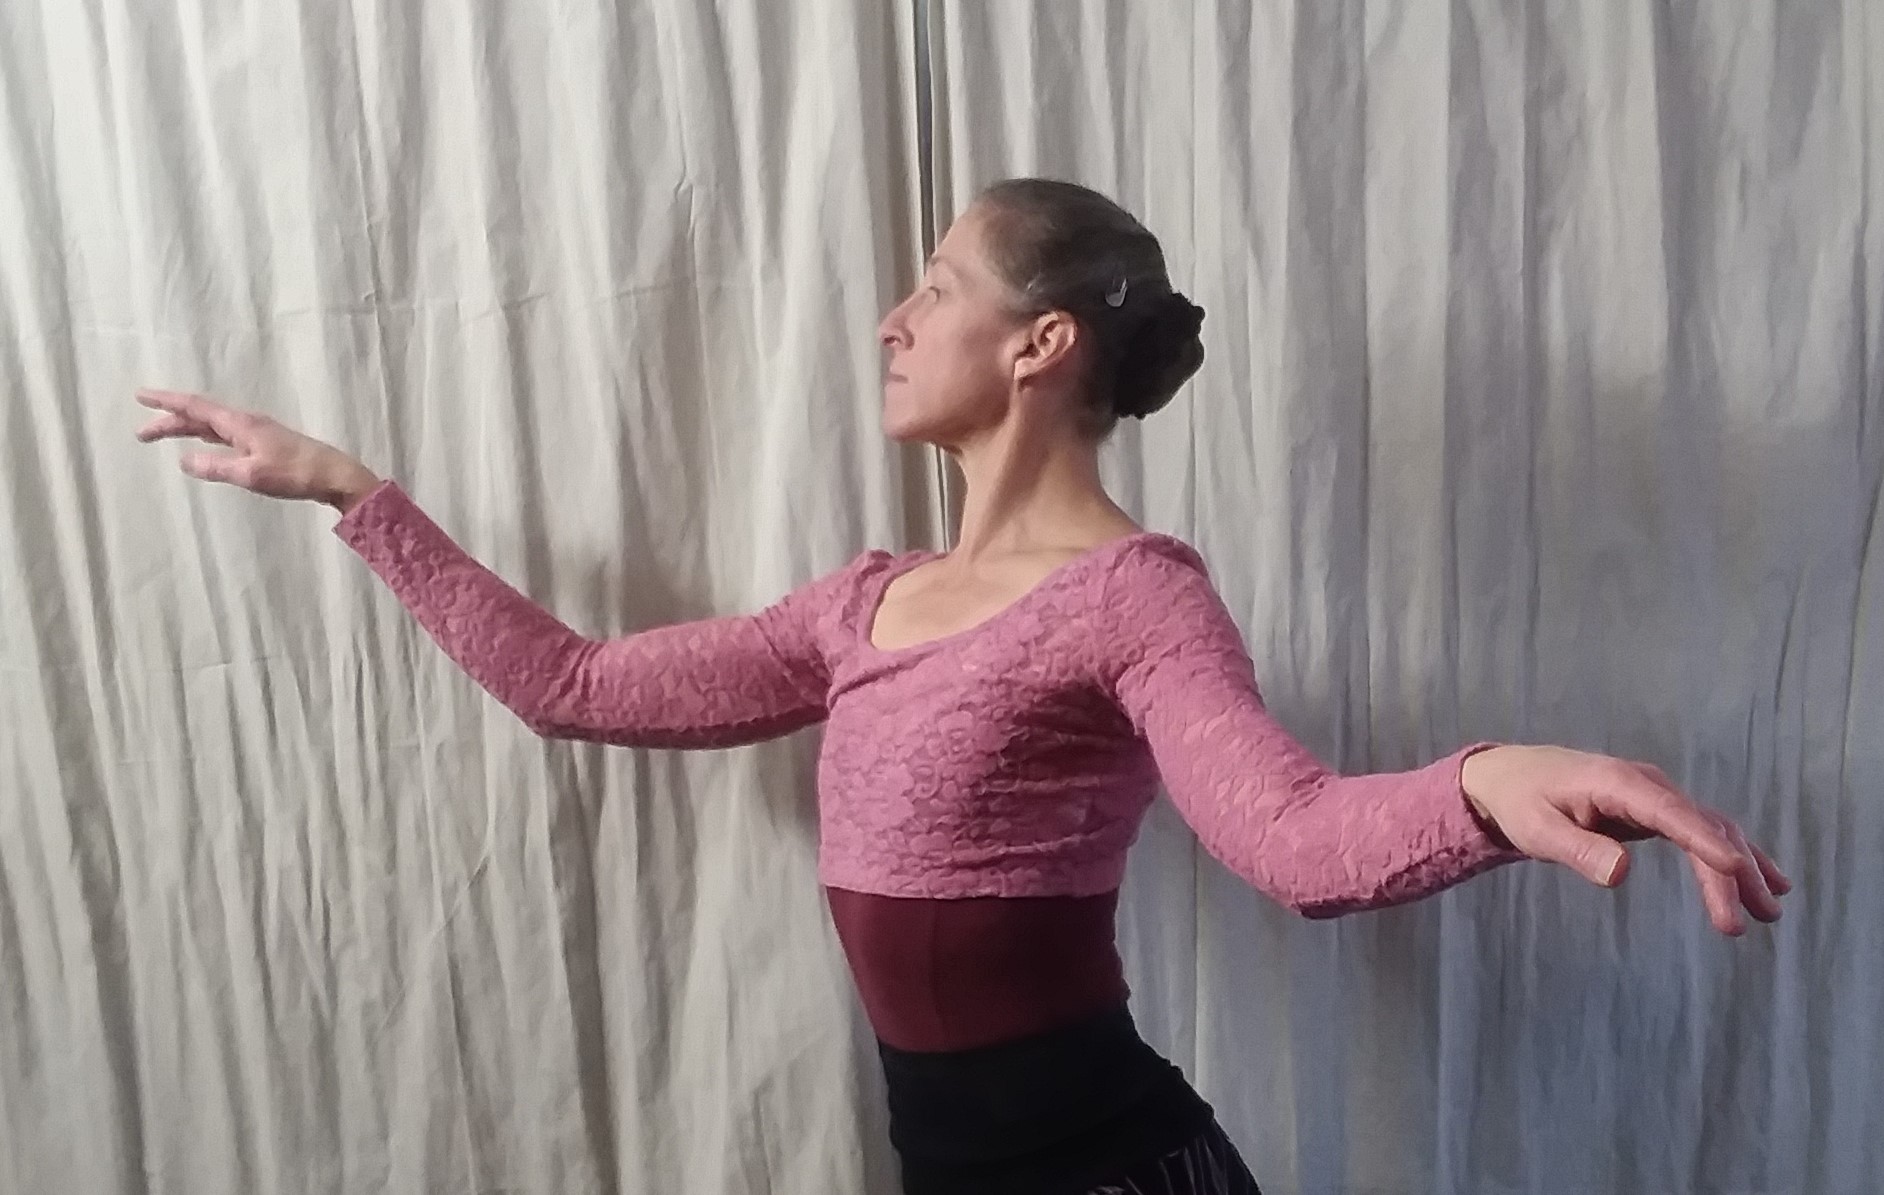
This is a very beautiful position when done correctly! The audience gets a full view of the dancer’s back with the arms elongated front and back in a shallow diagonal line. To get the proper feel of this position it is helpful to begin with the arms in 2nd position allongé. From here, twist at the waist such that the arms remain in their relationship to the back, but the back is now angled strongly towards the audience. The dancer should be looking high over the front hand with a slight incline of the head. It is very important, and very challenging, not to allow the back shoulder to crop up. The back arm must remain held within the shoulder socket as it is in 2nd position allongé, not dropped under and back.
Arabesque à deux bras (commonly known as Cecchetti 3rd arabesque)
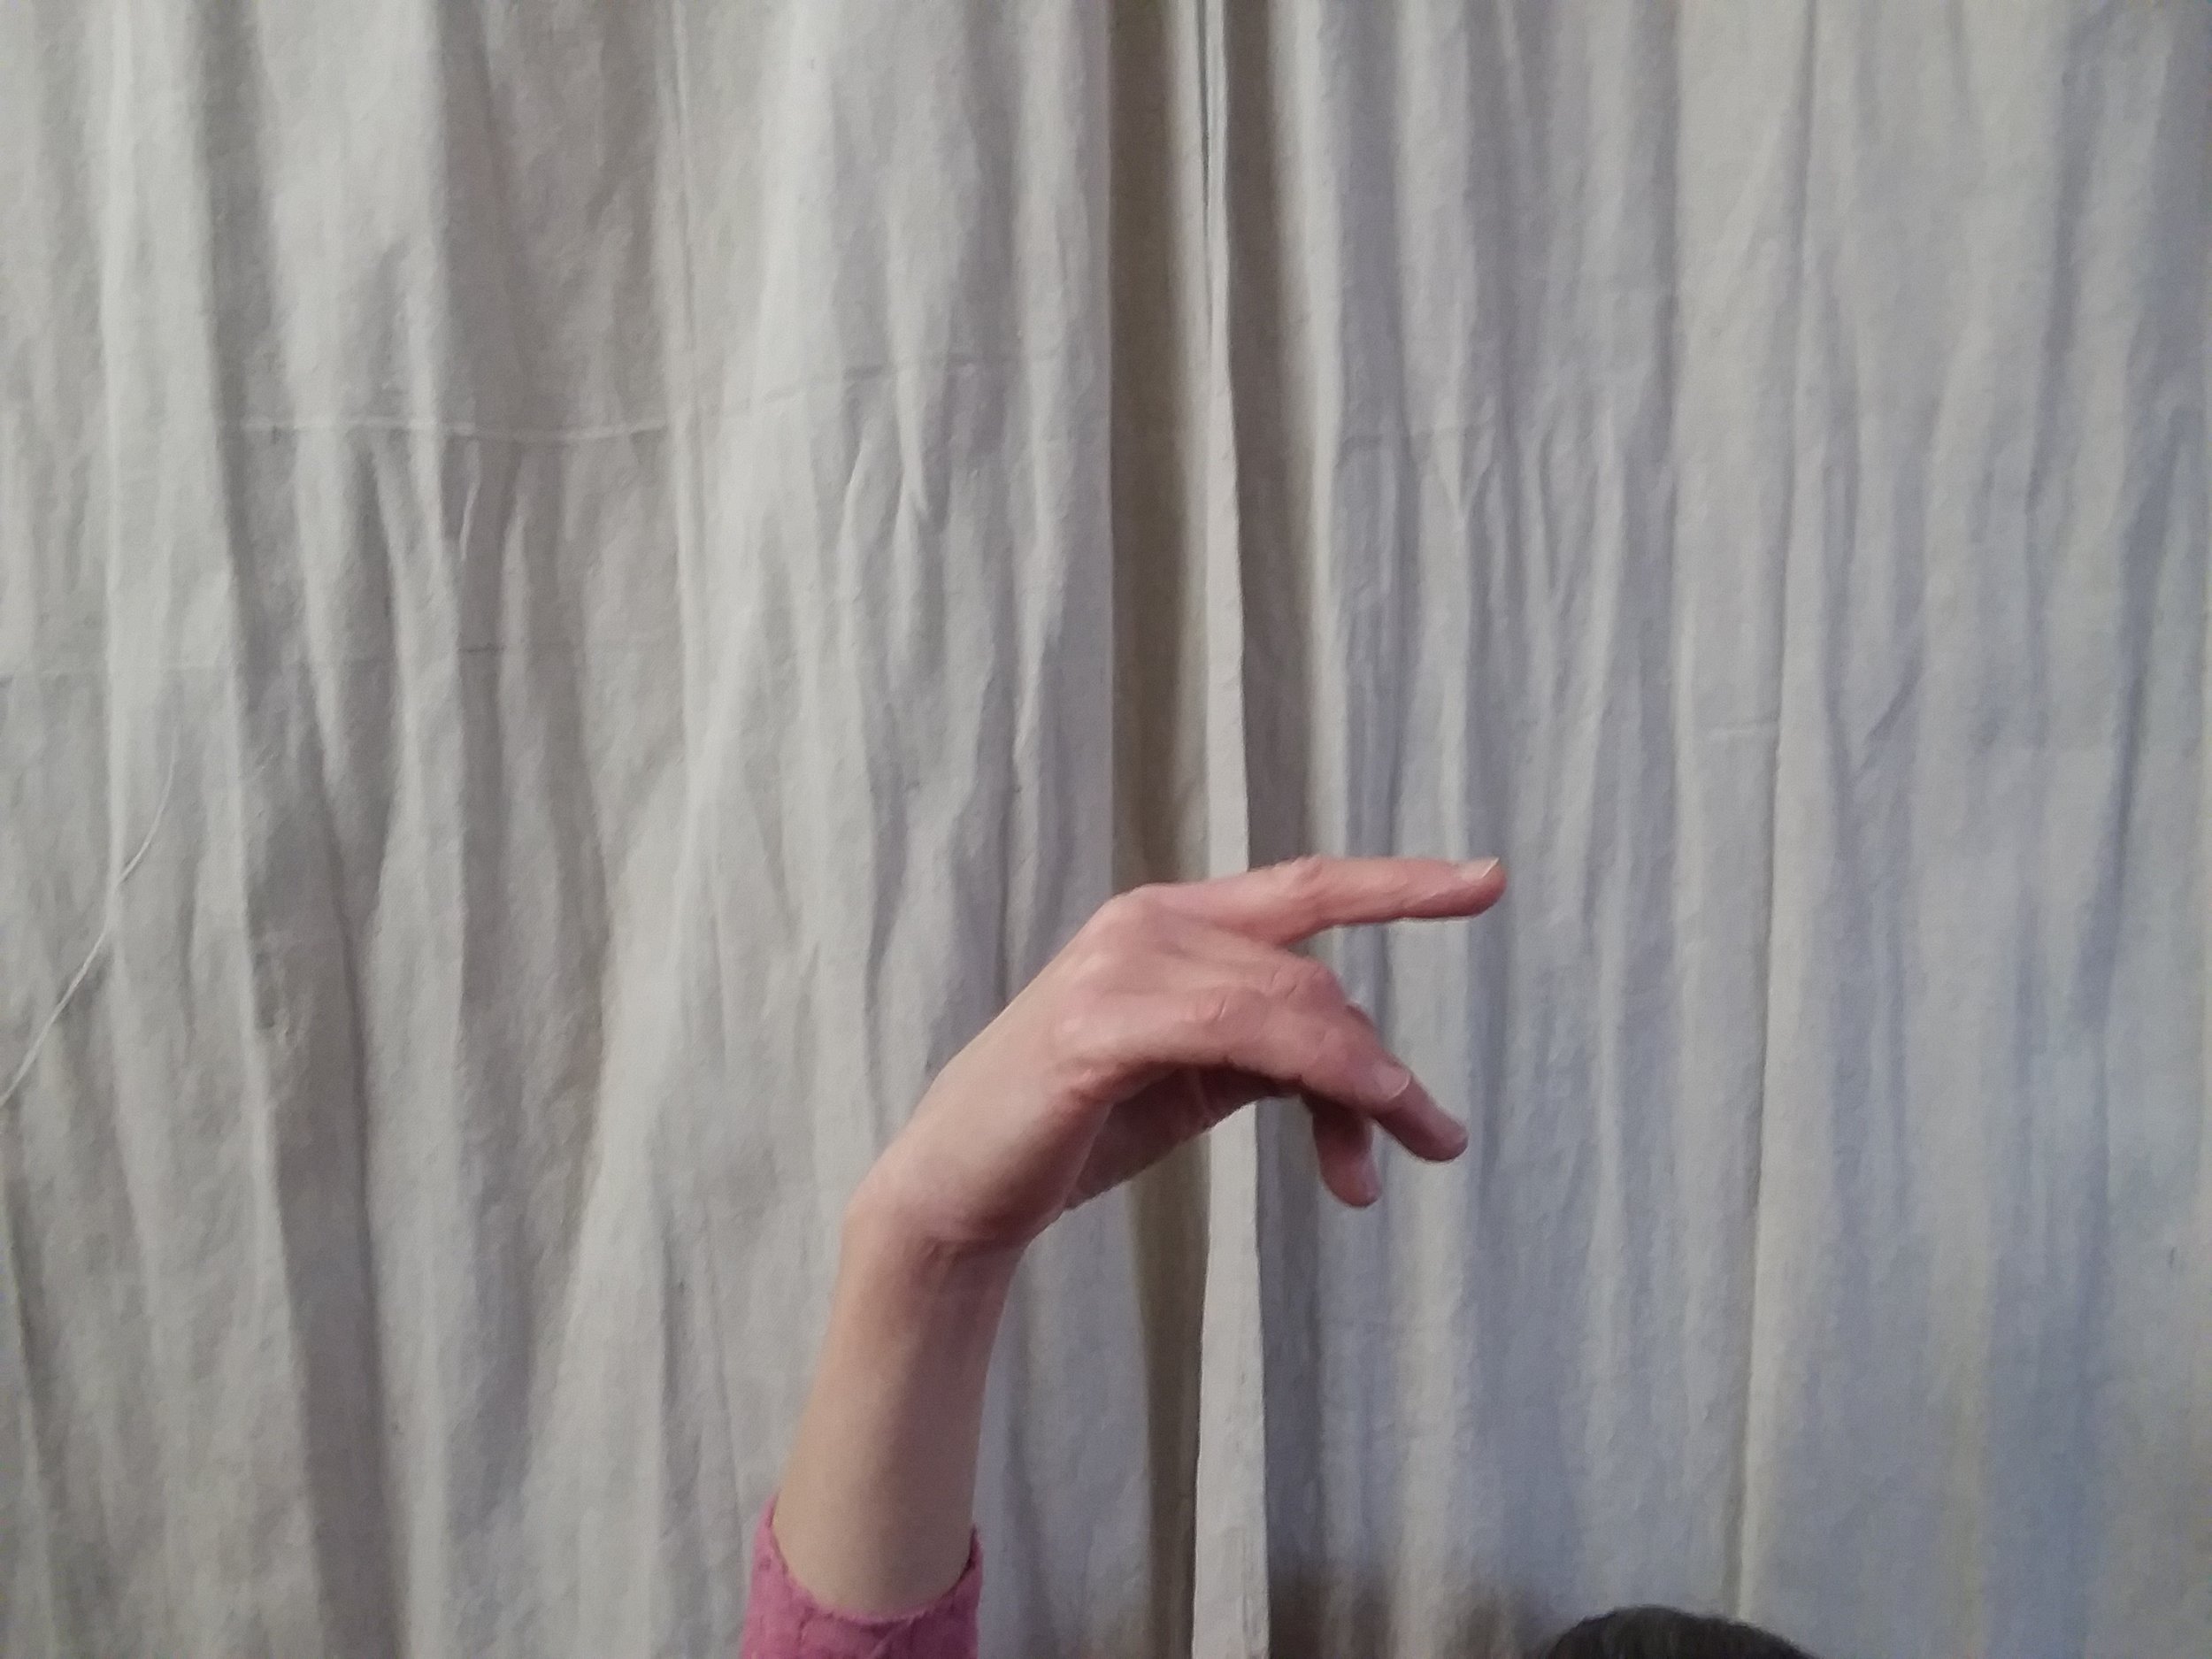
In this position, both arms are allongé in front of the body, but with the downstage arm lower than the upstage arm. One must be careful not to allow the arms to cause a pinching or closing off or hiding of the chest. The front arm should be just below the bust line while the upstage arm should be drifting towards head height. The elbows must have a softness to them allowing them to stay open and not pinch the line. Done poorly, this position gives a classic “zombie” look! Beware the ballerina zombie apocalypse!
In my follow-up blog in a few weeks, I will explain how to move the arms from one position to another while maintaining grace and form. Although in particular roles, for example a doll in the Nutcracker or Coppelia, it is appropriate to move the arms in a jerky and stiff manner, these roles are the exception and mostly we want the arms to have an aura of liquidity. We will also delve into the expressive quality the arms can offer to our dancing – bringing it from the level of a technician to the level of artistry. Stay tuned to make sure your arms are conveying the desired character to your audience!